Friday, December 03, 2010

St. Nicholas Day Paper Boots: For When a Paper Shoe Simply Isn't Big Enough

Not-big-enough paper shoe - Needs more room for chocolate
My tutorial for making paper shoes for St. Nicholas Day is probably my most popular post ever, which kind of cracks me up, since I hadn't imagined there would be much demand for such a goofy thing as a paper shoe. It's so popular that this cool online magazine, InCulture, asked me if they could reprint it this month as part of their holiday issue. You can find it here - and check out the rest of the magazine while you're at it. Lots of interesting articles on multicultural issues for kids and parents.

Anyway, I've recently learned there is an even greater need out there: a tutorial and template for a paper boot! Because boots are also traditional to put out for St. Nicholas Day and well-worn ones tend to smell even worse than used sneakers do, if that's possible.  More importantly, a paper boot can hold WAY more chocolates and other goodies than a paper shoe can. That's a need I can appreciate.

I didn't really have any idea how to make a paper boot, though, so I turned to my smartest, most trusted friend: Ms. Google.

And she let me down. The only templates/examples I could find for paper boots were really lame. In particular, they failed on the most important characteristic of a paper boot: capacity. This is because they were basically boot-shaped envelopes.

I have limited footwear engineering skills. Really, that paper shoe pretty much exhausted them. Though I do have these really, really cool vintage-maybe-antique children's shoe "lasts." (See, I even know the technical lingo.) They're iron and really, really heavy.
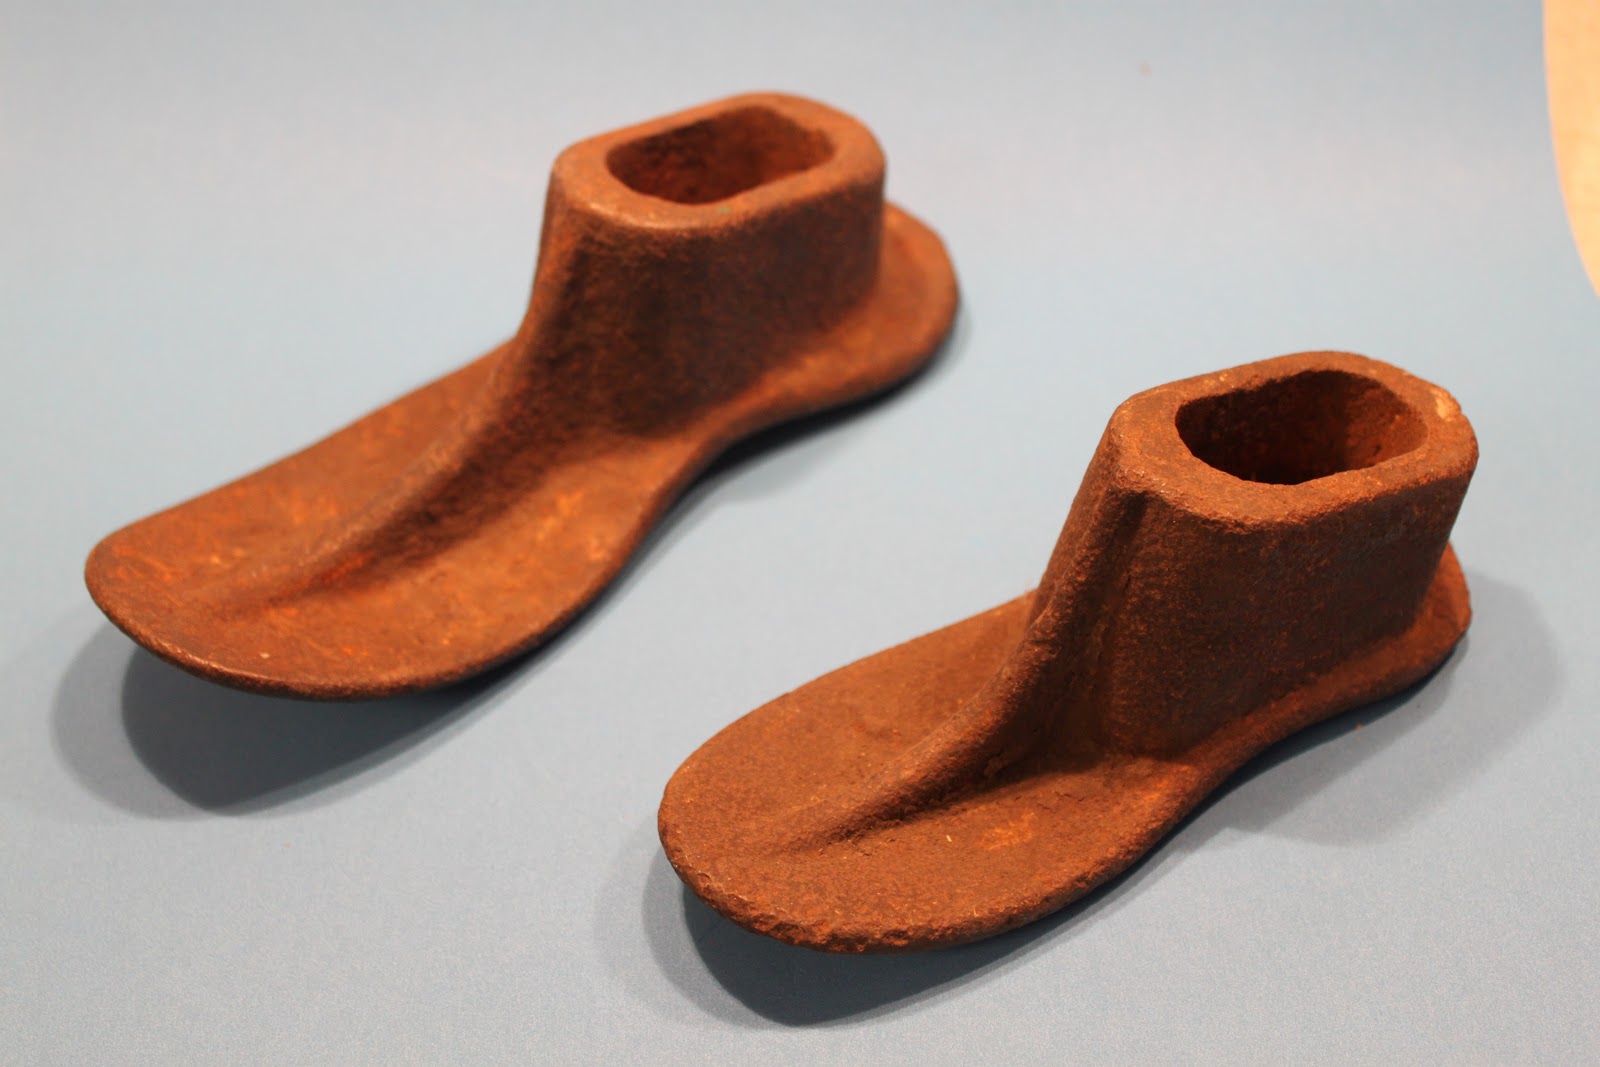
I bought them at an estate sale recently, even though I have no intention of becoming a shoemaker and don't have young children anymore. My husband says I'm insane. But he says it lovingly, so I forgive him.

So I was kind of stumped. Then I tripped over someone's boots in the hallway (oops - they were mine. It SNOWED yesterday. The nerve.) And then I had a flash of inspiration for how I could adapt the basic St. Nick paper shoe into a paper boot. And it only took me two tries to make something that works.

Here's how you do it:

You'll Need
  • Scrap papers
  • Cardboard from a cereal box (for making the original shoe, if you haven't already)
  • Printed templates (see below)
  • A pen or pencil
  • A pair of scissors
  • A glue stick (preferably the strong craft kind) or white glue with a toothpick or something to apply it.
  • A handful of unused tissues
  • A smidge of patience and frustration tolerance
Steps
1.Make the paper shoe from the template and tutorial here.

2. Print out this new template for the boot's upper, and transfer it to a paper of your choice.
I used the test print sheet my stupid printer wastes ink on every time I install a new cartridge. Cut out the two pieces. (Mine has nice decorative edging because I accidentally got Sharpie all over it when I was tracing it to make the printable template. I'm pretending it's a design feature.)

3. Stuff the shoe with the unused tissues. (You can reuse them later, so just sniffle for a bit until this is done.)
Stuff them loosely. You're going to need to extract them from the finished boot later.

4. Slather some glue stick on the piece that attaches to the heel and stick it on. Be patient. Wait for the glue to dry.

5. Now glue the sort of pointy part of the other piece of upper onto the top of the shoe. (There are probably fancy technical names for these parts, like "flange" or "gasket" or "whippersnapper," but I don't know them.) BE PATIENT. It will be much easier to do the next, a-little-bit-fiddly step if you let the glue dry.

6. Pressing hard, run the glue stick along the edges where the boot part will attach to the rest of the shoe upper and turn the corner to run glue along the part that will stick to the piece you already attached to the heel of the shoe.
Then stand the shoe up and stick everything together.
This is easier said than done. In truth, it is a bit fiddly. It might not be perfect. I have a little gappy place in mine. That's okay. This is a paper boot, people, not a pair of ridiculously expensive Frye boots like my daughter wants for Christmas. Just pretend you're one of the little elf guys in this story.
Only with less hammering. You won't have much boot left if you break out the hammers.
Do one side at a time, because otherwise the glue on the other side will dry out before you finish attaching the first side.

Here's a closeup of the attached bits.
7. After the glue dries, pull out the tissues, wipe everyone's noses, and dispose of them properly. Not in recycling, even though they're paper. Too gross.

There! Not bad for a paper boot, is it? And it totally beats those envelope ones in the important capacity category. You can have a rush of enthusiasm and decorate it if you want - glue some ribbon or rickrack around the top, attach some real or paper buttons or silk flowers or something. Be creative - I bet you can come up with some very good clever ideas using common household items, like flourescent-colored cereals or wheels that have come off little cars.

Just don't forget to put it out for St. Nick on the night of December 5th. Because it really looks best all filled up with chocolate and other lovely goodies.

Wednesday, December 01, 2010

Happy Hanukkah! With Coloring Tutorial!

This is a paper doll based on the star of my book Mimi, which I first posted last year in a longer piece about the holiday (complete with book recommendations and latke recipe) here. I've colored the sheet with colored pencils (though unfortunately it hasn't photographed great and scanned even worse...) Anyway, as a gift for the first day of Hanukkah, I'm going to offer some tips on coloring for young artists.

Below is the uncolored page, which you can dowload and print as a pdf here.
By the way, I apologize if you tried to download this or any of my other free printables recently and got asked to pay a monthly subscription fee to Scribd first. Apparently they were trying an "experiment" by asking people to subscribe in order to use "archived" documents (which they defined as anything that had been on there more than a couple months). They didn't notify users, so I didn't realize. But I've now changed my settings and you should once again be able to download all my printables for free. Sorry!

Tip Number One: Use the Best Quality Supplies You Can
One thing many people don't realize is that the kind of colored pencils marketed for kids are, well, lousy. If you are lucky, you'll get even a small set of artist-quality colored pencils, like these ones made by Prismacolor for Hanukkah or Christmas or whatever holiday you celebrate.

As you can see, good supplies are much more expensive than the kid-quality ones - the smallest set of 12 pencils is $10 US at 50% off at the above retailer - but they are totally worth it for several reasons. First, they work better which enables kids to produce a better final product which encourages them in turn to work harder and longer at their artwork. Second, kids are more likely to take care of and keep track of something that is special and valuable; this teaches them respect for their tools and good lifelong habits. And finally, giving them "real" art suppplies lets you demonstrate that you take your kids and their interests seriously. Two of the best gifts I ever received in my life were a set of artist quality watercolors that I got when I was nine (and which I still have and use) and a drawing table my folks got me for my birthday when I turned eleven. I still have it too, but my daughter uses it now.

One caveat: artist quality supplies don't have to adhere to the same safety standards as kid materials. Make sure you choose appropriate materials for kids who still mouth things or lack the dexterity to handle tools which are sharp or otherwise dangerous. And remember the real stuff is more likely to stain...

Tip Number Two: Start Light and Work Darker
You can always make things darker, but going light again is less successful. If you start out light, you'll be able to add some darker areas around edges or in folds to give a sense of dimension. In the image below, see how I've colored Mimi lightly all over, then gone back and added darker areas (fading toward light) around the edges of her face and in her ears to give the sense of roundness and/or depth. (I've also used a slightly darker pencil for her nose, mouth and eyebrows, but you can get almost the same effect by using more pressure on the pencil.) Another note: the pink pencil I used wasn't Prismacolor but highish quality kid pencil - and see how much less waxy and smooth the coverage is than with the yellow.

 By the way, I'm no master with colored pencils (which is why I work in other media professionally). You may notice I still tend to color outside the lines (and I wasn't great at coloring as a kid either). It's okay here, though, because Mimi will get cut out!

Another tip is to use dull pencils (or crayons) for large uniform areas of color and sharp ones for picking out details. And an advanced technique (which I did not use here) is to go over your colored pencils with a white one - it creates a smoother texture. That's called burnishing.

One other thing: many art educators frown on coloring; they feel it stifles creativity and doesn't teach kids real art skills. While I agree that coloring alone is not art, I disagree about its value. It lets kids (and adults) experiment and practice with basic skills and color use in a very low risk way. Similarly, using tracing paper, stencils and other "cheating" ways of drawing can help kids develop an understanding of how to draw things and muscle memory that lets them work more quickly on similar things in the future.

Tip Number Three: Shade with Other Colors
You'll get even better effects using blues, grays, and browns to add more shadows. To decide where to put shadows, look at things around you. In general, shadows go in areas that are under, behind, etc. depending on the light source. Learning to look carefully is a core skill for artists and worth cultivating daily.
In this close-up, notice how I've used some blue-grey for extra shadows (Payne's Gray is my favorite paint color for adding shadows). I have some around Mimi's nose, the tops of her shoulders, and the edges of her undies (to give a sense of puffiness). There's also some in the folds of her undershirt, but it didn't show up well in this photo.
Tip Number Four: Play with Color - and Leave some Areas White
I made Mimi's new dress a pale blue, in part because blue is a traditional Hanukkah color, but mostly because I like how the blue looks against her pink skin - a nice cool (blue) color contrasting with a warm (pink) one. With her underclothes, I went with yellow as an experiment to see which pairing I prefer (I like both, but prefer the blue a bit.) I used my light-dark technique to make the detailing on her dress look different from the main fabric too. And I chose green and yellow for the dreidel and gelt bag because I like the contrast with her dress. (Plus I made the menorah colorful, because I like the joyfulness the color scheme suggests - colors are strongly linked with emotions.)
You can play around with creating different shades by layering different colors on top of each other. I didn't here, but it is a fun and often overlooked technique.

Another thing I did was leave some areas white - we forget that the absence of color makes a statement too. So the bib of Mimi's dress is white instead of light blue (looks subtle in the picture), and her tights are lightly striped blue and white. I've also use white for modeling/texture. For example, by leaving areas of white on the toes of Mimi's party shoes, they appear both rounded and shiny.


Tip Number Five: Add Details, Make Changes, Make It Your Own!
You don't have to be limited by what is in front of you. I added an "embroidered" snowflake to Mimi's dress and yellow and orange stripes to her undies. I could have done more things - made Mimi a brown pig or even a green one. That's the beauty of coloring and drawing - you can make anything you choose!

I've always loved this description of one of the "Useless Presents" the poet Dylan Thomas recalls in his now classic book, A Child's Christmas in Wales by (I know - wrong holiday):
"...and a painting book in which I could make the grass, the trees, the sea and the animals any color I pleased, and still the dazzling sky-blue sheep are grazing in the red field under the rainbow-billed and pea-green birds."
 And that's it! If you want more advanced tips on drawing with colored pencils, you can also check out this tutorial.

Here's Mimi assembled but uncolored :(.

By the way, I LOVE paper engineering. It was lots of fun for me to figure out how to make a menorah that "works." By that I don't mean light the candles on fire. You can insert the proper number in for each day. Maybe you could craft another cool thing for Mimi yourself, like a little box of colored pencils where the pencils really go in and out. Or a dreidel that really works. This site is a cool if nearly overwhelming place to get some ideas and references.

Thursday, November 25, 2010

Happy Thanksgiving!: Simple Table Decor and a Last Minute Recipe for a Turkey Glaze and Sauce

We celebrated Thanksgiving a day early this year because my oldest decided at the last minute to spend the actual holiday out of town with his girlfriend and her family. That left Wednesday as the only night we'd be all together. It was so nice having our big meal on Wednesday evening that we're thinking about making it our new holiday tradition; we've spent today relaxing and playing games. It feels to me much more like an extra long weekend, since we don't lose Thursday to all-day food prep, eating too much, and cleaning up. I simplified the menu a bit because Wednesday's busier and I hadn't even baked pies or anything. But I also benefitted from having two of the kids already home from college and work to help out yesterday, so it wasn't too bad getting everything together.

My daughter decorated the table, using Japanese maple leaves she'd pressed and an odd assortment of ornaments and candles from family childhoods, like the Thanksgiving candles my husband has used as long as he can remember and the funny little clay pots all three kids made for their kindergarten Thanksgiving feasts.
We had a turkey breast rather than a whole turkey again this year; I finally realized that since no one in our family especially likes dark meat, it was silly to wrestle with gizzards and trying to get the dark meat cooked adequately without drying out the white meat when we could just buy and cook (much more quickly) the part we all like best. Doh!

 For a couple of years, I bought breasts from Costco that came packaged with a really delicious glaze. Costco stopped carrying that brand and I was feeling sad about the glaze again last night when it suddenly occurred to me to just look up a recipe for a similar one. Doh! again.  I found a recipe that seemed promising here, but I was missing some of the ingredients. The recipe that follows is my improvised version. I also added extra liquid to the leftovers to make a sauce that could substitute for gravy (I have one kid who eats gluten-free, which makes things like gravy challenging.) Anyway, it was so good, I actually wrote it down at the urging of the whole family so I'll be able to recreate it again.

This picture shows leftovers, because I forgot to take a picture last night. And there's no sauce poured over anything because it was so popular we finished it all last night (and I noticed someone even seemed to have licked the last of it out of the pitcher).

Orange-Chutney Glaze for Roasted Turkey Breast


• 2-3 cloves garlic, minced
• 1 tablespoon olive oil

• 6 ounces orange juice concentrate (about 3/4 cup – I used about 1/3 cup because that was all I had)

• 2 tablespoons Major Grey Chutney
• 2 tablespoons brown sugar

• 1 tablespoon soy sauce

• 1 teaspoon ground ginger or 2 tablespoons fresh minced ginger

• Pan juices and/or chicken broth and/or sherry or wine

Combine all ingredients except the pan juices/broth in a saucepan. Bring to a boil. Turn down heat and simmer 10-15 minutes until reduced and thickened. Baste turkey with glaze several times over the last 20 minutes of cooking. (I draped foil over it loosely.)

Just before serving, stir in enough defatted pan juices/broth/wine to make a sauce of your preferred thickness to use in place of gravy.  (I kept it fairly thick still.)

This would also be tasty on pork I think. I'm going to try it the next time I make a pork roast. For that matter, I think it would be good as a glaze for roasted veggies, like green beans. Hmm - time for some taste-testing experiments.

Oh, one more thing: you can make a really excellent gluten-free pie crust for pumpkin pie by combining 1 cup finely chopped pecans (freeze them first to make it easier to grind them), 2 T of sugar, and 2 T butter. It tends to caramelize faster than regular crust, so bake for the minimum time and keep an eye on the pies.

And last but not least, thanks to all of you who read my blog and make such nice comments. I'm grateful for everyone who has stuck with me through a long blog-hiatus. And I also thank everyone whose blogs I follow; I feel so lucky to be part of a creative, and generous community that stretches around the world.

Happy Feasting!

Sunday, November 21, 2010

Sunday Exploring: Chatham Village

 Twenty-one years ago, shortly after moving to Mt. Lebanon, Pennsylvania (a Pittsburgh suburb), I was wandering around my neighborhood with my one-year-old son in a backpack when I met another mom with her young son in a backpack. We shared a nice long walk that afternoon -- and have been walking together ever since. Mary Lou and I have covered a lot of ground, both literal and figurative, in the intervening years. Monday through Thursday evenings most weeks, we log five brisk miles over hilly terrain, usually close to home. On Saturdays, we frequently hit an estate sale somewhere not too far away and walk the surrounding neighborhood afterward.

But our Sunday morning walks these days are my favorites. A few years ago, we decided to walk every street and alleyway in our town. It took nearly a year of Sundays to finish Mt. Lebanon - and then we branched out into surrounding communities. In the years since, we've covered a good many neighborhoods all around Pittsburgh, and I've learned more about my city from our hikes than I'd learned in the fifteen years plus before that. We especially enjoy cemetaries, the steep hillside neighborhoods where steps often replace sidewalks, and the quirky older communities with interesting architecture and mature landscaping.

Today we visited Chatham Village, a planned community in the Mt. Washington section of Pittsburgh that's on the National Historic Register. It was developed in the 1930s in the model of the "Garden City" movement launched in England. It's as lovely and well-planned today as it was then. You can read more about it here and here.
 
 The community consists mostly of townhouses grouped in clusters around common greens with curving sidewalks, giving it the feeling of a college campus, I think. And each cluster has a lovely "folly" like the one shown above to house communal garden implements.
 The homes have lovely details - red brick, slate roofs, copper gutters and downspouts, limestone around the windows, and crests above the entry ways. And each cluster of townhomes is a little bit different.

 Around the perimeter is a large park of virgin forest (dating back to colonial times and before) with paths that curve and wind along the hillside. We saw plenty of wildlife today, including a large buck with an impressive rack.
 This is the updated playground, seen through the mist that hung over the hills this morning.
 And I arrived home to find that a squirrel has made a nest in the planter atop my rain barrel. And all day since I've been hearing him storing his acorns inside the rain barrel (which fortunately has a screen to keep debris out of the water).
I think he and his buddies are using my squirrel bench as a buffet table. But that does seem appropriate. And maybe there's a picture book in here...

Friday, November 19, 2010

Route 19 Writers: A Blog for Writers, Readers and Anyone Who Loves Kidlit

I know it seems crazy, since I haven't exactly posted regularly (okay, hardly at all) this past year, but I'm also writing now for another blog. The Route 19 Writers are a motley crew of mostly children's book writers who live along Route 19 South in the Pittsburgh, PA area. I've known most of them for years and am in awe of them as both writers and all-around-great people.

We take turns posting (at least three times a week), usually on a different theme each month. For this first month, we chose the theme "Novels" - but we allow lots of leeway in what to write about. You can see my first post on NaNoWriMo (National Novel Writing Month) and other  motivational writing "tools" here.

It even has the super easy directions for making this charming button chair (get it? Butt-in-Chair? That's the main tool you need to get your novel done.)

Of course, there's lots of other great stuff to find there too. A report on the great Katherine Patterson and her recent talk in Pittsburgh, a piece on finding your voice, a fabulous tutorial on twisting folktales to turn them into novels, new picture book stories, or tall tales, and even an interesting and funny discussion on figuring out what teens like to read (complete with very, very tasty recipe for Cornflake Chicken - yum.) I hope you'll check the blog out! Here!

Next month's topic is Giving and Receiving. I'm still noodling what I'll write about when it's my turn - but I'm already promising some kind of a nice giveaway. (Let me know if there's something you'd like me to write about.)

Oh, the new picture of the frog in my header is one I took this summer of one of the residents of my family's newish pond. I'll leave you with some images of flora and fauna around the pond this summer. (Can you tell I'm already feeling nostalgic for warm weather? Even though I really do love fall too.)


 This deer visited daily to clean up all the fallen apples from the tree that's the base for my tree house. She was very considerate and didn't eat any of my landscaping plants.

 The fish - mostly just the 12-for-a-dollar feeder goldfish - were prolific breeders this summer. It was so exciting! We rescued a few babies (which seemed to be a popular menu item for the adult fish and the frogs) and a number of them grew quite large by the end of the summer.


A view of the whole pond and new deck (before I did a lot of the planting around the pond). 

So great to be back blogging! I didn't realize how much I missed it until I started up again. Thanks for your patience with me.

Wednesday, November 17, 2010

Happy Birthday, Frances!

Karen MacPherson's syndicated Children's Corner column this week alerted me to an important occasion: the 50th birthday of Frances, star of the classic picture book series by Russell Hoban. (I strongly recommend reading Karen's column - always good and this one is chock full of interesting facts about Frances and how she came to be. Also, if you haven't read the Frances books, it's time to get to the library. Or better yet, go buy them.)

I first met Frances, the strong-willed, persnickety, song-writing, problem-solving badger, when I was a strong-willed, persnickety child myself. Although song-writing and problem-solving weren't my strengths so much, it's still small wonder that I identified with the young badger. The challenges Frances faces are universal ones of early childhood, and she confronts them with a quirky intelligence and creativity that I found both inspiring and reassuring. 

To celebrate this important event, I broke out some homemade bread and jam and my copy of Bread and Jam for Frances, my favoritest Frances book of all. Everything was delicious, and the dog enjoyed our read-aloud very much.

Possibly what she liked best was that I shared my bread and jam with her.

Anyway, I noticed something while I was reading the book: one spread seemed kind of familiar to me. And then I realized why.

The lower image is a spread in my Mimi book that I must have unconsciously modeled on the Frances one shown above. How funny!

By the way, notice how my copy of Bread and Jam for Frances is in black and white with blue washes? At the time the book was printed (1964 - this was a book club copy I got through school), color printing was still both expensive and tedious. Illustrators had to meticulously make color separations by hand, with separate transparencies created for each color used. These were done in shades of gray and took real skill. That's why the old books often had only one or two colors. I feel very fortunate to be able to do my illustrations with full color and any media!

Over the years, the Frances books have been re-released with color. The top image shows two different era versions of the cover of A Birthday for Frances. And here's a comparison of an inside spread.
It's probably just nostalgia, but I like the older one better. (I do like the new color one too - just not quite as much.)

Another interesting thing to note is how much more text-heavy the older picture books were than ones published today.  A friend who attended a children's writing conference last weekend said the editor who spoke recommended no more than 50 words for a picture book text. I wonder if the push for shorter and shorter texts for pretty much all picture books has contributed to the decline in their sales; as the New York Times noted recently, many parents are pushing their kids to listen to chapter books at earlier and earlier ages. Maybe they would feel less need to do so if they had meaty complex picture books like these old ones available.

Here's a brief excerpt of a scene between Frances and her mother to give you a feeling for the quality of the writing and for Frances' personality. Mother is getting things together for Frances's sister's birthday, and Frances is working through her jealousy by pretending to prepare a party for an imaginary pal:
"Who is Alice?" asked Mother.
     "Alice is somebody that no one can see," said Frances. "And that is why she does not have a birthday. So I am singing Happy Thursday to her."
     "Today is Friday," said Mother.
     "It is Thursday for Alice," said Frances. "Alice will not have h-r-n-d, and she will not have g-k-l-s. But we are singing together."
     "What are h-r-n-d and g-k-l-s?" asked Mother.
     "Cake and candy. I thought you could spell," said Frances.
By the way, in case I've convinced you to rush out and buy copies of all the Frances books (and I hope I have), you need to be aware that in honor of Frances' birthday, HarperCollins has released abridged versions of the Frances books in an "I Can Read" format for beginning readers. I haven't seen them yet, and it's encouraging that Hoban and his daughter worked together on the reformat. But I'm sure I'll never love them the way I love the originals - and I definitely recommend reading them first.

Last but not least: food. You can find my recipe for the homemade bread I nibbled today in an earlier post here. And, in case like Frances, you have learned to like some other more adventurous foods as well, here is a recipe for soup that I think goes especially well with the bread. I got the recipe from a neighbor, who got it from a cookbook - but I don't know which cookbook and the neighbor has long since moved away. I think it was called Chippewa Soup. I also may not have the recipe quite right. Somehow I never actually wrote it down; I just kind of remember it - plus I've undoubtedly changed it over the years because I am as much a revision addict for recipes as I am for the written word.


Tomato Vegetable Soup
aka Chippewa Soup
aka The Best Soup You'll Ever Eat on a Chilly Autumn Night

Ingredients
Olive oil
2-3 yellow onions, finely chopped
3-4 ribs celery, finely chopped
2-3 carrots, shredded
2-3 cloves garlic (Note: if you are lazy or pressed for time, most supermarkets carry all the veggies pre-chopped/shredded and sometimes it is just worth the extra expense)
Curry powder to taste -- I use 1 T mild curry powder when making it for people who don’t like spicy stuff (aka children), 2-3 for the more adventurous eaters (aka certain adults)
1 tsp cumin
Ground black pepper
1 26-oz can Campbell’s tomato soup, plus water to reconstitute it
2 11-oz cans Campbell’s Green Pea soup - but NO water. (Yes, it is really gross looking right out of the can. Try not to think about it.)
1 cup milk or cream (more if you prefer a thinner soup)
1 ham hock (optional)
Chopped ham (optional)
Dollop of low fat sour cream (optional)

Directions
In a large stock pan, heat the olive oil. Add the onions, celery, garlic and carrots and sauté until the onions are translucent and the celery and carrots are softened. Mix in seasonings and cook, stirring, for a minute or two to combine flavors well. Add soups and water (it is really tricky to get the pea soup stirred in well - but worth the trouble because coming across a big lump of the concentrate when you're eating your soup is an unpleasant surprise, in my book). Add ham hock, if using. Try not to examine it too closely as this may also gross you out. Bring to a boil, reduce heat and simmer on low heat at least one hour (more is better). Stir occasionally to prevent soup from sticking to the bottom of the pan. Shortly before serving, stir in milk or cream (and chopped ham if desired) and heat through.

This is quite good served on a doily with a tiny vase of violets, along with a crisp green salad and Swedish Sour Rye bread. If you are careful, you can take bites of each and make everything come out even.

And if you did not get this literary allusion, I am going to admonish you even more strongly to go check Bread and Jam for Frances out of the library.

Thursday, March 18, 2010

Another Radio Day! Parents Rule with Pat


I'm doing a radio show this afternoon on topics from my latest parenting book, The Preschooler Problem Solver (Peachtree, 2009). I'll post the announcement for the show below, which you can listen to on the radio, the internet or by podcast. Pat Montgomery, the host and a parenting expert herself, and I will cover lots of interesting topics, including how to handle oppositional kids, coping with meltdowns, talking to kids about fun topics like sex or family finances, how to help your child make and keep friends, and of course, that perennial favorite, how to get your kid to quit picking his nose at the supermarket. Should be a good hour - please join us or send Pat your questions!

In case you didn't get an email from me about the show, here's the official announcement from Pat:

It is about time someone wrote a book about preschoolers and the myriad of issues their parents face. My guest this week has done it for us and she is willing to tell all she knows. At least all that will fit into the hour long show!

Carol Baicker-McKee PhD is trained in child and family psychology, as well as being a mom of three. Her book, The Preschooler Problem Solver: Tackling Tough and Tricky Transitions with Your Two to Five Year Old, is terrific. She has so many wonderful ideas and insights from all her experience that she shares in this book. And, it is a fun and interesting read!

We are going to discuss:

The defiant toddler

Nose picking

Planning for the new baby

Toilet training

And much more.

You are not going to want to miss this show!

Blog: http://www.parentsrulewithpat.blogspot.com

Latest blogs: What to Do if You Witness a Theft?

Are You an Olympics Junkie?

You are welcome to call in during live shows with questions or comments. 404-943-1620

Be sure to pass this notice on to anyone you know who would be interested in this topic.

Knowledge is power. Be informed.

As always, you can hear the show locally in Sandy Springs on 1620 a.m. or, for most of you, on the internet at www.radiosandysprings.com or www.americaswebradio from 2-3pm EST every Thursday.

Can't listen at that time?

Go to iTunes and sign up for free podcasts!! Browse for Parents Rule. That way you will never miss a show.

Or

Go to http://www.radiosandysprings.com/showpages/parents.php to listen or download at your convenience. Any problems with that, give me a call.

Upcoming shows:

Mar 25 Helping Kids that Others Don’t

Apr 1 replay of Nightmares and Dreams

Apr 8 Dr. Papciak, our favorite pediatrician, is back

Apr 15 TBD

Apr 22 Grandparenting

Apr 29 TBD