 |
| Not-big-enough paper shoe - Needs more room for chocolate |
My tutorial for making paper shoes for St. Nicholas Day is probably my most popular post ever, which kind of cracks me up, since I hadn't imagined there would be much demand for such a goofy thing as a paper shoe. It's so popular that this cool online magazine, InCulture, asked me if they could reprint it this month as part of their holiday issue. You can find it here - and check out the rest of the magazine while you're at it. Lots of interesting articles on multicultural issues for kids and parents.
Anyway, I've recently learned there is an even greater need out there: a tutorial and template for a paper boot! Because boots are also traditional to put out for St. Nicholas Day and well-worn ones tend to smell even worse than used sneakers do, if that's possible. More importantly, a paper boot can hold WAY more chocolates and other goodies than a paper shoe can. That's a need I can appreciate.
I didn't really have any idea how to make a paper boot, though, so I turned to my smartest, most trusted friend: Ms. Google.
And she let me down. The only templates/examples I could find for paper boots were really lame. In particular, they failed on the most important characteristic of a paper boot: capacity. This is because they were basically boot-shaped envelopes.
I have limited footwear engineering skills. Really, that paper shoe pretty much exhausted them. Though I do have these really, really cool vintage-maybe-antique children's shoe "lasts." (See, I even know the technical lingo.) They're iron and really, really heavy.
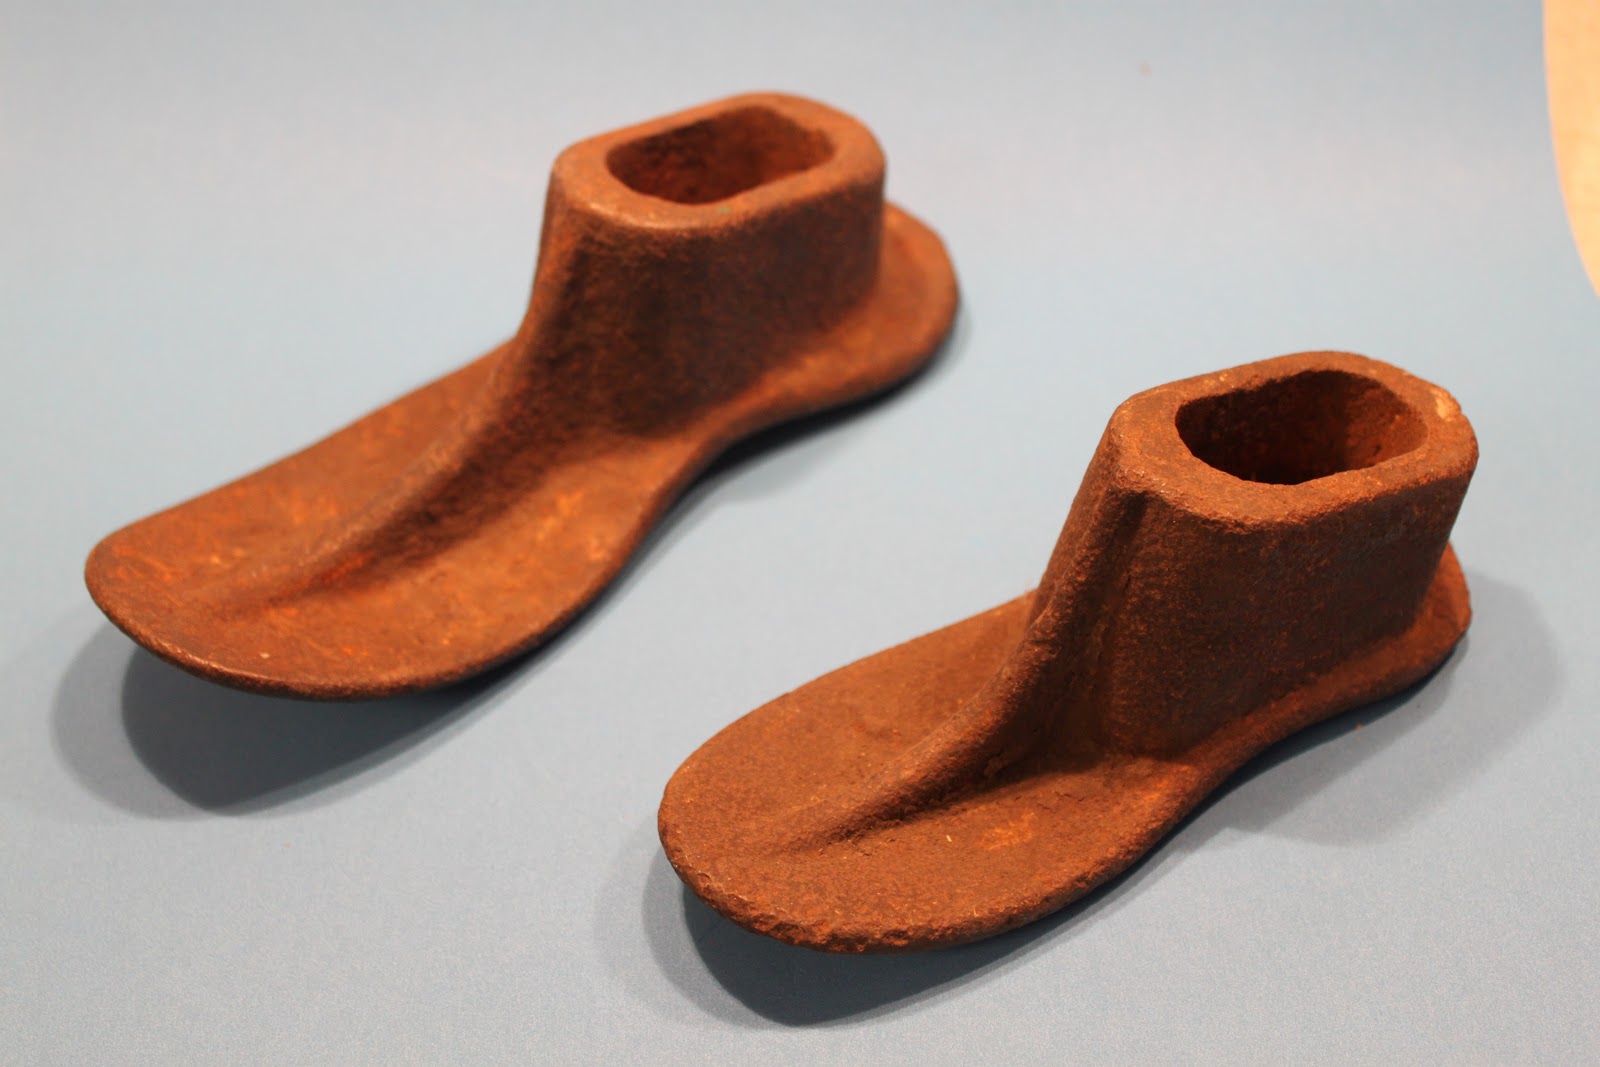 I bought them at an estate sale recently, even though I have no intention of becoming a shoemaker and don't have young children anymore. My husband says I'm insane. But he says it lovingly, so I forgive him.
So I was kind of stumped. Then I tripped over someone's boots in the hallway (oops - they were mine. It SNOWED yesterday. The nerve.) And then I had a flash of inspiration for how I could adapt the basic St. Nick paper shoe into a paper boot. And it only took me two tries to make something that works.

You'll Need
- Scrap papers
- Cardboard from a cereal box (for making the original shoe, if you haven't already)
- Printed templates (see below)
- A pen or pencil
- A pair of scissors
- A glue stick (preferably the strong craft kind) or white glue with a toothpick or something to apply it.
- A handful of unused tissues
- A smidge of patience and frustration tolerance
1.Make the paper shoe from the template and tutorial here.
2. Print out this new template for the boot's upper, and transfer it to a paper of your choice.

3. Stuff the shoe with the unused tissues. (You can reuse them later, so just sniffle for a bit until this is done.)

Stuff them loosely. You're going to need to extract them from the finished boot later.
4. Slather some glue stick on the piece that attaches to the heel and stick it on. Be patient. Wait for the glue to dry.

5. Now glue the sort of pointy part of the other piece of upper onto the top of the shoe. (There are probably fancy technical names for these parts, like "flange" or "gasket" or "whippersnapper," but I don't know them.) BE PATIENT. It will be much easier to do the next, a-little-bit-fiddly step if you let the glue dry.

6. Pressing hard, run the glue stick along the edges where the boot part will attach to the rest of the shoe upper and turn the corner to run glue along the part that will stick to the piece you already attached to the heel of the shoe.

This is easier said than done. In truth, it is a bit fiddly. It might not be perfect. I have a little gappy place in mine. That's okay. This is a paper boot, people, not a pair of ridiculously expensive Frye boots like my daughter wants for Christmas. Just pretend you're one of the little elf guys in this story.

Do one side at a time, because otherwise the glue on the other side will dry out before you finish attaching the first side.
Here's a closeup of the attached bits.

There! Not bad for a paper boot, is it? And it totally beats those envelope ones in the important capacity category. You can have a rush of enthusiasm and decorate it if you want - glue some ribbon or rickrack around the top, attach some real or paper buttons or silk flowers or something. Be creative - I bet you can come up with some very

Just don't forget to put it out for St. Nick on the night of December 5th. Because it really looks best all filled up with chocolate and other lovely goodies.


1 comment:
Love this!
St Nick
www.StNicksday.com
Post a Comment