Showing posts with label paper doll. Show all posts

Wednesday, December 01, 2010

Happy Hanukkah! With Coloring Tutorial!

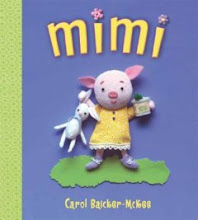
This is a paper doll based on the star of my book Mimi, which I first posted last year in a longer piece about the holiday (complete with book recommendations and latke recipe) here. I've colored the sheet with colored pencils (though unfortunately it hasn't photographed great and scanned even worse...) Anyway, as a gift for the first day of Hanukkah, I'm going to offer some tips on coloring for young artists.

Below is the uncolored page, which you can dowload and print as a pdf here.
By the way, I apologize if you tried to download this or any of my other free printables recently and got asked to pay a monthly subscription fee to Scribd first. Apparently they were trying an "experiment" by asking people to subscribe in order to use "archived" documents (which they defined as anything that had been on there more than a couple months). They didn't notify users, so I didn't realize. But I've now changed my settings and you should once again be able to download all my printables for free. Sorry!

Tip Number One: Use the Best Quality Supplies You Can
One thing many people don't realize is that the kind of colored pencils marketed for kids are, well, lousy. If you are lucky, you'll get even a small set of artist-quality colored pencils, like these ones made by Prismacolor for Hanukkah or Christmas or whatever holiday you celebrate.

As you can see, good supplies are much more expensive than the kid-quality ones - the smallest set of 12 pencils is $10 US at 50% off at the above retailer - but they are totally worth it for several reasons. First, they work better which enables kids to produce a better final product which encourages them in turn to work harder and longer at their artwork. Second, kids are more likely to take care of and keep track of something that is special and valuable; this teaches them respect for their tools and good lifelong habits. And finally, giving them "real" art suppplies lets you demonstrate that you take your kids and their interests seriously. Two of the best gifts I ever received in my life were a set of artist quality watercolors that I got when I was nine (and which I still have and use) and a drawing table my folks got me for my birthday when I turned eleven. I still have it too, but my daughter uses it now.

One caveat: artist quality supplies don't have to adhere to the same safety standards as kid materials. Make sure you choose appropriate materials for kids who still mouth things or lack the dexterity to handle tools which are sharp or otherwise dangerous. And remember the real stuff is more likely to stain...

Tip Number Two: Start Light and Work Darker
You can always make things darker, but going light again is less successful. If you start out light, you'll be able to add some darker areas around edges or in folds to give a sense of dimension. In the image below, see how I've colored Mimi lightly all over, then gone back and added darker areas (fading toward light) around the edges of her face and in her ears to give the sense of roundness and/or depth. (I've also used a slightly darker pencil for her nose, mouth and eyebrows, but you can get almost the same effect by using more pressure on the pencil.) Another note: the pink pencil I used wasn't Prismacolor but highish quality kid pencil - and see how much less waxy and smooth the coverage is than with the yellow.

 By the way, I'm no master with colored pencils (which is why I work in other media professionally). You may notice I still tend to color outside the lines (and I wasn't great at coloring as a kid either). It's okay here, though, because Mimi will get cut out!

Another tip is to use dull pencils (or crayons) for large uniform areas of color and sharp ones for picking out details. And an advanced technique (which I did not use here) is to go over your colored pencils with a white one - it creates a smoother texture. That's called burnishing.

One other thing: many art educators frown on coloring; they feel it stifles creativity and doesn't teach kids real art skills. While I agree that coloring alone is not art, I disagree about its value. It lets kids (and adults) experiment and practice with basic skills and color use in a very low risk way. Similarly, using tracing paper, stencils and other "cheating" ways of drawing can help kids develop an understanding of how to draw things and muscle memory that lets them work more quickly on similar things in the future.

Tip Number Three: Shade with Other Colors
You'll get even better effects using blues, grays, and browns to add more shadows. To decide where to put shadows, look at things around you. In general, shadows go in areas that are under, behind, etc. depending on the light source. Learning to look carefully is a core skill for artists and worth cultivating daily.
In this close-up, notice how I've used some blue-grey for extra shadows (Payne's Gray is my favorite paint color for adding shadows). I have some around Mimi's nose, the tops of her shoulders, and the edges of her undies (to give a sense of puffiness). There's also some in the folds of her undershirt, but it didn't show up well in this photo.
Tip Number Four: Play with Color - and Leave some Areas White
I made Mimi's new dress a pale blue, in part because blue is a traditional Hanukkah color, but mostly because I like how the blue looks against her pink skin - a nice cool (blue) color contrasting with a warm (pink) one. With her underclothes, I went with yellow as an experiment to see which pairing I prefer (I like both, but prefer the blue a bit.) I used my light-dark technique to make the detailing on her dress look different from the main fabric too. And I chose green and yellow for the dreidel and gelt bag because I like the contrast with her dress. (Plus I made the menorah colorful, because I like the joyfulness the color scheme suggests - colors are strongly linked with emotions.)
You can play around with creating different shades by layering different colors on top of each other. I didn't here, but it is a fun and often overlooked technique.

Another thing I did was leave some areas white - we forget that the absence of color makes a statement too. So the bib of Mimi's dress is white instead of light blue (looks subtle in the picture), and her tights are lightly striped blue and white. I've also use white for modeling/texture. For example, by leaving areas of white on the toes of Mimi's party shoes, they appear both rounded and shiny.


Tip Number Five: Add Details, Make Changes, Make It Your Own!
You don't have to be limited by what is in front of you. I added an "embroidered" snowflake to Mimi's dress and yellow and orange stripes to her undies. I could have done more things - made Mimi a brown pig or even a green one. That's the beauty of coloring and drawing - you can make anything you choose!

I've always loved this description of one of the "Useless Presents" the poet Dylan Thomas recalls in his now classic book, A Child's Christmas in Wales by (I know - wrong holiday):
"...and a painting book in which I could make the grass, the trees, the sea and the animals any color I pleased, and still the dazzling sky-blue sheep are grazing in the red field under the rainbow-billed and pea-green birds."
 And that's it! If you want more advanced tips on drawing with colored pencils, you can also check out this tutorial.

Here's Mimi assembled but uncolored :(.

By the way, I LOVE paper engineering. It was lots of fun for me to figure out how to make a menorah that "works." By that I don't mean light the candles on fire. You can insert the proper number in for each day. Maybe you could craft another cool thing for Mimi yourself, like a little box of colored pencils where the pencils really go in and out. Or a dreidel that really works. This site is a cool if nearly overwhelming place to get some ideas and references.

Wednesday, December 16, 2009

Happy Hanukkah!


Happy Hanukkah! Nearly belatedly! In honor of the Jewish Festival of Lights, I have another Mimi paper doll available to print and color; you can get it here. There's a brief story-ette about Mimi going to a Hanukkah feast, and it includes a menorah that can stand up when assembled, as shown above. The top part of the menorah is a "pocket" in which you can insert the correct number of candles for the current night of Hanukkah (today is the 6th day of Hanukkah for 2009, so you'd insert six candles, plus the center one or shammes candle, which is used to light the others). I was too lazy/rushed to color Mimi and her menorah, but she looks great "colorized" with colored pencils or crayons.
Not sure why this image came out vertically; thought I'd saved it rotated...

Quick question: I've been posting various paper dolls as sort of doodly coloring pages - just pencil sketches, and no color. What do you think - should I keep doing them that way, or would you greatly prefer something more final-artish that you'd have to print in color? (Keep in mind that would likely mean I'd make even fewer of them...)

One of my favorite things about December is the variety of special days (Christmas, Hanukkah, St. Lucia Day, St. Nicholas Day, the winter solstice, etc.), and the opportunities they provide to learn about different cultures (or even just people who have different traditions). My husband and I both grew up celebrating Christmas, so that's the December holiday we celebrate with our kids, but our extended families include people from diverse backgrounds, including the Jewish faith. We live some distance from them, so our kids have only occasionally celebrated Hanukkah with those relatives. Fortunately, though, we long had a tradition of sharing holidays with neighbors and good friends who are Jewish. Their kids came over each year to help decorate our Christmas tree, sing a few Christmas songs, and have a holiday dinner, and our kids went to their house each year for a Hanukkah feast, complete with dreidel games and songs and decorations. (They always sent extra latkes home for me, the latke-fiend. Yum!)

Here's my favorite low-fat latke recipe. I don't have a photo to show you because I haven't managed to make them yet this year, but I'll try to add a picture later. These are quite tasty, though perhaps not as scrumptious as the crispy fried ones. I cut the recipe out of some newspaper many years ago; more than that I can't tell you about its origin. Sorry.

Low Fat Potato Latkes
3 lbs. potatoes (I've used both Idaho and Yukon gold)
1 onion
1/3 cup matzo meal or flour
1/2 tsp baking powder
3 T chopped parsley
2 eggs plus 4 additional whites
salt and freshly ground pepper, to taste
2-3 T canola oil (I've used olive oil on occasion and that was good too)
Low fat sour cream and/or applesauce for garnish

Preheat oven to 450 F, with a nonstick baking sheet inside. Peel potatoes (if desired) and grate them and the onion coarsely. Squeeze handfuls to remove as much liquid as possible. Transfer potatoes and onion to a bowl, and stir in meal/flour, baking powder, parsley, eggs and salt and pepper. Pour the oil onto the hot baking sheet and spread it around with the back of a wooden spoon. Spoon 2 1/2 inch mounds onto the sheet, leaving at least 1 inch between. Bake until golden, 6-8 minutes (or a little more), turning at the half way point. While they're baking, sing "The Dreidel Song" ("Oh, dreidel, dreidel, dreidel,/ I made it out of clay./ And when it's dry and ready,/ Oh dreidel I will play!") and challenge the kiddies to a game for gelt (the chocolate coins wrapped in gold foil that you may have given out on St. Nicholas Day). You are not allowed to cheat, although you may save a little "grown-ups only" chocolate aside for later. Serve latkes promptly with sour cream and applesauce.

Two excellent vintage Hanukkah-related books to enjoy (both fortunately are still available new and both squeak past the CPSIA axe):

The Trees of the Dancing Goats written and illustrated by Patricia Polacco tells the true story of an incident from her childhood when her Christian neighbors came down with scarlet fever right at Christmas. Her family used their Hanukkah feast and decorations to assemble holiday food and lovely trees to rescue Christmas for the sick families. The illustrations are fabulous and the story could not be any more heartwarming or more beautifully told. We read this book every year. Here's a link to her website, with assorted printable and freebies related to this book (and others too)


Next: Hershel and the Hanukkah Goblins by Eric Kimmel and illustrated by Trina Schart Hyman.
I love this book. It's perfect for kids who like a bit of a scare (though I remember one of my kids made me read the goblins' dialogue in my "regular voice" because my goblin one made the experience a bit too terrifying). It's a longer picture book, which is another reason to save it for slightly older kids. But what a great tale, of the triumph of good over evil, and cleverness over brute strength. Lots of fun. And as for the illustrations, well, sadly the world will never again see the likes of Trina Schart Hyman. She was really something.

Happy Hanukkah! Or however you choose to spell it!

Saturday, December 06, 2008

St. Nicholas Day Gifts - Printable Gift Tags and Paper Dolls


I know it's a bit late in the day for St. Nick to be stuffing little gifts into your cyber-shoes, but better late than never, right?

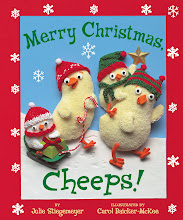
One of your gifts is a page of printable gift tags with images of the chicks who star in my book Merry Christmas, Cheeps! (or if you live in the UK, Merry Christmas, Little Cheeps!) written by Julie Stiegemeyer (Bloomsbury, 2007). The images aren't actually from the book, but do show the Cheeps doing various wintry and festive things, like the guy sledding or baking. Plus there's a penguin with a copy of the book and a nice big chocolate bar - what else do you need for a cold, winter's night?These can be printed with Avery labels (#s 5163, 5263, or 8163) to be self-sticking. Print all the labels you need (available as a pdf here), but please don't sell them. (Just click on the button that says iPaper to get to print options.)
I also have another page of color-your-own paper dolls, this time featuring the two littlest Cheeps. They don't have much in the way of clothing, but they do come with plenty of little accessories. You can access the pdf here.
One of these days, I'll get my act together enough to offer some color versions, with the 3-D art I use in my books.
Sorry I couldn't figure out a way to give you free chocolates - but happy St. Nicholas Day anyway!

Update Notes See my other posts on St. Nicholas Day too. This one has a tutorial and link to a printable template for making paper shoes and more information about the holiday, and this one has a tutorial and link to a template for expanding the paper shoe into a paper boot.

Saturday, November 22, 2008

Mimi Printable Paper Doll

This is really a test for me. I'm trying to see if I've figured out a way to add a printable pdf file to a blog posting. If it works, I have some more goodies to add soon!

Click on this link here (I hope) to take you to a black and white paper doll of Mimi and friends that you can print out, color, and play with, if you're so inclined. (To print the pdf file, click on the iPaper button on the toolbar and select print.)

You're free to use this image for non-commercial purposes, including printing it out for a class or library storytime. The picture above is of some of the pieces colored with colored pencils, cut out, glued to cereal box cardboard where applicable (i.e., Mimi, Bunny, and Frank), and assembled where necessary (i.e., the book). I'm working on making a full color, 3-D Mimi paper doll to post on my website too, and I'll link to it here as well once I finish it.

I have been ga-ga for paper dolls as long as I can remember. When we were young, my mom used to let me and my sisters pick them out at the five and dime if we'd been good on long shopping outings. My favorites were the ones that came with lots of accessories, like a crib to put the baby in, or little bowls of food with tiny spoons, etc. My grandmother also used to save the Betsy McCall paper dolls that came in her copies of McCall's Magazine for us to play with when we came to visit. (You can find printables of these old paper doll pages at Janie's The Bleu Door site here, as well as links to other paper doll sites.)

I really credit a lot of my skill with scissors to years of practice cutting out paper dolls and clothing. I remember too, my mom showing me how to make my own paper dolls by drawing a doll figure, taping it to the window, taping another piece of paper over it, and then drawing clothes that would fit. I made zillions of my own dolls, figuring out the engineering of accessory furniture and other items as well. And then I spent hours and hours pretending with my dolls. All those skills have served me well in my writing and illustrating!

For using paper dolls with very young children, I recommend using the Scotch Repositionable glue sticks rather than the tabs for putting clothes on - much less frustrating for tiny hands. The repositionable glue stick has a bond roughly equivalent to a Post-It Note, so it's easy to attach and remove and won't leave a huge permanent mess all over your kitchen table. Because the print outs are close to free (just the cost of paper and ink) you can let the little ones have a go at cutting them out themselves, which they'll probably do badly. One thing that makes it easier is to first cut around each piece so the paper is easier to manipulate.