
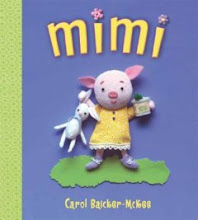
This is a paper doll based on the star of my book Mimi, which I first posted last year in a longer piece about the holiday (complete with book recommendations and latke recipe) here. I've colored the sheet with colored pencils (though unfortunately it hasn't photographed great and scanned even worse...) Anyway, as a gift for the first day of Hanukkah, I'm going to offer some tips on coloring for young artists.
Below is the uncolored page, which you can dowload and print as a pdf here.

By the way, I apologize if you tried to download this or any of my other free printables recently and got asked to pay a monthly subscription fee to Scribd first. Apparently they were trying an "experiment" by asking people to subscribe in order to use "archived" documents (which they defined as anything that had been on there more than a couple months). They didn't notify users, so I didn't realize. But I've now changed my settings and you should once again be able to download all my printables for free. Sorry!
Tip Number One: Use the Best Quality Supplies You Can
One thing many people don't realize is that the kind of colored pencils marketed for kids are, well, lousy. If you are lucky, you'll get even a small set of artist-quality colored pencils, like these ones made by Prismacolor for Hanukkah or Christmas or whatever holiday you celebrate.

One caveat: artist quality supplies don't have to adhere to the same safety standards as kid materials. Make sure you choose appropriate materials for kids who still mouth things or lack the dexterity to handle tools which are sharp or otherwise dangerous. And remember the real stuff is more likely to stain...
Tip Number Two: Start Light and Work Darker
You can always make things darker, but going light again is less successful. If you start out light, you'll be able to add some darker areas around edges or in folds to give a sense of dimension. In the image below, see how I've colored Mimi lightly all over, then gone back and added darker areas (fading toward light) around the edges of her face and in her ears to give the sense of roundness and/or depth. (I've also used a slightly darker pencil for her nose, mouth and eyebrows, but you can get almost the same effect by using more pressure on the pencil.) Another note: the pink pencil I used wasn't Prismacolor but highish quality kid pencil - and see how much less waxy and smooth the coverage is than with the yellow.

Another tip is to use dull pencils (or crayons) for large uniform areas of color and sharp ones for picking out details. And an advanced technique (which I did not use here) is to go over your colored pencils with a white one - it creates a smoother texture. That's called burnishing.
One other thing: many art educators frown on coloring; they feel it stifles creativity and doesn't teach kids real art skills. While I agree that coloring alone is not art, I disagree about its value. It lets kids (and adults) experiment and practice with basic skills and color use in a very low risk way. Similarly, using tracing paper, stencils and other "cheating" ways of drawing can help kids develop an understanding of how to draw things and muscle memory that lets them work more quickly on similar things in the future.
Tip Number Three: Shade with Other Colors
You'll get even better effects using blues, grays, and browns to add more shadows. To decide where to put shadows, look at things around you. In general, shadows go in areas that are under, behind, etc. depending on the light source. Learning to look carefully is a core skill for artists and worth cultivating daily.
 In this close-up, notice how I've used some blue-grey for extra shadows (Payne's Gray is my favorite paint color for adding shadows). I have some around Mimi's nose, the tops of her shoulders, and the edges of her undies (to give a sense of puffiness). There's also some in the folds of her undershirt, but it didn't show up well in this photo.
Tip Number Four: Play with Color - and Leave some Areas White
I made Mimi's new dress a pale blue, in part because blue is a traditional Hanukkah color, but mostly because I like how the blue looks against her pink skin - a nice cool (blue) color contrasting with a warm (pink) one. With her underclothes, I went with yellow as an experiment to see which pairing I prefer (I like both, but prefer the blue a bit.) I used my light-dark technique to make the detailing on her dress look different from the main fabric too. And I chose green and yellow for the dreidel and gelt bag because I like the contrast with her dress. (Plus I made the menorah colorful, because I like the joyfulness the color scheme suggests - colors are strongly linked with emotions.)

You can play around with creating different shades by layering different colors on top of each other. I didn't here, but it is a fun and often overlooked technique.
Another thing I did was leave some areas white - we forget that the absence of color makes a statement too. So the bib of Mimi's dress is white instead of light blue (looks subtle in the picture), and her tights are lightly striped blue and white. I've also use white for modeling/texture. For example, by leaving areas of white on the toes of Mimi's party shoes, they appear both rounded and shiny.

Tip Number Five: Add Details, Make Changes, Make It Your Own!
You don't have to be limited by what is in front of you. I added an "embroidered" snowflake to Mimi's dress and yellow and orange stripes to her undies. I could have done more things - made Mimi a brown pig or even a green one. That's the beauty of coloring and drawing - you can make anything you choose!I've always loved this description of one of the "Useless Presents" the poet Dylan Thomas recalls in his now classic book, A Child's Christmas in Wales by (I know - wrong holiday):
"...and a painting book in which I could make the grass, the trees, the sea and the animals any color I pleased, and still the dazzling sky-blue sheep are grazing in the red field under the rainbow-billed and pea-green birds."
And that's it! If you want more advanced tips on drawing with colored pencils, you can also check out this tutorial.

Here's Mimi assembled but uncolored :(.
By the way, I LOVE paper engineering. It was lots of fun for me to figure out how to make a menorah that "works." By that I don't mean light the candles on fire. You can insert the proper number in for each day. Maybe you could craft another cool thing for Mimi yourself, like a little box of colored pencils where the pencils really go in and out. Or a dreidel that really works. This site is a cool if nearly overwhelming place to get some ideas and references.


1 comment:
There are time that no matter how many toys you give to a kid or how much they once loved their new toys, kids are bound to say they are over it. To avoid making multiple trips to the toy store, we have to be creative to help our kids make the most out of the toys they have. Coloring is great activity, not expensive at the same time, help kids develop their mental abilities.
Post a Comment