I'm joining in for the first time with the meme "My Creative Space" over at
Kootoyoo's fun blog - you can check out all the other cool spaces and projects for this week
here. Pictured above is one of my projects for this week, a button necklace that's a belated birthday gift for a good friend. (My first attempt was a disaster. This one is not going much better. Just a few tips - if you're going to make someone a crocheted button necklace, it is probably good to know how to crochet already. And to follow the directions. And to have the right size crochet hook.) This project is on my kitchen table because, as anyone who read yesterday's post will know, my studio is a disorganized disaster.

So I'm pleading for some ideas. I got these great books out of the library - and they do have sound strategies and photos of some truly gorgeous work spaces - but I am sufficiently organizationally impaired, and my space is small and odd enough, and my stuff varied and uh, numerous enough, that their ideas don't really work for me. I'm open to any suggestions, except to throw everything out and start over. (But pare down...that I'll probably have to live with.)
Here's a tour of my studio, which is in a big landing area at the top of the steps to our second floor. It has some charming features, like knee walls and a little alcove-y thing, but it's pretty small, has low ceilings, the original dark wallpaper, tiny windows and generally poor lighting, and it's rather "public" since anyone going to one of the bedrooms or upstairs bathrooms has to pass through it. Which means, my husband thinks, that it would be better if it didn't always look like the aftermath of a major earthquake or Category 5 hurricane. He may have a point.

This is my drawing table, which is pretty large. I never use the tilt function, so I probably don't really need something this nice, but it is in good shape and I already own it. I usually have it set up with "stations." The near edge is for cutting (mat, blades, etc.). The edge along the right has, sometimes, space for working with polymer clay (including my oft-used pasta machine). (The stairs are just out of the photo on the right, and it does make me a bit nervous to sit along that side, with my back to the steep staircase.) The far edge is my sewing area, with my trusty vintage Singer Featherweight (hand-me-down from my mom). The sitting space is a bit tight, but it does more or less work. And the side on the left is for drawing, gluing and whatever else needs to be done. There is not supposed to be so much stuff piled all over the desk, but there always is.
Behind the drawing table along the far wall, there is lots of storage-y stuff - some narrow shelves, a 2-drawer file cabinet, a small chest of drawers, an old glass-fronted kitchen cabinet with tool drawer things on it, and thread racks. Across from that, forming a hallway to the bedrooms is a large flat file. It has a great melamine top that my husband made for it and could be a good extra workspace, if I ever managed to keep it clear. I store large pieces of foamcore and some finished stuff vertically between it and the stair railing.

This is the view in the opposite direction. I have bookshelves and an old card catalog with tons of little items in it to the left (which is a narrow space leading to the door to my daughter's bedroom. I would feel sorry for her having to navigate through all my crap except: a) she has just as much crap in her room, b) she uses my studio herself all the time, and c) she's often responsible for lots of the mess in my studio too.)
I love the little alcove/dormer area, but feel like I'm not making good use of it. There's a cabinet where I store things like stuffing and batting and various odds and ends. On top I have a light table thing, which I rarely use anymore and could probably get rid of or at least store out of the way. I'd love ideas for how to make this area either more attractive or useful. Or, and this would be really cool, both.
On the right is an old IKEA piece of "little drawers." They are mostly filled with crap and badly need to be purged and reorganized. On top are my homemade trays for when I'm working on a book - there are 34 of them, one for each page in the book plus the covers. They were an ingenious (I think) solution for my weird needs - they keep all the little odds and ends for each page corralled and unsquished until I glue them in place and even give me a space to lay out each page on top of a photocopy of the sketch so I can make sure things are going along well. I'd like to have smaller stacks of them - it's tricky grabbing a tray from the bottom of one when I'm working - but on the whole it's one of the better organizational strategies I've used.

Finally, a view of the third wall. I have a large old IKEA unit that used to be in our family room for the TV and whatnot. It is in desperate need of sorting and organizing. It holds various reference books for drawing and techniques that I use often, as well as the "Bible" notebook I create for each book I'm currently working on, fabric, paper, old "stuff" I quickly hide during pre-houseguest clean-up frenzies, and most of my polymer clay stash.
Not shown is where I have all the artwork from the books I've done. I've given away a lot of it, but I still have enough that it's quite frankly overwhelming. It's all stacked in the bedroom of one of my kids who's off at college. I'm praying he doesn't want to move back home for a while after he graduates; there's not really much space left for him. (Legally, I can't really sell or give away my work anymore, thanks to the stupid CPSIA law - it almost certainly wouldn't pass the tests for lead and phthalates, plus the testing would destroy it. I think it's okay to sell or give it to adult-only households or art/kids' books collections, since it could then be classified as a collectible, but I'm not exactly famous enough to attract much interest from those markets yet.)

This is my mish-mosh inspiration bulletin board. I haven't updated it in many, many years. Bad me. But check out this unbelievably cool (and unused feature). You lift off the bulletin board and...

Ta-da! There's a hidey-hole, complete with a safe from the days when this was my middle son's "bedroom" (he got a real bedroom when he reached adolescence, but it's still kind of embarrassing that we made him sleep on the landing for years). I do not know the combo for the safe, but I bet I could jimmie it open. Wonder what's inside?

I have various little cool storage thingies that I don't make good use of. The little drawers above are from my 70s teen years and now contain 1 needle threaded with white thread, 2 gold paper leaves, and a handful of picture hangers. The shopping cart usually holds spare postcards, business cards, flyers, etc. that I take with me to book events.
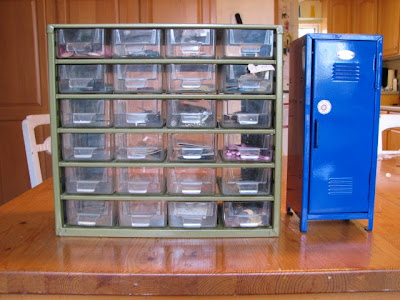
The little drawers have stuff like buttons, but mostly my buttons are in jars. The locker used to hold my spare x-acto blades and a tin of used ones, but now it's pretty much empty. It looks like a real locker inside with a high shelf, a low shelf and a biggish middle area with hooks on the sides. Any ideas for making better use of these?
After you guys help me with this, I'll get your assistance with my desk area downstairs. (See it below.) Yikes.
 Not too surprisingly, I continue to fall farther behind with my attempts at daily blogging this month, even though the weather has been keeping me home and mostly inside - though also computer and sewing machine-free, as I seem to be taking my electrical interference tendencies to the wider community and causing neighborhood electrical outages. (Really we got some of that huge storm that hit much of the U.S. through here - really wild winds and plummeting temps for the last couple days. Brrr.)
 On my sewing table were also this old doll, in bad need of a new dress...
 ...and this new one in need of, well, everything.
 Lots of sewing and ironing!




 Posts
Posts