Thursday, December 10, 2009

My Creative Space - The Holidays Are Coming!

Not too surprisingly, I continue to fall farther behind with my attempts at daily blogging this month, even though the weather has been keeping me home and mostly inside - though also computer and sewing machine-free, as I seem to be taking my electrical interference tendencies to the wider community and causing neighborhood electrical outages. (Really we got some of that huge storm that hit much of the U.S. through here - really wild winds and plummeting temps for the last couple days. Brrr.)

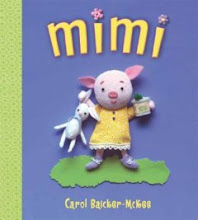
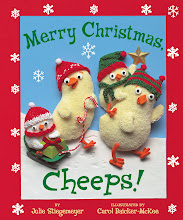
On my drawing table this week are the little angels above. I made the prototypes last year (based on the characters in my Merry Christmas, Cheeps and Mimi books) intending them to be gift tags that could be made into ornaments, but never finished them. The dog found the paper prototypes the other day and got completely freaked out by them (they move when she breathes heavily on them), which inspired me to finish them, if for no other reason than the opportunity to freak the dog out in living color.

On my sewing table were also this old doll, in bad need of a new dress...

...and this new one in need of, well, everything.

Lots of sewing and ironing!

Head on over to kootoyoo's to see the rest of the creative spaces bursting with projects. And take your time checking them out, because Kirsty's taking a well-earned break until after the holidays. (Phew - gives me more time to make some progress on my studio. And maybe finish up some of these projects.) While you're there, be sure to check out the pix of Kirsty's own beautiful creative space. I'm so jealous!

Tuesday, December 08, 2009

Hot+Not: Computers and Piggies and Lanterns, Oh My!


Hot. Not. Loobylu. Need I say more?

This week, I'm starting with the NOTS.

Not. Any Computer in Our House. Or, for that matter, any electrical appliance, like say my car. My refrigerator. Half the lightbulbs.
Lordy, it's been a week of technology-related woes, and I still feel a bit shaky. I know I was complaining about this last week, but things just kept getting worse every time I turned around, and of course my husband was out of town for much of the week, leaving me, the person who still struggles even just to turn on the TV (which is really not my fault, since we seem to have like a thousand remotes and way too many buttons and I never have the right ones), to be the family Geek Squad. Mostly that means we were computer-light (hence the week of no posts - but I have lots of stuff half written I'll try to post in catch-up fashion). And the car wouldn't go, so I was stuck at home. And the refrigerator was WAY too cold, freezing all the veggies and making the butter extra-rock hard. Maybe even diamond-hard. And I don't know what the heck was going on with the light bulbs, but they were burning out left and right and I still haven't caught up replacing them.

Making Little Dresses for Little Piggies.
This little dress was way too small. This little dress was way too big. And this little dress was really too big too, but I fudged and made it kind of fit because I couldn't bear to try again.


Not getting the recipe for this St. Nicholas Day treat up until today. Two days after St. Nicholas Day.
These are actually buckeyes, which aren't officially a St. Nick treat, but they are very similar to a traditional St. Nick candy I found online. More importantly, they are super easy, no cook, use only ingredients I already have in the house, and contain chocolate.

Here's what you do: Combine 3/4 cup of peanut butter, 2 T honey, 1/4 cup crushed graham crackers OR crushed breakfast cereal, and a handful of mini chocolate chips in a bowl. Stir and mush around with your hands, adding a little more of this or a little more of that until the texture seems right - sticks together adequately to shape into small super ball-sized balls and doesn't "melt" into a blob if you walk away for five minutes. You can roll the balls in grated chocolate or dip them in melted chocolate for fanciness, but the plain ones taste perfectly wonderful.

I used natural peanut butter because I think it tastes better, but it does have the disadvantage of having the oil leach out if you don't eat them all in the first hour. Fortunately that is not a big problem.

That's it! Now the HOT.

Little Piggies
Specifically the hot babes above. I finally finished making prototypes and working up tutorials and patterns for making two different styles of Mimi dolls to go with my book of the same title. It was hard for me because I have not really sewn much with an actual pattern since high school. And I've definitely never made up my own pattern first (as opposed to just winging it as I go). I'm hoping to have the patterns and tuts finished and posted here in the next day or two.

Mimi 1 is posable and intended for kids past the age of putting things in their mouths because she does have small parts (like her eyes, nose, and buttons - oh, and her belly button. And her bunny slippers). (Secretly she's my favorite. Also secretly, I'm giving her to my daughter for Christmas because Sara's kind of gaga for her, even though I messed up Mimi's ear, her legs, and half her other body parts.) I'm working on some other outfits too, like her tutu, jammies, tiara, and cape. And of course Bunny and Frank-the-Roly-Poly-Bug.

Mimi 2, below, is a softie appropriate for babies and toddlers. Her features are embroidered or sewn (her nose and belly button), and she's a little larger and softer and easier for a little one to grasp and tote to bed. She's very sweet and cute, especially for my first effort with this sort of thing, but she doesn't seem quite as...spirited, I guess, as posable Mimi.


SNOW!
Technically cold, but light and magical like this, and in the run-up to Christmas, just right hot for me. Of course, we're getting freezing rain at the moment, but I did enjoy the white stuff while it lasted.

And Ice!
As in ice lanterns. I blogged about making these last year here. Jennifer Hedberg, the ice lantern lady I interviewed for the Nick Jr. article that featured them, has added a nice blog to her website here with lots of cool (get it?) new tips, supplies you can order, and pretty pictures.

My daughter made several of these over the weekend, and fortunately we lit them yesterday (before the temps warmed up and the rain came), even though that was one day early for celebrating La Fete des Lumieres (which is December 8th) in honor of Mary. I'd never heard of the holiday until last week - but as it turns out to be celebrated only in Lyons, France, I think I can be forgiven. Still I'd love to go check it out some day. Here are some links where you can read about it and look at pretty pictures.

Wednesday, December 02, 2009

Hot+Not: Hearts and Chili and More


I'm joining in again with what's hot and what ain't at Loobylu (and you should definitely head over there to wish her a happy 10th blogging birthday at a minimum), but I'm starting to squeak in just under the deadline every week - but it's one of the "nots" fault. At least it's not yet midnight on Wednesday (here in Pittsburgh anyway), so here's my list:

HOT

A Template for the Scandinavian Heart Tutorial Which I posted, um, last December here. Well, now that I've remembered again how to turn jpegs into pdf files and post them so you can actually get them (I think Blogger still doesn't allow them - somebody please correct me if I'm wrong), I decided to make a new printable (can't find the old one anymore) and quick get it up. You can get it here. It's not exactly pro-quality or anything, but it does get the job done - as shown in the examples above.
This (above, not the chili below) is what the finished templates should look like when you make them out of your cereal box.

Turkey Chili - and Using Up the Last of the Thanksgiving Turkey
This is such an easy meal and satisfying on a cold night (and again for lunch the next day) and it makes a nice change from yet another turkey sandwich. I make my chili dinners a little differently each time (my usual cooking approach), but here's more or less the way I did it this time - and it was very good.

Turkey Chili
Olive oil for sauteing (1-2 T)
2-3 ribs celery, chopped
1 large onion, chopped
2-3 cloves garlic, minced
Other veggies (optional) like shredded carrots, peppers, or finely chopped broccoli, or whatever you have about to go bad
All the leftover turkey, cut into cubes - or 1 lb ground
2 cans chili beans, 1 mild, 1 medium (you can substitute whatever canned beans you like - I often use one can of black beans - but you may need to increase the other seasonings if they're plain)
2 small cans diced tomatoes (these had more onions and garlic and peppers in with them)
1 medium can tomato sauce
2 T, more or less to taste, chili powder (although I think that was a tad too much here)
1-2 tsp cumin
Dollop of sour cream and/or shredded cheddar cheese and/or rice or something like that (all optional)

Saute the chopped veggies in the olive oil until soft and add the cubed or ground meat. Add the beans, canned tomatoes and sauce and bring to a gentle boil. Add the seasonings gradually, tasting frequently (it's easy to go overboard). Stir in well, reduce heat and allow to simmer until heated through or the kitchen smells incredible. Serve as is or over rice (or noodles, or potatoes, or even toast). Garnish with sour cream and/or cheese, especially if you've accidentally made it too spicy. Great served with cold beer, hot corn muffins and a tossed salad.

Now I'm hungry again.

This Book It's called The Worst Kids in the World in Australia. Here's a link to the author's website.
This year I've decided to review mostly vintage holiday books (see my nots for why), which is easy for me to do since there are so many I love. This chapter book has been a favorite of my family's for many years. I'm reading it aloud to my daughter yet again (I absolutely cannot shake the daily holiday book readings no matter how old my kids get - I'm worried that next December I'll have to read them to the dog after Sara's off at college too). Anyhow, how can you resist a holiday book that opens, "The Herdmans were absolutely the worst kids in the history of the world. They lied and stole and smoked cigars (even the girls) and talked dirty and hit little kids and cussed and took the name of the Lord in vain and set fire to Fred Shoemaker's old broken-down toolhouse." Fortunately, the book is still in print and easy to find (plus there's a movie version and a play script, though I've not seen either).

Having My Mini Pie Tutorial Mentioned on joepastry Great website for foodies. You can find it here and read his short post about my little apple pies here. I'm drooling with pleasure. Thanks to Lisa Holewa, author of the fabulous parenting book What Kindergarten Teachers Know for mentioning the post to Joe.

College Applications. Getting Done! 4 down and bunch still to go but we are all less grouchy already. And as a bonus the girl already got an acceptance letter (probably the only one she'll get until April, but it sure does take the pressure off). I would be completely content not to ever edit/proofread another application essay as long as I live.

NOT

Bad Electrical Karma I seem to be breaking (or at least causing to work badly) every electrical item I get near. First one computer, then my email stopped working on the other (and I've lost apparently forever, all my old saved ones in my folders), my car's been acting up, and now my beloved Mac is being as....slow...as...a...turtle...eating....molasses. I've restarted everything and nothing is better. It is driving me insane.

The *&#%# CPSIA Law Which is not going away, not getting tweaked to resolve its flaws, and is scheduled to move forward with testing requirements come February. Vintage books, despite being so low a risk that NO ONE has ever gotten lead poisoning from one, remain on the chopping block, and I worry what will happen come February. I can still find old kids' books for sale online, but almost none at my local used bookstores or the library bookshop. I worry they're being pulped. I know, your eyes are glazing over. Everyone who knows me is tired of hearing about this - BUT IT IS STILL A REAL PROBLEM! And it's going to get worse. Call your congress people again and give them a good ranting for the holiday. I know I'm going to. Again.

There, not too bad. Other little grumblies, but mostly life is good. Though my house isn't decorated, I haven't bought gifts much less wrapped them, and the only lights up are the ones I had up in the backyard over the summer (but they still look festive out there, so I think that can count). But I feel merry anyway.

Tuesday, December 01, 2009

Get Ready for St. Nicholas Day - by Making Paper Shoes with My Handy-Dandy Tutorial!


How goofy are paper shoes? But when I checked the stat thing for my blog the other day, I noticed that lots of people have been coming here looking for directions and a template for making them for St. Nicholas Day, which is coming up fast on December 6th. I felt kind of bad because I don't have anything like that on here. And then, probably because I've been busy making little bunny slippers for my Mimi doll, I realized I could figure out how to make some, so I did. These ones are just the right size to hold the bag of chocolate coins St. Nick is likely bringing my kids in a few days. (You can buy the same ones at Aldi's. Yum.) These paper shoes turn out to be very easy to make, and practically free (except for a small quantity of glue) because I used all materials from the recycling bin.

My husband says blogging is making me completely lose my marbles. He may be right. Only now am I wondering why people would want to make paper shoes for St. Nick Day - for party favors? For a class project? Because they're not sufficiently addicted to chocolate to overlook the fact that their bag of chocolate coins smells a bit like old sneaker if they put out their regular shoes to receive treats, like we do?

Whyever. Here's the tutorial:


STEP ONE: Gather your materials You'll need:
  • a printed copy of the template, which is available as a pdf here,
  • some lightweight cardboard (I used some from an empty cereal box),
  • some scrap paper (I used the insides of security envelopes, which I am absolutely addicted to these days - I have fits if anyone rips the envelopes when opening bills),
  • some kind of a quick grabbing glue, like Alene's Fast Grab Tacky Glue, pictured above (and no, Aleene's does not give me any kind of a kickback for how frequently I mention their glues, but I wouldn't say no if they offered one...),
  • a pair of scissors, and
  • a pencil for tracing the patterns
STEP TWO: Transfer your patterns and cut out all the pieces I just cut out the templates and traced around them on the back side of my paper, but there are many other ways to transfer patterns, and I will guess you are smarter about the whole thing than I am. Remember that the heel upper piece needs to be cut along a fold.
I did cut 2 of the sole templates, so I could give the slippers a nice, finished looking bottom. I cut them with the cardboard right sides together (whatever that is for you) because I wanted the plain brown to show both inside the shoe and on the bottom of the sole. This is because I am insane.

STEP THREE: Fold the tabs on the uppers toward the wrong side of the paper For you origami people, if you're looking at the right side of the paper, it should be a mountain fold.

STEP FOUR: Ignore the picture above and glue the heel/upper piece on first Or carefully peel the rear part of the toe piece off so you can get the other piece glued in place...
Start by spreading a thin line of the tacky glue along the outer edge of the bottom of sole A (the top of this piece will be what shows inside the shoe). Glue the upper to the sole starting by attaching the tab along the fold to the middle of the heel. Work toward the front, bending the upper so that the fold along each tab is snug against the sole - should be pretty easy.
Then attach the toe upper the same way, starting with the middle tab. This is a bit trickier to glue because you have to allow the top of the upper to bow up over the sole, but it's still not terribly difficult once you get the hang of it. Position the tabs at whatever angle gives you a snug fit to the sole.

After I finished this tutorial, I had the bright idea to do a google search of my own for paper shoes. Naturally there are a number of others out there. I like the shoes here (meant as a shower favor thing, but that hardly matters) - they're so cute and the template looks so professional - but I do think they're probably a lot more trouble than mine. They're from Lovebug Scrapbook who says they're adapted from a tutorial in an old issue of Somerset magazine.

Now for my suggested twists on a new tradition for celebrating St. Nicholas Day. Take your kid shopping for some new shoes -- for someone needy. "Encourage" him chip in some of his own money if he has any (and if he's 3 and up, he ought to have small amounts to spend, save, and give). Then help him write a note to St. Nick saying he'd like St. Nick to take the shoes instead of leaving him presents in them, and give the new shoes to a child who really needs some. St. Nick will likely leave behind some of these paper ones with some treats anyhow, and a nice note about how he appreciates your child's kindness so much that Black Peter definitely won't be leaving him any coal this year!

You can help St. Nick donate the shoes to a local homeless shelter, women's shelter, or other organization that collects shoes for needy kids. Or you can make a donation to Soles 4 Souls here, which does a lot of good things.


While you're awaiting St. Nicholas's visit, you might want to read about him. If you'd enjoy a book that focuses on the religious aspects of the man and his holiday rather than the folktale and celebration angle, I highly recommend my friend Julie Stiegemeyer's book, pictured above. Julie has such a clear, warm writing style that I can't help feeling a bit teary every time I read her books. This one is clearly a standout among St. Nick books too - it continues to be a mega-seller year after year. I have amazon ranking envy... Here's a link to read more about it on Julie's blog, and also one for buying the book on amazon, thereby making me feel even more jealous (in a nice way).

Still hungry for more about St. Nicholas and the celebration on December 6th? Check out my last year's post here or check out this amazing website completely devoted to the holiday. It has stories, recipes, crafts (including yet another paper shoe one, sigh), songs, e-cards and more.

Update Note I've added a tutorial and template for expanding the paper shoe into this paper boot. You can find the tutorial and a link to the printable template here.

Monday, November 30, 2009

Advent Traditions: Encouraging Affection, Kindness, and Gratitude with Tiny Food and Little Notes

Happy Advent, which I guess technically started yesterday, but in my household it begins officially on December 1st (making me early! At least in the U.S.!) Last year, I wrote about my family's advent traditions which are focused around a little Elf dropping by to leave the kids little gifts and chocolates in a pocket calendar to minimize the "I can't wait for Christmas" whining. I also linked to a zillion ways to make your own creative calendar. (You can see my 2008 post here - I checked and all the links still work. Amazing.)

Anyhow, over the last year while working on my Preschooler Problem Solver book, I talked to a lot of parents about their families' holiday traditions and ended up feeling regretful that I'd failed to take our calendar tradition to the next level and use it to help instill some better character traits in my kids. Some families, for example, instead of doling out more goodies every day to their already privileged kiddos, set up a little empty creche with a container of straw next to it. The idea is that the kids (and I guess the adults too) add a straw to the creche each time they do a good deed. The family tries to amass enough kind works to create a nice cozy soft bed for the baby Jesus by December 24th. They didn't mention anything about having to remove straws for evil deeds done to your little brother, but that corollary might be useful in certain unnamed households.

Other families have traditions like decorating a tree via good deeds (you add an ornament each time you do something kind), having secret Santas within the family, secretly delivering goodies or thank you notes to deserving people around the community, or putting notes with compliments or promises of a family activity in their calendars instead of sugary things or cute erasers shaped like animals.

The closest my family came to some advent altruism was leaving an occasional little something for the advent elf and writing him teeny thank you notes at the end of the advent season. I'm reasonably proud I did that (not every night or anything! I was way too tired, plus struggling to remember to, um, remind the elf to visit in a timely fashion). You can read about sending elf thank yous in a post from last year here and find my pdf template for making a cute cardstock elf mailbox and mini card and envelope here. Anyhow, today's craft is making elf-sized food and arranging a welcoming rest stop for the present-deliverer who visits your house. This stuff is actually edible, as both I and the dog can attest.
Naked Mimi, above (I will finish her dress one of these days, very soon), is standing, or more precisely, sitting in for our elf, who just happens to be 9 inches tall like her, in front of a tempting wee feast, featuring a properly crustless peanut butter and jelly sandwich, cut on the diagonal as it should be, potato chips, apple slices, and bits of a blackberry artfully arranged to look like grapes (until they shriveled up while they sat on the counter for a couple hours waiting for me to get around to taking a picture of them).
We have prepared almost this same menu with great success for our ant picnics/science experiments on many occasions, and I can testify that the recipes are easy enough for a four year old to manage most of the steps, (leaving only a little peanut butter globbed on the underside of the kitchen table to be discovered at a later date by an unwary visitor's knees).

Take a slice of bread (white is best, given the suggested use for the leftovers for "cinnamon rolls" - but you can use whole grain white if your elf is into healthy eating). Cut off the crusts and hand your kid a rolling pin. A full-size one works fine, but it's much, much more satisfying to use one of those little ones that comes with play kitchen sets. (If the bread is too wide for the little roller, you can cut it in half.) Roll the bread out as thin as possible (which is amazingly thin). Cut two small squares to the scale of your choice, and then thinly spread jelly on one side and pb (or vegemite or whatever it's called in Australia) on the other. (Fingers or a table knife work fine for spreading, but again, a toy knife will seem just right.) Pre-slice an apple into smallish bits and give your child a plastic or toy knife to make them smaller yet. One potato chip broken into tiny bits will yield enough elf chips to last him several days. The blackberry thing is probably best reserved for someone with a delicate touch, like not your average 4-year-old boy.
Then it's onto dessert! The cookie plate above features a pseudo cinnamon roll made by spreading a wide strip of the remaining smushed bread with a smear of Nutella (possibly the most heavenly substance known to man), which is then rolled up jelly-roll style and carefully sliced into spirals. If you were being very fancy, you could squeeze a little white frosting on it. I am too lazy. The cookies are made from a small ball of toll house cookie dough snagged from the batch of cookies I was making for the college student about to head back to school after break. For the chocolate chip cookie on the right, I just mixed in a few mini-morsels and shaped the whole thing into a ball slightly larger than a petite pea. The pseudo peanut butter kiss on the left was made from a ball of plain dough, baked along side the chocolate chip cookie (and lots of their little companions) at 375 F for 3 minutes (cooking times may vary by oven - start checking at the 2 minute mark). A mini morsel was pressed into the center of the cookie while it was still hot.
If it were the elf's birthday or he'd been especially thoughtful and generous lately, you could bake him a cake like the one above. It was made by baking two slightly larger balls of plain cookie dough (about the size of a smallish grape I'd say) for 3 and 1/2 minutes. After cooling, the top of one cookie was spread with Nutella and the other cookie carefully stacked on top of it. The whole thing was then covered with more Nutella, which proved to be a fairly messy venture. I think you could use melted chocolate chips for the frosting, which might work better as the chocolate would firm up while it cooled (the Nutella stayed deliciously and messily moist, even until the next day). The top was decorated with little holiday cake decoration thingies made of some kind of hard inedible sugar stuff and sold in a little jar at the supermarket. Tiny sprinkles would look nice too and be equally inedible.

We arranged a couple birthday candles in button candle holders on the table we set up for the elf, just to make the whole thing look appropriately festive, but I definitely don't recommend lighting these before bed in anticipation of the elf's visit. I believe he carries his own matches and will light them himself when he comes.

It would be awfully sweet for your child to make a miniature thank you drawing for the elf and dictate a note for him to read while he eats his snack. A really nice elf might write a note back from time to time, thereby reinforcing good manners and encouraging literacy skills.

Next up: preparations for St. Nicholas Day (December 6th).

Friday, November 27, 2009

My Creative Space - Week 3

Well, I'm a day late with this post this week - Thanksgiving and guests got me a bit behind - and, I'm ashamed to admit, I've made no significant progress with organizing my studio this week. Sorry Crzylady - next week will be better, I promise.

On the other hand, I did make progress on several projects this week, including this prototype for a Mimi softie. She's from my book of the same name (see sidebar for more info about it). Since the book was published last year, I've received numerous questions about when there will be a Mimi doll available to buy, and sadly, the answer likely is never. It's actually rare for a picture book to get merchandise (it pretty much has to be a best seller). Mimi has had okay sales, but not even strong enough for a go-ahead on the sequel I was hoping to do, much less a softie or something fun like that. But because I continue to get requests, I decided to develop a pattern and tutorial for interested people to make their own. The pattern-making process has proven a bit tricky, though - I'm really not much of a seamstress (I'm a big fan of glue), and I've made only a handful of stuffed animals in my life.
My prototype thus has lots of flaws, but I think she also has some lopsided charm. With luck I'll have figured out the worst of the difficulties in the next couple of days, so I can get the tutorial and pattern up in time for people to make this for a holiday gift. I'll have patterns for clothes (you can see the first bunny slipper in the photo above!) and for Mimi's friends, her stuffed Bunny and her roly-poly Frank. I'm also hoping to offer some help making other accessories, like Mimi's cape, tiara, and sunglasses, Frank's special yogurt cup home, some library books, and maybe Mimi's missing underpants too...
Speaking of which, here's Mimi's bare backside - which has already gotten me in trouble with a few folks who objected to the view of her little piggy tail in the book. Oops.
Here's the start of her dress.

This Mimi is poseable, with a pipe cleaner skeleton inside. She's intended for kids past the age of putting everything in their mouths. I'm also working on a simpler softie-version with all embroidered/sewn features intended for the toddlers and babies. I'll write more later about the value of dolls and book-doll combos for helping little guys develop their imaginations.

Oh, I added a photo of the chocolate cheesecake to Wednesday's post, if anyone's curious to see it.

Wednesday, November 25, 2009

What's Hot + What's Not: Happy Chaxgven


I love Wednesdays. Time to play along again with all the hotter-notters at Loobylu's. Head over there to check out the cute artwork Claire's featuring this week and to see what's hot and not around the globe!

HOT

Chaxgven Also known as Thanksgiving. We renamed the holiday after receiving this charming invitation a few years ago from my nephew who was then in kindergarten. (In case you don't read invented spelling, it says, "Dear Baicker-McKees Could you come over for Thanksgiving."
Naturally, we couldn't refuse.) Hope you have lots to gve chax for this year; I know we do. And it's not just the food.

The Kitchen That's because of the food. Specifically at the moment because of the Chocolate Amaretto Cheesecake that's about to come out of the oven. (I'll have to add a picture shortly.) Not traditional - but good on any occasion. We're having pumpkin pie too, and lots of other typical Thanksgiving dishes, but I'm planning to give special chax for this dessert. Here's the recipe, which came to me by way of a work colleague of my husband's. Here's the amazing part: it's low fat, but you'd never guess that from the taste. It is, quite frankly, incredible.


Chocolate Amaretto Cheesecake
2 small tubs soft light cream cheese (I've tried fat free, but the texture was weird.)
1 cup sugar
1 cup 1% fat small curd cottage cheese
1/4 cup flour
1/4 cup + 2 Tbsp unsweetened cocoa
1/4 cup amaretto (you can sub almost any liqueur, like creme de menthe, Kahlua, Cointreau)
1 tsp. vanilla extract
1/4 tsp salt
1 egg
4 Tbsp mini chocolate chips
8-9 crushed chocolate wafers OR 2-3 crushed graham crackers OR a 1/3 cup graham cracker crumbs
Extra chocolate bar for making decorative curls (and tiding you over until it's time for the feast)

Preheat the oven to 300 degrees. Prepare a 7 or 8 inch spring-form pan by spraying it lightly with Pam. Then put the cookies in heavy duty zipper bags, squeeze out the air and seal. Recruit your little people to crush them. (Consider double-bagging them if your kids are "enthusiastic" workers - less chance of dog hair mixing in with the crumbs that way.) They can use the traditional rolling pin or canned peas to crush them - or for extra fun, they can run their trucks back and forth over them or stomp them to smithereens with a large toy dinosaur. Sprinkle the crumbs over the bottom of the pan, adding some extra if the bottom isn't covered. Set aside.

Put the first 8 ingredients (cream cheese through salt) in the food processor with the sharp spinning blade thing. Process the heck out of these, pausing several times to scrape down the sides. The mixture should look very smooth and creamy, with only faint traces of tiny white lumps/dots. Add the egg and process just until mixed in. Remove the blade, taking care not to cut yourself or drip chocolate on the dog or kids whining at your feet. Fold in the chocolate chips, then pour the mixture carefully over the crumbs.

Pop in the oven and bake, 45-50 minutes for an 8-inch pan or 65-70 minutes for a 7-inch one. In my oven I nearly always need an additional 5 minutes. The direction says it's done when a knife comes out clean, but I don't think that EVER happens. I look to make sure it seems set (not too wobbly in the middle) and that it's starting to pull away from the sides a tad.

Refrigerate for at least 8 hours before serving. It may crack as it cools, but no worries. Just use your veggie peeler to make lovely chocolate curls (or the grater for grated stuff) for a dense garnish that hides all the flaws. Then eat the rest of the chocolate to keep your strength up.


Coming up with an idea for Once Daily
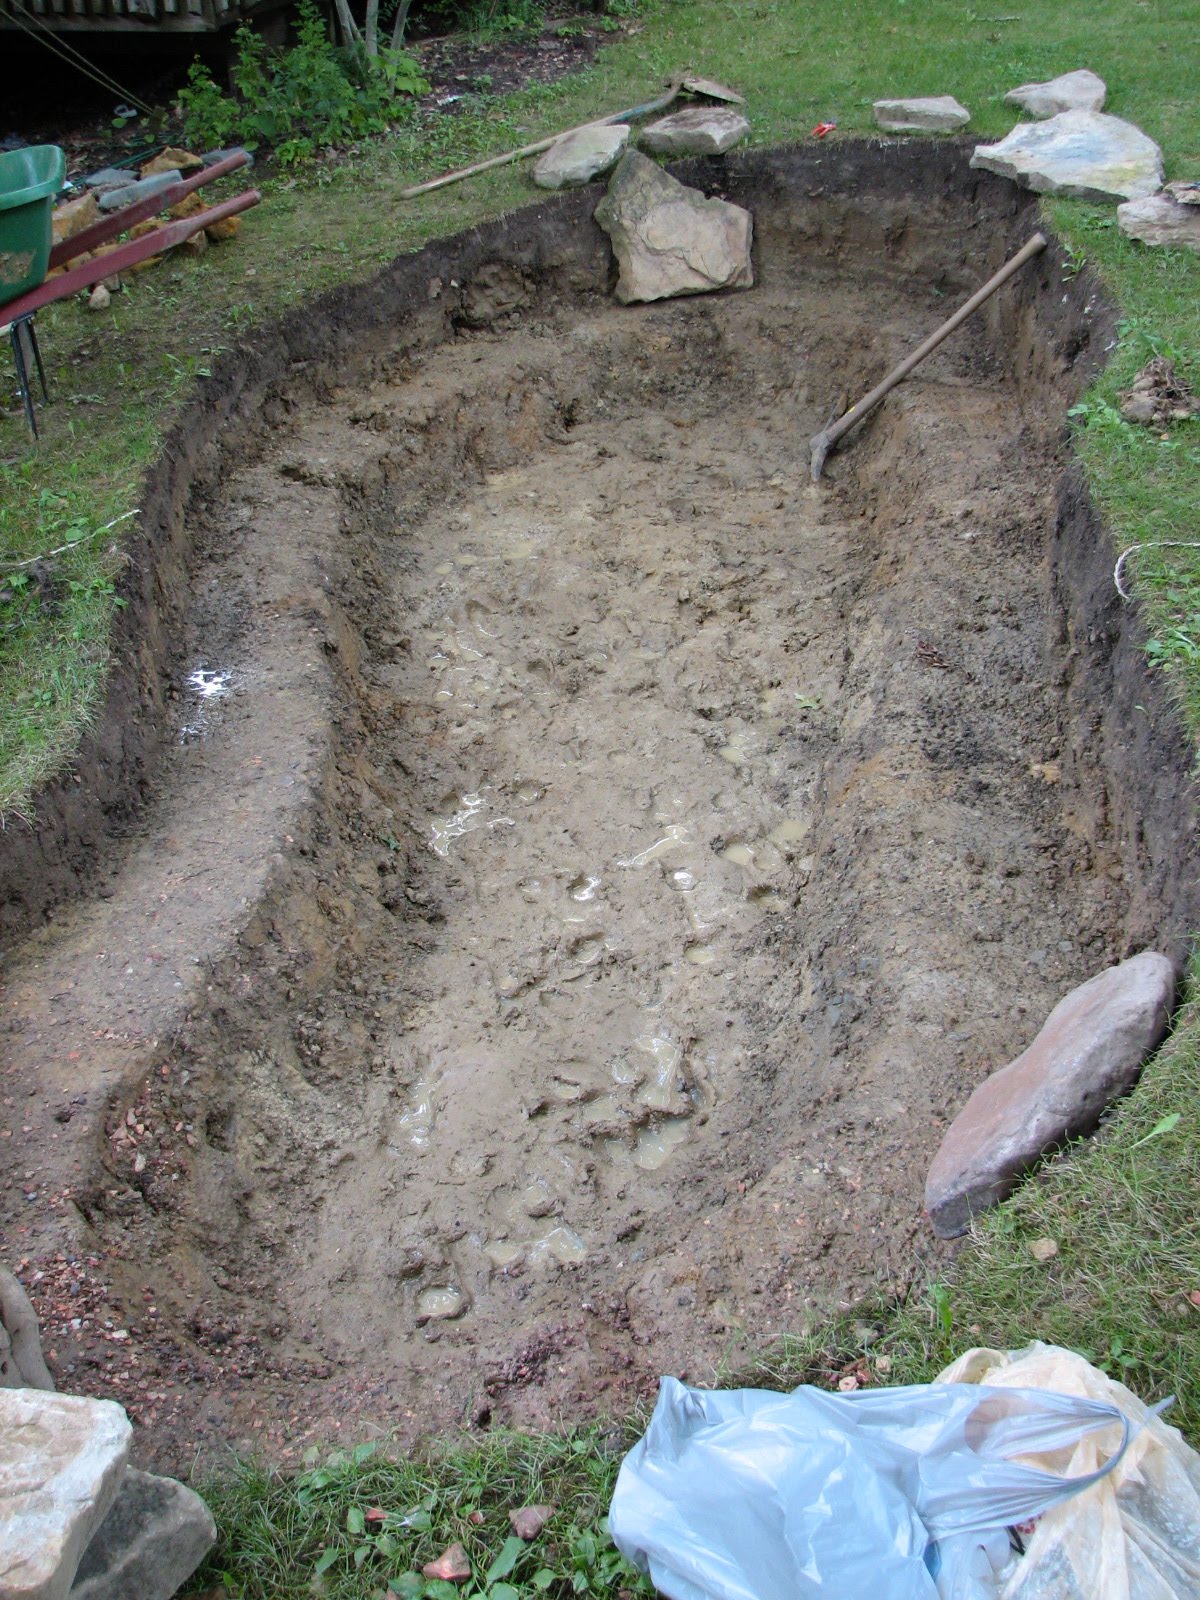
That's Claire's ning-thing where you post one photo a day, usually around a theme. Read more about it here. I'm going to take photos of my new backyard pond. (Just wishing I'd started back when the pond first did. Here some more in-progress pictures. (It's not done yet - but done enough to enjoy.)


Last but not least, gearing up for my second annual Advent blog
Starting Sunday! Over the month (probably not daily, but I'll try) I'll have a little something holiday related. Like the tutorial for these little mushroom houses that I meant to post last year...and lots of other craft ideas too (most kid-friendly). And some recipes, book recommendations, fun if somewhat quirky traditions, and some gift ideas for kids and parents too. I'm working on a few printables and a give-away as well. Any requests or suggestions for other ideas?

NOT
Skipping the nots in honor of the holiday. Must. Bite. Tongue.