Tuesday, December 01, 2009

Get Ready for St. Nicholas Day - by Making Paper Shoes with My Handy-Dandy Tutorial!


How goofy are paper shoes? But when I checked the stat thing for my blog the other day, I noticed that lots of people have been coming here looking for directions and a template for making them for St. Nicholas Day, which is coming up fast on December 6th. I felt kind of bad because I don't have anything like that on here. And then, probably because I've been busy making little bunny slippers for my Mimi doll, I realized I could figure out how to make some, so I did. These ones are just the right size to hold the bag of chocolate coins St. Nick is likely bringing my kids in a few days. (You can buy the same ones at Aldi's. Yum.) These paper shoes turn out to be very easy to make, and practically free (except for a small quantity of glue) because I used all materials from the recycling bin.

My husband says blogging is making me completely lose my marbles. He may be right. Only now am I wondering why people would want to make paper shoes for St. Nick Day - for party favors? For a class project? Because they're not sufficiently addicted to chocolate to overlook the fact that their bag of chocolate coins smells a bit like old sneaker if they put out their regular shoes to receive treats, like we do?

Whyever. Here's the tutorial:


STEP ONE: Gather your materials You'll need:
  • a printed copy of the template, which is available as a pdf here,
  • some lightweight cardboard (I used some from an empty cereal box),
  • some scrap paper (I used the insides of security envelopes, which I am absolutely addicted to these days - I have fits if anyone rips the envelopes when opening bills),
  • some kind of a quick grabbing glue, like Alene's Fast Grab Tacky Glue, pictured above (and no, Aleene's does not give me any kind of a kickback for how frequently I mention their glues, but I wouldn't say no if they offered one...),
  • a pair of scissors, and
  • a pencil for tracing the patterns
STEP TWO: Transfer your patterns and cut out all the pieces I just cut out the templates and traced around them on the back side of my paper, but there are many other ways to transfer patterns, and I will guess you are smarter about the whole thing than I am. Remember that the heel upper piece needs to be cut along a fold.
I did cut 2 of the sole templates, so I could give the slippers a nice, finished looking bottom. I cut them with the cardboard right sides together (whatever that is for you) because I wanted the plain brown to show both inside the shoe and on the bottom of the sole. This is because I am insane.

STEP THREE: Fold the tabs on the uppers toward the wrong side of the paper For you origami people, if you're looking at the right side of the paper, it should be a mountain fold.

STEP FOUR: Ignore the picture above and glue the heel/upper piece on first Or carefully peel the rear part of the toe piece off so you can get the other piece glued in place...
Start by spreading a thin line of the tacky glue along the outer edge of the bottom of sole A (the top of this piece will be what shows inside the shoe). Glue the upper to the sole starting by attaching the tab along the fold to the middle of the heel. Work toward the front, bending the upper so that the fold along each tab is snug against the sole - should be pretty easy.
Then attach the toe upper the same way, starting with the middle tab. This is a bit trickier to glue because you have to allow the top of the upper to bow up over the sole, but it's still not terribly difficult once you get the hang of it. Position the tabs at whatever angle gives you a snug fit to the sole.

After I finished this tutorial, I had the bright idea to do a google search of my own for paper shoes. Naturally there are a number of others out there. I like the shoes here (meant as a shower favor thing, but that hardly matters) - they're so cute and the template looks so professional - but I do think they're probably a lot more trouble than mine. They're from Lovebug Scrapbook who says they're adapted from a tutorial in an old issue of Somerset magazine.

Now for my suggested twists on a new tradition for celebrating St. Nicholas Day. Take your kid shopping for some new shoes -- for someone needy. "Encourage" him chip in some of his own money if he has any (and if he's 3 and up, he ought to have small amounts to spend, save, and give). Then help him write a note to St. Nick saying he'd like St. Nick to take the shoes instead of leaving him presents in them, and give the new shoes to a child who really needs some. St. Nick will likely leave behind some of these paper ones with some treats anyhow, and a nice note about how he appreciates your child's kindness so much that Black Peter definitely won't be leaving him any coal this year!

You can help St. Nick donate the shoes to a local homeless shelter, women's shelter, or other organization that collects shoes for needy kids. Or you can make a donation to Soles 4 Souls here, which does a lot of good things.


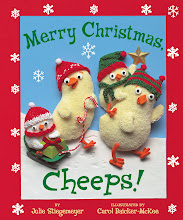
While you're awaiting St. Nicholas's visit, you might want to read about him. If you'd enjoy a book that focuses on the religious aspects of the man and his holiday rather than the folktale and celebration angle, I highly recommend my friend Julie Stiegemeyer's book, pictured above. Julie has such a clear, warm writing style that I can't help feeling a bit teary every time I read her books. This one is clearly a standout among St. Nick books too - it continues to be a mega-seller year after year. I have amazon ranking envy... Here's a link to read more about it on Julie's blog, and also one for buying the book on amazon, thereby making me feel even more jealous (in a nice way).

Still hungry for more about St. Nicholas and the celebration on December 6th? Check out my last year's post here or check out this amazing website completely devoted to the holiday. It has stories, recipes, crafts (including yet another paper shoe one, sigh), songs, e-cards and more.

Update Note I've added a tutorial and template for expanding the paper shoe into this paper boot. You can find the tutorial and a link to the printable template here.

Monday, November 30, 2009

Advent Traditions: Encouraging Affection, Kindness, and Gratitude with Tiny Food and Little Notes

Happy Advent, which I guess technically started yesterday, but in my household it begins officially on December 1st (making me early! At least in the U.S.!) Last year, I wrote about my family's advent traditions which are focused around a little Elf dropping by to leave the kids little gifts and chocolates in a pocket calendar to minimize the "I can't wait for Christmas" whining. I also linked to a zillion ways to make your own creative calendar. (You can see my 2008 post here - I checked and all the links still work. Amazing.)

Anyhow, over the last year while working on my Preschooler Problem Solver book, I talked to a lot of parents about their families' holiday traditions and ended up feeling regretful that I'd failed to take our calendar tradition to the next level and use it to help instill some better character traits in my kids. Some families, for example, instead of doling out more goodies every day to their already privileged kiddos, set up a little empty creche with a container of straw next to it. The idea is that the kids (and I guess the adults too) add a straw to the creche each time they do a good deed. The family tries to amass enough kind works to create a nice cozy soft bed for the baby Jesus by December 24th. They didn't mention anything about having to remove straws for evil deeds done to your little brother, but that corollary might be useful in certain unnamed households.

Other families have traditions like decorating a tree via good deeds (you add an ornament each time you do something kind), having secret Santas within the family, secretly delivering goodies or thank you notes to deserving people around the community, or putting notes with compliments or promises of a family activity in their calendars instead of sugary things or cute erasers shaped like animals.

The closest my family came to some advent altruism was leaving an occasional little something for the advent elf and writing him teeny thank you notes at the end of the advent season. I'm reasonably proud I did that (not every night or anything! I was way too tired, plus struggling to remember to, um, remind the elf to visit in a timely fashion). You can read about sending elf thank yous in a post from last year here and find my pdf template for making a cute cardstock elf mailbox and mini card and envelope here. Anyhow, today's craft is making elf-sized food and arranging a welcoming rest stop for the present-deliverer who visits your house. This stuff is actually edible, as both I and the dog can attest.

Naked Mimi, above (I will finish her dress one of these days, very soon), is standing, or more precisely, sitting in for our elf, who just happens to be 9 inches tall like her, in front of a tempting wee feast, featuring a properly crustless peanut butter and jelly sandwich, cut on the diagonal as it should be, potato chips, apple slices, and bits of a blackberry artfully arranged to look like grapes (until they shriveled up while they sat on the counter for a couple hours waiting for me to get around to taking a picture of them).
We have prepared almost this same menu with great success for our ant picnics/science experiments on many occasions, and I can testify that the recipes are easy enough for a four year old to manage most of the steps, (leaving only a little peanut butter globbed on the underside of the kitchen table to be discovered at a later date by an unwary visitor's knees).

Take a slice of bread (white is best, given the suggested use for the leftovers for "cinnamon rolls" - but you can use whole grain white if your elf is into healthy eating). Cut off the crusts and hand your kid a rolling pin. A full-size one works fine, but it's much, much more satisfying to use one of those little ones that comes with play kitchen sets. (If the bread is too wide for the little roller, you can cut it in half.) Roll the bread out as thin as possible (which is amazingly thin). Cut two small squares to the scale of your choice, and then thinly spread jelly on one side and pb (or vegemite or whatever it's called in Australia) on the other. (Fingers or a table knife work fine for spreading, but again, a toy knife will seem just right.) Pre-slice an apple into smallish bits and give your child a plastic or toy knife to make them smaller yet. One potato chip broken into tiny bits will yield enough elf chips to last him several days. The blackberry thing is probably best reserved for someone with a delicate touch, like not your average 4-year-old boy.
Then it's onto dessert! The cookie plate above features a pseudo cinnamon roll made by spreading a wide strip of the remaining smushed bread with a smear of Nutella (possibly the most heavenly substance known to man), which is then rolled up jelly-roll style and carefully sliced into spirals. If you were being very fancy, you could squeeze a little white frosting on it. I am too lazy. The cookies are made from a small ball of toll house cookie dough snagged from the batch of cookies I was making for the college student about to head back to school after break. For the chocolate chip cookie on the right, I just mixed in a few mini-morsels and shaped the whole thing into a ball slightly larger than a petite pea. The pseudo peanut butter kiss on the left was made from a ball of plain dough, baked along side the chocolate chip cookie (and lots of their little companions) at 375 F for 3 minutes (cooking times may vary by oven - start checking at the 2 minute mark). A mini morsel was pressed into the center of the cookie while it was still hot.
If it were the elf's birthday or he'd been especially thoughtful and generous lately, you could bake him a cake like the one above. It was made by baking two slightly larger balls of plain cookie dough (about the size of a smallish grape I'd say) for 3 and 1/2 minutes. After cooling, the top of one cookie was spread with Nutella and the other cookie carefully stacked on top of it. The whole thing was then covered with more Nutella, which proved to be a fairly messy venture. I think you could use melted chocolate chips for the frosting, which might work better as the chocolate would firm up while it cooled (the Nutella stayed deliciously and messily moist, even until the next day). The top was decorated with little holiday cake decoration thingies made of some kind of hard inedible sugar stuff and sold in a little jar at the supermarket. Tiny sprinkles would look nice too and be equally inedible.

We arranged a couple birthday candles in button candle holders on the table we set up for the elf, just to make the whole thing look appropriately festive, but I definitely don't recommend lighting these before bed in anticipation of the elf's visit. I believe he carries his own matches and will light them himself when he comes.

It would be awfully sweet for your child to make a miniature thank you drawing for the elf and dictate a note for him to read while he eats his snack. A really nice elf might write a note back from time to time, thereby reinforcing good manners and encouraging literacy skills.

Next up: preparations for St. Nicholas Day (December 6th).

Friday, November 27, 2009

My Creative Space - Week 3

Well, I'm a day late with this post this week - Thanksgiving and guests got me a bit behind - and, I'm ashamed to admit, I've made no significant progress with organizing my studio this week. Sorry Crzylady - next week will be better, I promise.

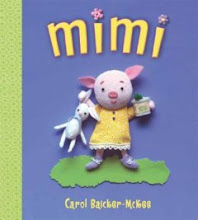
On the other hand, I did make progress on several projects this week, including this prototype for a Mimi softie. She's from my book of the same name (see sidebar for more info about it). Since the book was published last year, I've received numerous questions about when there will be a Mimi doll available to buy, and sadly, the answer likely is never. It's actually rare for a picture book to get merchandise (it pretty much has to be a best seller). Mimi has had okay sales, but not even strong enough for a go-ahead on the sequel I was hoping to do, much less a softie or something fun like that. But because I continue to get requests, I decided to develop a pattern and tutorial for interested people to make their own. The pattern-making process has proven a bit tricky, though - I'm really not much of a seamstress (I'm a big fan of glue), and I've made only a handful of stuffed animals in my life.
My prototype thus has lots of flaws, but I think she also has some lopsided charm. With luck I'll have figured out the worst of the difficulties in the next couple of days, so I can get the tutorial and pattern up in time for people to make this for a holiday gift. I'll have patterns for clothes (you can see the first bunny slipper in the photo above!) and for Mimi's friends, her stuffed Bunny and her roly-poly Frank. I'm also hoping to offer some help making other accessories, like Mimi's cape, tiara, and sunglasses, Frank's special yogurt cup home, some library books, and maybe Mimi's missing underpants too...
Speaking of which, here's Mimi's bare backside - which has already gotten me in trouble with a few folks who objected to the view of her little piggy tail in the book. Oops.
Here's the start of her dress.

This Mimi is poseable, with a pipe cleaner skeleton inside. She's intended for kids past the age of putting everything in their mouths. I'm also working on a simpler softie-version with all embroidered/sewn features intended for the toddlers and babies. I'll write more later about the value of dolls and book-doll combos for helping little guys develop their imaginations.

Oh, I added a photo of the chocolate cheesecake to Wednesday's post, if anyone's curious to see it.

Wednesday, November 25, 2009

What's Hot + What's Not: Happy Chaxgven


I love Wednesdays. Time to play along again with all the hotter-notters at Loobylu's. Head over there to check out the cute artwork Claire's featuring this week and to see what's hot and not around the globe!

HOT

Chaxgven Also known as Thanksgiving. We renamed the holiday after receiving this charming invitation a few years ago from my nephew who was then in kindergarten. (In case you don't read invented spelling, it says, "Dear Baicker-McKees Could you come over for Thanksgiving."
Naturally, we couldn't refuse.) Hope you have lots to gve chax for this year; I know we do. And it's not just the food.

The Kitchen That's because of the food. Specifically at the moment because of the Chocolate Amaretto Cheesecake that's about to come out of the oven. (I'll have to add a picture shortly.) Not traditional - but good on any occasion. We're having pumpkin pie too, and lots of other typical Thanksgiving dishes, but I'm planning to give special chax for this dessert. Here's the recipe, which came to me by way of a work colleague of my husband's. Here's the amazing part: it's low fat, but you'd never guess that from the taste. It is, quite frankly, incredible.


Chocolate Amaretto Cheesecake
2 small tubs soft light cream cheese (I've tried fat free, but the texture was weird.)
1 cup sugar
1 cup 1% fat small curd cottage cheese
1/4 cup flour
1/4 cup + 2 Tbsp unsweetened cocoa
1/4 cup amaretto (you can sub almost any liqueur, like creme de menthe, Kahlua, Cointreau)
1 tsp. vanilla extract
1/4 tsp salt
1 egg
4 Tbsp mini chocolate chips
8-9 crushed chocolate wafers OR 2-3 crushed graham crackers OR a 1/3 cup graham cracker crumbs
Extra chocolate bar for making decorative curls (and tiding you over until it's time for the feast)

Preheat the oven to 300 degrees. Prepare a 7 or 8 inch spring-form pan by spraying it lightly with Pam. Then put the cookies in heavy duty zipper bags, squeeze out the air and seal. Recruit your little people to crush them. (Consider double-bagging them if your kids are "enthusiastic" workers - less chance of dog hair mixing in with the crumbs that way.) They can use the traditional rolling pin or canned peas to crush them - or for extra fun, they can run their trucks back and forth over them or stomp them to smithereens with a large toy dinosaur. Sprinkle the crumbs over the bottom of the pan, adding some extra if the bottom isn't covered. Set aside.

Put the first 8 ingredients (cream cheese through salt) in the food processor with the sharp spinning blade thing. Process the heck out of these, pausing several times to scrape down the sides. The mixture should look very smooth and creamy, with only faint traces of tiny white lumps/dots. Add the egg and process just until mixed in. Remove the blade, taking care not to cut yourself or drip chocolate on the dog or kids whining at your feet. Fold in the chocolate chips, then pour the mixture carefully over the crumbs.

Pop in the oven and bake, 45-50 minutes for an 8-inch pan or 65-70 minutes for a 7-inch one. In my oven I nearly always need an additional 5 minutes. The direction says it's done when a knife comes out clean, but I don't think that EVER happens. I look to make sure it seems set (not too wobbly in the middle) and that it's starting to pull away from the sides a tad.

Refrigerate for at least 8 hours before serving. It may crack as it cools, but no worries. Just use your veggie peeler to make lovely chocolate curls (or the grater for grated stuff) for a dense garnish that hides all the flaws. Then eat the rest of the chocolate to keep your strength up.


Coming up with an idea for Once Daily
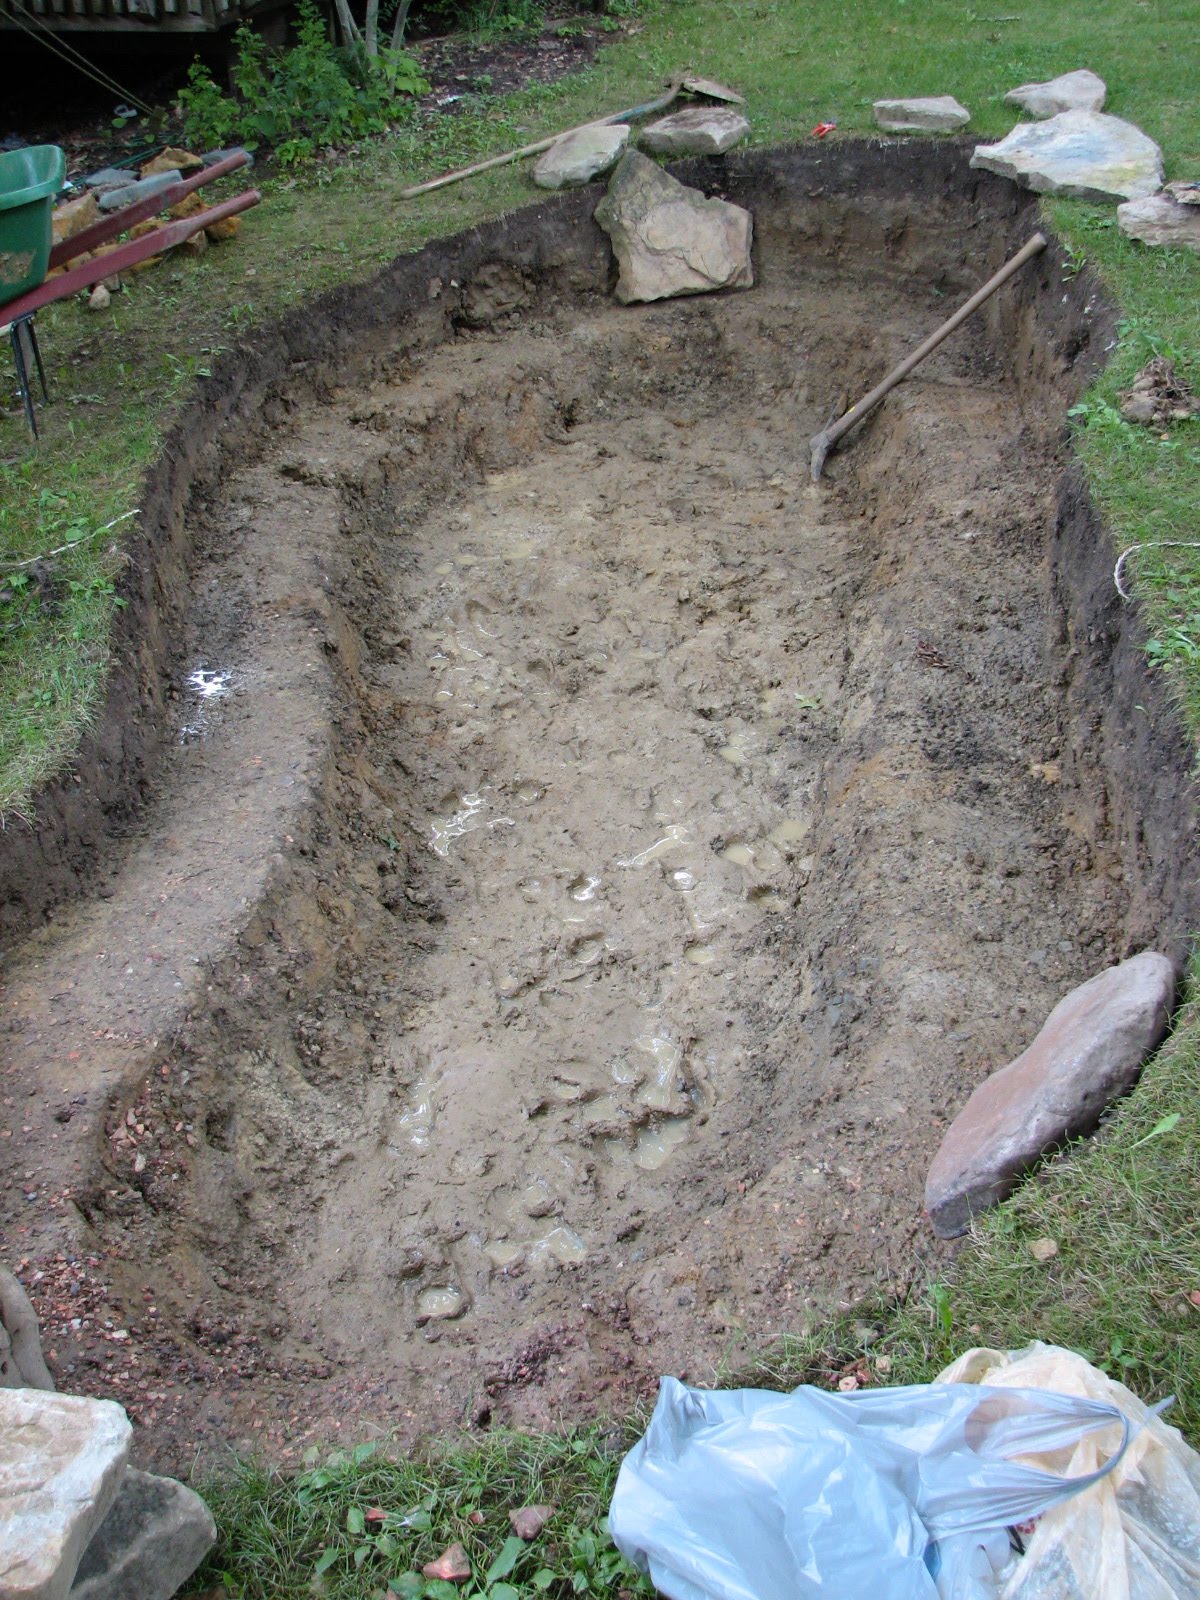
That's Claire's ning-thing where you post one photo a day, usually around a theme. Read more about it here. I'm going to take photos of my new backyard pond. (Just wishing I'd started back when the pond first did. Here some more in-progress pictures. (It's not done yet - but done enough to enjoy.)


Last but not least, gearing up for my second annual Advent blog
Starting Sunday! Over the month (probably not daily, but I'll try) I'll have a little something holiday related. Like the tutorial for these little mushroom houses that I meant to post last year...and lots of other craft ideas too (most kid-friendly). And some recipes, book recommendations, fun if somewhat quirky traditions, and some gift ideas for kids and parents too. I'm working on a few printables and a give-away as well. Any requests or suggestions for other ideas?

NOT
Skipping the nots in honor of the holiday. Must. Bite. Tongue.

Monday, November 23, 2009

Miniature Apple Pie Tutorial


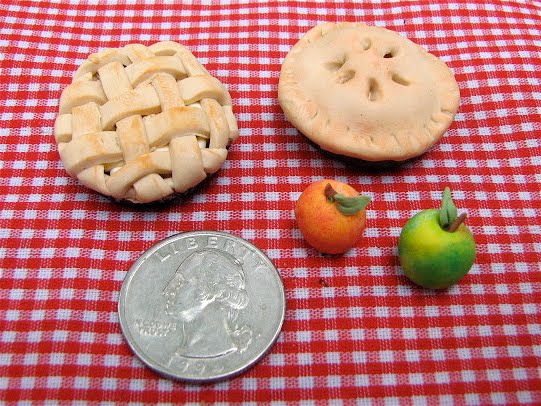
Well, I still haven't managed to resurrect my old hard drive. But I've decide to celebrate having a new computer up and running by recreating the mini apple pie tutorial I mentioned in an earlier post here. This tutorial is more or less the process I used to make the apple pies in my newest picture book An Apple Pie for Dinner (by Susan VanHecke, Marshall Cavendish, 2009). I learned the basic strategy for making the pies, the apples, and many of the other clay miniatures for the book from Sue Heaser's outstanding book Making Doll's House Miniatures with Polymer Clay.
You can read about Sue at her website here and also find ordering information for the book - which I really cannot recommend highly enough if you're into making polymer clay tiny things.
Anyway, here's the tut (I'll do the apples, and maybe some pumpkins or something too, tomorrow. I hope.):

STEP 1: Gather your materials (most of which are shown above)
  • Clay I used Fimo "sandstone" for the crust and a mix of yellow and white for the apples (but you could certainly cheat on them since they barely show). Any brand of polymer clay will work. If you're making this with a very young child, you might want to consider using a more kid-friendly modeling material like Crayola's Model Magic, plasticine, or even play dough. For that matter, you could use snippets of real dough and apple bits (though I'd recommend either not eating the finished product or removing the plastic liner from the bottle cap first).
  • Bottle Cap This will be the pie pan. You can buy unused ones at craft stores or some kitchen/beer-making supply places and they're really ideal since they flare out a little more. But I just used one from a bottle of root beer, and it was fine. If you're making this with a young child, consider using some larger "pan" like a bigger metal lid or dessert patty pan - this scale is challenging for little fingers.
  • Soft Pastels OR Ground Cinnamon You'll use these to "brown" your pie to a lovely golden color. You also need a tool to scrape some of the pastel dust off and a paint brush to spread the coloring, whichever you use. I used real cinnamon, which works just as well and has the added advantage of smelling lovely.
  • A Cutting Tool I love the super thin slicing tool pictured above, but an x-acto blade or old paring knife (NOT one you'll want to use again for food) or other sharp blade will do. Obviously an adult should use the sharp tool!
  • Waxed Paper Or something similar to protect your work surface. Do not use polymer clay directly on wood or on any surface used for food preparation or consumption.
  • A Baking Container Many polymer clay artists prefer glass pans, but I find cookie sheets, metal or ceramic baking dishes or cheap aluminum bakeware works fine. You can even just bake the little pies inside a cupcake liner place carefully on the rack. Just don't use a container you'll want to bake food in again.
  • A Small Wad of Fiberfill (optional) For filler in the bottom of your pie and a few strands for "steam."
  • Miscellaneous A soft brush (even a soft OLD toothbrush will do), a pointy thing like a bamboo skewer or knitting needle if you want to make a traditional top crust (I'm going to show a lattice-top crust). If you want to add steam, you'll also need a couple drops of a glue that adheres to clay. And if you want a sliced pie, some gloss medium or varnish will give it a more realistic look.
STEP 2 Prepare the crust
Cover your work surface with waxed paper. Then condition the clay you're using for the crust by kneading it with your fingers or running it through a craft pasta machine. You'll need two balls about the size shown (I stuck the penny and bottle cap in to help you judge the amount.)

STEP 3: Roll out the dough into circles
I didn't actually roll these out - just flattened them with my fingers. With a pasta machine, use the #4 setting. The kids I've done this project with really liked using miniature rolling pins, but then we had to go back and fine tune with fingers. Ideally, the crusts should be very thin (especially the one for the top crust).


STEP 4: Put the crust in the pan
I used the rounded end of my old toothbrush to help work the crust tightly against the sides of the "pan." Any rounded object will work.


STEP 5: Trim the excess dough
Not really a precision maneuver at this point. It does help to leave a little dough overlapping the top crust, especially if you're going to make a full top crust. This is easier with the flared unused bottle caps, but you can fudge with either.


STEP 6: Prepare the filling
I like to put a small wad of fiber fill in the bottom of my pie as filler - but you could also make a zillion more mini apples or use little lumps of clay. If you want to make the finished pie look like it has a slice taken out of it, make sure you cut away a slice of bottom crust and leave just a couple crumbs and a couple apple bits in the bottom. Save the cut out bottom crust to make a slice that will stand on its own.
(By the way, I had too much fiberfill in the picture above and took some out before filling it with my apples.)
Prepare the clay for the apples by conditioning a small ball of white and a pinch of yellow and kneading them together until they're a pale yellow. You can add a smidge of green too, especially if they're supposed to be Granny Smith apples.
Form this clay into small apple crescents. They won't really show much if your pie is completely covered, but they look good peeking through and give the top crust a natural lumpy look.

STEP 7: Dump the filling in the pan
Really, carefully arrange your mini apples over the fiberfill or clay lumps. Remember the nearly "empty" area if the pie will be missing a slice, and put some apples in the cut out slice you set aside.
At this point, you can sprinkle/brush a little cinnamon or cinnamon-colored pastel over the prepared apples - more important for a sliced pie than a covered one. (Don't forget to add some to your separate slice too.)


STEP 8 Prepare the top crust (Sorry for the lousy photo here.)
Retrieve the other crust circle. If you'll be making a lattice top like I am, cut it into narrow slices. I wanted at least 10 strips, so I could have 5 in each direction.

If you'll be making a full top crust, use your skewer or knitting needle to poke some holes in the top (where the steam would escape). You can also use clay scraps to make little leaves or a tiny apple for a decoration for the top. Finally, if you want a sliced pie, cut out a wedge shape out of the top crust now - it's trickier to slice it once it's in place.

Step 9: Put the top crust in place
For a full crust, lay it in position (carefully if you're going for the sliced look) and push it down around the edges of the bottom crust, remove the excess, and use your skewer or knitting needle to "crimp" the edge, just like you would use a fork to crimp a real pie crust.
If you're doing a lattice top like I am, follow these directions:
a) Lay five parallel strips, leaving the same width between strips, across the top as shown. Place the longest strip down the middle, the next 2 on either side of it, and the 2 shortest toward the edges. (I'm going to refer to the strips by number, with "1" at the top.)
b) Gently fold strips 1, 3, and 5 back on themselves, leaving 2 and 4 in place.

c) Lay a new strip (the other longest one) down the center of the pie over strips 2 and 4. Then fold numbers 1, 3, and 5 back down. You've finished the first weaving!

d) Now fold #2 and 4 back on themselves, leaving 1, 3, and 5 in place.

e) Lay the next longest strip parallel to the one you just place and fold strips 2 and 4 back in place. I have no idea why this is underlining.
f) Go the other side of the center strip and again fold 2 and 4 back on themselves, but in the opposite direction. Lay another strip down and fold 2 and 4 back. It should like the picture above.
Repeat with the last 2 small strips, but folding 1, 3, and 5 back in opposite directions and replacing them (should look like the photo below).

STEP 10: Trim the excess
Just make sure the top crust is adhering well to the bottom one and/or the pan.

If you're making the other style top, also remove the excess, and then use your skewer or knitting needle to "crimp" the edge, just like you would use a fork to crimp a real pie crust

STEP 11: Brown the crust
Gather some pastel dust or, as in this case, real cinnamon on your soft brush and lightly dust the top of your crust, thinking about how a real pie crust browns (usually more near the edges and a bit in the center). You can use your fingers to smooth out the dusting if you want. (I wish I'd gone a little heavier with the browning on this pie in hindsight.)

STEP 12: Bake and enjoy!
Follow the clay manufacturer's instructions regarding temperature. Because of the small size and thinness of the clay, these will bake quickly - I give them 15 minutes. Allow to cool before using. And be sure to use the oven fan - probably not great to breathe polymer clay fumes on a regular basis.

Optional Extra Steps
You can dot a clay-strength glue on the top of the pie and attach a few strands of fiberfill as steam. (Use a toothpick to press them in place if you don't like glue-y fingers.)
If you've made a sliced pie, paint gloss medium or varnish over the apples at all the cut edges (don't forget the separate slice too). This will give it a realistic cooked appearance.

Bon Appetit! (Not really!)

Thursday, November 19, 2009

My Creative Space - Week 2

BEFORE...
AND AFTER! WELL, DURING!
Crzylady at Home Grown Insanity who is apparently both organized and an organizer has given me lots of food for thought and inspiration for reorganizing my creative space. She has this great checklist, perfect for creative spaces, and a wonderfully gentle manner. I'm planning to post my progress weekly, along with a project or two that I can actually work on as I gain space and order - and a feeling of peace.

As you can see, I have a long way to go - but I'm taking the first "baby steps" as Flylady decrees. (Flylady, in case you aren't already familiar with her, has a free online organize-your-whole-life-even-your-body website that has been very helpful to me in general, though not one bit with this space...). I'm throwing stuff out as well as shifting some things to other places, and creating some better homes (and labels) for the stuff I keep.

I took Crzylady's advice to start by clearing one big space, both to give me working room and a sense of encouragement - and it has helped. I got my drawing table cleared off of most of the unnecessary junk, re-established my stations and cleared the floor enough around them that I can fit easily in and out of my chairs. Phew! And then I even started clearing out the shelves on the wall behind. Look! There's some empty space! (Probably won't stay that way for long - but I'll settle for order.)

Anyway, I got things tidy enough to get working on my Christmas card (that's what the little Christmas tree in the foreground goes to), to make good progress on the sketches of two picture books, and to nearly finish this gift I started making a while ago. SPOILER ALERT, MARY LOU - don't peek.

It's a drawstring knapsack for my walking buddy. On Saturday mornings we visit estate sales and then take our walk in the neighborhood around it. I'm making her a bag to tote her loot, and I've used all thrifted materials I've acquired at the sales. The main fabric is blue and white ticking from a vintage pillow cover, the calico lining (shows at the casing) was a vintage fabric I bought from a crafter's huge stash (it was really something - and it takes a lot to impress a hoarder like me), and the pocket on the front is from an embroidered hand towel. The bag also has a couple interior pockets. I used the excellent tutorial for a lined pack with interior pockets on Break It Down Design here - and, get this: I followed practically all the instructions. Maybe that's why it came out so well.... (Changes: I folded the lining to the front to make the casing for prettiness' sake, added an exterior pocket too of my own "design," and used grommets instead of button holes - partly because I can't remember where my button hole attachment is, partly because the fabric was too heavy for my little machine and would never have been able to manage them.) The tutorials are free, but she accepts donations, and I'll make one when I finish - the tutorial was really a big help.
Here's a close up of the tea towel pocket. I probably should have lined it.
I'm filling the bag with some other thrifted treasures - a small measuring tape, a notebook and pen for keeping wish lists and jotting measurements, etc., and an old tin I lined with felt and filled with some quarters and a few dollars (we're very cheap - but it's nice to have a little mad money for those things you absolutely don't need but really want). Any other suggestions of vintage-y things that would be useful?

Sorry my photos are crap today. Waited until it was dark to take them and the lighting is less than optimal at night.

Head on over to Kootoyoo to see all the other wonderful creative spaces, including hers. Thanks Kootoyoo!