Sunday, November 30, 2008

Announcing My First Annual Advent Blog


Happy Advent! This is a very ambitious plan for someone like me who some months can't manage even a single post, but my pledge is that for the next 24 days, I'll do one post per day with:

  • holiday craft tutorials (for kids and adults - some with a book tie-in)
  • recipes
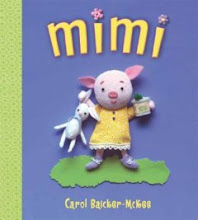
  • printables (including gift tags, a bookplate and more outfits for the Mimi paper doll)
  • thrifty decorating ideas
  • suggestions for cheap, high appeal gifts for kids
  • descriptions of "quirky" holiday traditions
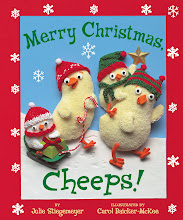
  • and a give-away or two (including a personalized copy of my holiday book for toddlers, Merry Christmas, Cheeps! by Julie Stiegemeyer). Send me an email by December 15, 2008 at baickermckee [at] gmail [dot] com with your name and contact info to register for the give-aways, and I'll pick the winner(s) at random and (I hope) mail the treat(s) out in time for Christmas.


The photo at the top of this post is of the felt (over burlap) advent calendar my sister Anna made for my family more than 20 years ago. It's a bit faded, not to mention falling apart a bit now, thanks to some enthusiastic gift retrieval by the youngsters in my house, but it's still beloved by us all. It has two features my kids consider essential: the pockets are cleverly disguised as pictorial elements (like the balls and hat of the snowman, the top of the lamppost, the windows in the house and church), and the numbers are scattered randomly, so you have to hunt for the right one when it's your turn. (Sometimes you have to hunt rather hard because the numbers were just printed with a sharpie marker and they've gotten blurry over time).

Unless you're planning to stay up very late, and you're well-stocked in the craft and sewing supply department, you probably won't manage to add an elaborate calendar like this one this year (but you could always start planning for next year). But here are some links for crafting advent calendars, many much simpler than this one:
  • A compilation of TONS of different advent calendars from bella dia at the Crafty Crow
  • 3 clever ideas using common objects like matchboxes, assembled by Domestika
  • a funny calendar using Altoid tins at craftzine

The way the advent tradition works at my house is that the Advent Elf sneaks in during the night and leaves one little something (a candy cane, a small toy, something practical-ish like chapstick) in the correct pocket. Sometimes the Advent Elf is delayed by bad weather, traffic, etc. and has to slip in during the day when no one's looking. Also sometimes the Advent Elf gets the pockets mixed up, but it's not nice to make fun of him, especially during Christmas season. My 3 kids take turns getting the gifts, and we have an elaborate rotation system of who goes last (for some reason the most coveted position). This tradition is still going on, even though two of the "youngsters" are now in college. (The Advent Elf is not above using the U.S. Mail.) My husband thinks the Advent Elf is insane, and he might be right.

My sister-in-law has taken the Advent Elf tradition to a whole 'nother level. She shares it with another family, and the Elf surprises one family or the other throughout the month with rather more elaborate goodies, like whole batches of home-baked cookies or a jigsaw puzzle to assemble, or something else that makes me tired just thinking about it. But it does seem to be fun for all of them.

Tuesday, November 25, 2008

Blunchtime Again! A Bread Recipe for Delicious Leftover Turkey Sandwiches

It has been positively wintry here for the last couple weeks, with several snows that have accumulated (well, at least more than a dusting). It's snowing now with 2-4 inches predicted today, more tomorrow and still more on Thanksgiving.

On the whole, I am not a big fan of premature winter. I am already yearning for a Caribbean island. The only good thing about this weather is that it does put me in a cozy baking mood. The other day I decided to make some bread by hand, something I have not done since getting a breadmaker about 10 years ago. And oh my God, I'd forgotten how homemade bread is even better than breadmaker bread (which I do think is pretty tasty too). And especially I'd forgotten how wonderful this bread is, though it was my favorite as a teen, the first wholegrain bread I ever liked and the the first bread I learned to make myself (because my mother didn't bake it often enough to satisfy my cravings). I love this so much I made my mother bake dozens of loaves to serve at my wedding reception.

I do not recall exactly where the recipe is from, though I'd guess from one of my mom's old Scandinavian cookbooks. (My mom's dad was Norwegian.) It's a bit of a bother, as any homemade bread is, but it's completely worth the trouble, even just for the way it makes the kitchen smell heavenly. And feel nice and warm.

Swedish Sour Rye Bread

This makes 2 loaves, which is never enough. If you have a big enough bowl, maybe you should double the recipe.

2 cups thick sour milk
2/3 cup dark molasses
¼ cup salad oil (I use canola)
1 cake compressed yeast (OR 3 packets active dry yeast)
2 cups white flour
2 cups whole wheat flour
2 cups rye flour
2 tsp. salt
Extra flour for kneading

If you don’t have teens to help you make thick sour milk the old fashioned way (by leaving it on the counter all day after fixing their breakfast cereal), you can cheat by adding a few tablespoons of vinegar to the milk and letting it sit for 15 minutes – it should separate and look kind of nasty.) Heat the sour milk to lukewarm. I just beep it in the microwave, checking the temperature every 45 seconds or so. (All the liquid ingredients should be 110 to 115 degrees to activate the yeast, which means you'll want the milk to be a bit warmer than that, if you're the precise measure-y sort.) Pour the milk into a large bowl, and stir in the molasses, oil, and yeast. Put it aside to let the yeast get bubbly and gross-looking.

Sift the flours and salt together into a medium-size bowl. Stir the flour mixture into the milk mixture gradually, beating well after each addition. Turn the dough out onto a well-floured board and allow to rest 10 minutes or more.

Then put on some nice music or, my current favorite, podcasts of old episodes of NPR’s Wait, Wait, Don’t Tell Me and knead the dough until very smooth and elastic (10 minutes or more). You can sing loudly and annoy your children while you do this. Shape the dough into a ball and place in a large, well-greased bowl (I use olive oil to grease it). Turn the ball so it’s coated all over. Cover the bowl with a clean dishcloth and place it in a warm spot to rise until the dough is doubled in bulk (about 2 hours).

Punch down well and turn out on a lightly floured board. Divide the dough in half and shape into 2 loaves. Spray the loaf pans with Pam and put the loaves in them. Place them back in the warm spot, cover with the dishcloth again, and allow to rise until nearly doubled in bulk (2 hours). Bake at 350 degrees for 40-60 minutes until nicely browned and the edges are pulling away from the pan. (The loaves should also sound hollow when thumped.)
Try to let it cool a bit, but go ahead and have some while it's still warm. I'll happily eat it plain, but it's extra incredible with some real butter or a little honey. Or made into sandwiches with your Thanksgiving turkey leftovers. Or with cold turkey meatloaf, which I'll give you the recipe for later, when you're no longer sick of the bird. My family knows to grab some quickly, otherwise, I'll eat it all while they're off at work or school.

Saturday, November 22, 2008

Mimi Printable Paper Doll

This is really a test for me. I'm trying to see if I've figured out a way to add a printable pdf file to a blog posting. If it works, I have some more goodies to add soon!

Click on this link here (I hope) to take you to a black and white paper doll of Mimi and friends that you can print out, color, and play with, if you're so inclined. (To print the pdf file, click on the iPaper button on the toolbar and select print.)

You're free to use this image for non-commercial purposes, including printing it out for a class or library storytime. The picture above is of some of the pieces colored with colored pencils, cut out, glued to cereal box cardboard where applicable (i.e., Mimi, Bunny, and Frank), and assembled where necessary (i.e., the book). I'm working on making a full color, 3-D Mimi paper doll to post on my website too, and I'll link to it here as well once I finish it.

I have been ga-ga for paper dolls as long as I can remember. When we were young, my mom used to let me and my sisters pick them out at the five and dime if we'd been good on long shopping outings. My favorites were the ones that came with lots of accessories, like a crib to put the baby in, or little bowls of food with tiny spoons, etc. My grandmother also used to save the Betsy McCall paper dolls that came in her copies of McCall's Magazine for us to play with when we came to visit. (You can find printables of these old paper doll pages at Janie's The Bleu Door site here, as well as links to other paper doll sites.)

I really credit a lot of my skill with scissors to years of practice cutting out paper dolls and clothing. I remember too, my mom showing me how to make my own paper dolls by drawing a doll figure, taping it to the window, taping another piece of paper over it, and then drawing clothes that would fit. I made zillions of my own dolls, figuring out the engineering of accessory furniture and other items as well. And then I spent hours and hours pretending with my dolls. All those skills have served me well in my writing and illustrating!

For using paper dolls with very young children, I recommend using the Scotch Repositionable glue sticks rather than the tabs for putting clothes on - much less frustrating for tiny hands. The repositionable glue stick has a bond roughly equivalent to a Post-It Note, so it's easy to attach and remove and won't leave a huge permanent mess all over your kitchen table. Because the print outs are close to free (just the cost of paper and ink) you can let the little ones have a go at cutting them out themselves, which they'll probably do badly. One thing that makes it easier is to first cut around each piece so the paper is easier to manipulate.

Friday, November 07, 2008

Book Review: Gobble, Gobble Fun!


My friend and collaborator Julie Stiegemeyer has a new picture book out! Gobble, Gobble Crash! A Barnyard Counting Bash, illustrated by Valerie Gorbachev (Dutton, 2008) will delight 3 to 7 year olds from start to finish. And even though you might think it was a Thanksgiving tale, what with all those gobbles in the title and the turkeys on the cover, it's really an any-season bedtime/counting story, so go ahead and add it to your holiday or birthday shopping lists.

There are so many things to love about this book. First, there's the plot, which is a variation on one of my favorite themes: putting one over on a too-stern grownup. A quartet of rambunctious turkeys gobble and tumble and crash into the barnyard one evening just as the farm animals - and the cranky farmer - are settling down for the night. The turkeys rouse the animals, prompting the little ones to giggle and squeal and join in the fun. The barnyard mamas are as annoyed as the farmer - until they overhear his plan for taking care of those turkeys once and for all. The scheme the animals devise to protect the silly turkeys will have young listeners snickering in collusion.

Second, there's the language. The story is told in rhythmic rhyming couplets that are a pleasure to read aloud, with a fun "gobble, gobble, crash" refrain for little ones to repeat with gusto. It's a book that works well both one-on-one and with a large group. Julie uses strong verbs too, making this a good choice for teachers to use as an example in writing workshops in the early grades.

Finally, there are fun counting and searching elements, some of which are extra challenging and enjoyable in this book. In some of the illustrations, the animals are neatly lined up for beginning counters to note easily, but in others, the animals are scattered throughout a complex illustration, making for a more advanced task that stretches early math skills. A couple times Mr. Gorbachev makes the counter's job particularly complicated and interesting, thereby encouraging kids to devise new, more sophisticated counting strategies; this aspect adds to the appeal for slightly older audiences. For example, the reader can't simply count noses to confirm that Mama Mouse has seven babies; she's got them huddled so tightly in her arms that the reader has to search for seven tiny pairs of ears. Sharp-eyed little ones will also have fun figuring out what the farmer can't, namely what has become of those noisy turkeys.

The illustrations are lovely too, with the story beginning visually in the front matter even before the text starts. Gorbachev has a loose energetic feel to his watercolor and pen and ink pictures, and adds lots of interesting details to examine. The colors are muted, as befits a night-time tale, but with spots of bright yellows and reds to draw the reader's attention to the important parts of the action.

You can gobble, gobble up this book at amazon, barnes and noble (where you can read the excellent professional reviews the book has received), and powell's.

Thursday, November 06, 2008

Blunchtime! Fairy Drinking Goblets

Sigh. I struggle so much to blog regularly, even though I always enjoy posting. My biggest problem, aside from being over-extended in almost every area of my life, is that blogging makes me feel guilty. I shouldn't be doing something frivolous like writing about kids' books or crafts or whatever, when there are important things to be doing like meeting deadlines or dragging my daughter to visit colleges. And laundry. (I'm not sure why guilt is so effective in preventing me from blogging when it definitely doesn't stop me from eating chocolate or sprawling on the sofa to watch old episodes of House or Battlestar Gallactica - but maybe it's just easier to hide the evidence of those things.) Anyhow, I have a possible solution for my guilt: blunching, or blogging at lunch (instead of doing a sudoku and the word scramble thing). We'll see if this works...


Today I have instructions for making sweet (and functional!) drinking goblets for fairies. Or G.I. Joes, if your kid's tastes run more that way. My mother-in-law taught my kids how to make these (who in turn taught me); she learned from her grandmother. They're easy to craft, make a good prop for imaginative play or a gift to leave for the tooth fairy - and best of all, give you a good excuse for eating a chocolate that comes in a pretty foil wrapper. So feel free to raid your kids' remaining Halloween stash.

OKAY! Blogger's formatting drives me insane sometimes! I cannot get anything to go where it's supposed to. ARGH. Hope you can follow the steps anyhow because lunchtime is OVER and I must stop. SORRY!

Step 1

Unwrap a candy and smooth the foil wrapper with your thumbnail. This one is a York peppermint patty, which has a nearly perfect wrapper for this purpose. Plus, if you hold the peppermint to your ear and snap it in two, it makes a really cool sound.


Eat the candy yourself, explaining to your young child that candy isn't good for her teeth, so you're doing her a big favor.

Step 2

Curl the wrapper around the tip of your finger with the pretty shiny side out.

Step 3

Pinch and twist the wrapper just past your fingertip. The part left on your finger becomes the bowl of the goblet; the part you're twisting is the stem. Stop a few centimeters from the bottom. (Pretty fancy of me being all metric, huh?)

Step 4

Shape those last couple centimeters into the base of the goblet by folding and squishing them into a circle. This is a little tricky and may take some practice. Smash the bottom agains the table to make sure it's flat and the goblet is stable.

Step Ta-Da!

Admire your elegant goblet.

Then unwrap a few more chocolates and let your kid make a complete set for a large fairy dinner party. Then set her (or him) up with some fairy dolls or other little guys, a child-sized teapot or small pitcher filled with a little lemonade or watered down apple juice. If the weather permits, these are nice for kids to play with in a mossy spot under a tree. Otherwise, opt for some mess-proofish place, like on a tray at the kitchen table or in the bathroom. You get to curl up nearby with a cup of tea and read your novel, while patting yourself on the back for encouraging your child's imagination.


Tuesday, November 04, 2008

Just Do It!

I hope you'll support my guy -- but either way, make your voice heard! And then afterwards let's all work together to make this country an even better place for our children and grandchildren. Thanks!

P.S. I'm ready to resume posting. I promise!
P.P.S. These polling hours are for Pennsylvania -- check your own state's hours.