Friday, December 26, 2008

Thank You Ideas

When my kids were small I saw a cute idea in a magazine (maybe Family Fun?)for kids to send a Valentine to distant relatives. We've since used the "hug card" to send thank you notes, get well soon cards, and simply "I miss you" notes. Have your kid lie down and spread out his arms on a long sheet of paper. (We used the rolls we had for easel painting, but you can also just tape sheets of paper together.) Trace around your kid's hands, arms, head and neck, then cut out the shape. Your kid can add hair and facial features with crayons or markers, and then dictate a note for you to print across the "hug." It takes a lot of folding to fit in an envelope and it's kind of a pain to cut out, but I've never known a grandparent who wasn't ga-ga for a note like this.
And speaking of cute mail, don't let your kid forget to send a little thank you note to Santa! After all, I bet Santa went to a lot of trouble in his workshop or hanging out in those long lines at the mall, not to mention the late night on Christmas Eve and all. Standard mail delivery to the North Pole is a bit iffy after December 25th, but you can rely on Elf Mail to get a miniature note to Kris Kringle promptly. You can get a pdf to print a template for a make-your-own Elf mailbox, plus a cute little Elf-sized greeting card and envelope here. My sample, above, is just assembled from the paper print out, but it does look (and work) even better if you print it on cardstock. You can choose your own color scheme and add whatever decorations/embellishments you prefer.
Assembly is fairly straight forward, but it's definitely a job for grown ups or skilled older kids.


Supplies


  • Cardstock, white paper

  • Craft-quality glue stick or tacky glue and toothpick; repositionable glue stick

  • Scissors, craft knife, chopstick, scoring tool (like inkless ballpoint pen)

  • Markers, stickers, whatever for embellishing the mailbox and cards

I also have some tips to make assembly easier.


  1. You can print and cut out the template on cardstock and trace it onto whatever paper or card you want - or make life a little easier by printing a copy on paper, cutting loosely around the mailbox and extra parts (the support piece, the door handle, and the key) and lightly gluing them to your cardstock with a repositionable glue stick or spray adhesive. Then carefully cut out along the dark solid lines and score and fold along the dashed and dotted lines with the template still in place. (If you've glued the template to the right side, just follow the mountain versus valley fold lines as marked - but reverse them if you glue it to the wrong side.) Don't forget to use a craft knife to cut out 3 sides of the lower door (the one for the elf mailman to use to remove the mail) and cut out the keyhole too, because it does kind of work with the key.

  2. Remove the template, and assemble the mailbox, using a glue stick or tacky glue applied with a toothpick. First, glue the support piece to the underside of the shelf that connects to the pull-down door (A in my template). The tabs will fold up next to the door (you'll glue them to the inner sides in a minute). Glue the handle to the door.

  3. Cut out the little triangle-y parts around the part that curves over the top if you haven't already done so. (It's easier to do the folds before you cut them out.)

  4. Fold the main part into a box shape, and secure by gluing the long tab to the edge it meets. You may have to reach inside from both the top and bottom to pinch it or use your chopstick to get it to stick well. Then fold the shelf and door into position and glue the little tabs of the support piece just in front of the pull-down door - this isn't absolutely necessary, but it does make everything more stable when you open and close the door to drop the letters in.

  5. Fold up the bottom and glue its tabs in place. You may need to use a chopstick or something to reach in and rub the surfaces together.

  6. Rub glue on the triangle tabs on both sides of the curved top piece and position them carefully. This is a bit tricky. Again, a chopstick is useful for reaching inside for the gluing.

  7. Cut out some cards and envelopes. Have your kid dictate notes and maybe decorate the fronts with mini artwork or tiny stickers. (You can also enlarge the notes 200%, write them and then reduce 50% to make it easier if you're at the reading glasses stage of life like I am.) Then let your kid post his mail!

The mailbox is also excellent for sending letters to the Tooth Fairy or any other tiny creatures who frequent your home.
Here's a link for some more printable miniature envelopes at Jim's Dollhouse Pages (which also has tons of other printable cool miniatures in different scales).

If you like the idea of the mailbox, but can't muster the energy to make another craft after the holiday season, you can buy a lovely little metal one here from Hearthsong, one of my favorite catalog/online toy stores. Or you can hunt for a vintage one like this that makes me feel utterly nostalgic and sentimental - I used to buy very similar ones for like 35 cents at the Williamsburg Pharmacy in Arlington, VA when I was a kid. I think I had about a dozen of them, but none survived our various moves. Sigh. Maybe I'll have to buy myself a holiday letdown gift...

Tomorrow (or soon) the templates and tutorial for the mushroom glitter house!
Thursday, December 25, 2008

Merry Christmas!

Merry Christmas! 

I, um, got behind even more with the advent, but I have some good things saved up for next year, and that will have to do.

My daughter Sara and I made these little mushroom glitter house scenes for the grandmas this year. Here's what one looks like inside a stemless wine glass, which we used for display.

 I'll include directions and templates for making your own shortly, so you can get a head start for next year's Christmas gifts (which is what I should do). Or you could make some for New Year's gifts. (After all, the mushrooms are a symbol of good luck, which works equally well for Christmas or New Year's good wishes.) Sara and I are making some more as New Year's gifts for some special folks since we liked making these so much. (And that's amazing because I have kind of a love-hate relationship with glitter. I love it because it looks so pretty and, well, glittery, but I hate how it ends up everywhere. Forever.)

I'll be back tomorrow too, with some ideas for crafting creative and heartfelt thank yous. And I have some ideas for New Year's greetings, which I'm hoping to send this year, since I never managed to finish my Christmas card.

Hope this finds all of you snug and cozy with your loved ones, whether or not you celebrate Christmas. Thank you all for reading my blog this year, and for your kind notes and the inspiration you've given me. I feel truly blessed. 

Best to all,
Carol

Friday, December 12, 2008

St. Lucia Day is Coming!

Now that I'm a parent, I have a real fondness for holidays that involve kids bringing me breakfast in bed, which is why I insist that St. Lucia Day is an important element of my Scandinavian heritage that my family must celebrate (even though we never celebrated it when I was a kid).

St. Lucia was a Roman girl who refused to renounce her devotion to God and marry some guy she didn't love, so she was sentenced to be burned and her eyes poked out and whatnot - but because she was a good Christian the fire wouldn't burn her. That's why the poor oldest girl in the family who brings mom and dad special saffron buns (called lussekatter, or cat's eyes) and coffee in bed on the morning of December 13th is supposed to wear a wreath decorated with flaming candles - while balancing a tray with hot coffee and wearing a long white dress. Maybe the custom was intended as a form of population control....

Mimi, above, is wearing a battery operated wreath, (which I could not find for sale online anywhere!), and the coffee cup is empty. Also because she is a bit clumsy at times, it's a plastic cup, as is the plate. But Daddy is being a good Daddy and bringing the real deal for Mommy on a separate tray. That's the most important part of the tradition. Plus, they've all let Mommy sleep in a bit.

I can fantasize.

Anyway, the buns are good. (I think especially good if you substitute some chunks of high quality dark chocolate for the raisins, but you can be all healthy and dried fruit-ish if you prefer.) This recipe is not from my Norwegian mom, but from a friend and neighbor who's a really attractive Hispanic/African-American/Polish mix and an outstanding cook. (Here's a link to a very similar recipe using metric units: saffron buns.)

Helena's Lussekatter

Ingredients

1/3 cup milk
¼ cup butter
¼ cup lukewarm water
1 pkg dry yeast
¼ cup sugar
2 eggs (1 for the dough, 1 for the “wash” before baking)
½ tsp salt
¼ tsp saffron (or just cheat and add a little yellow food coloring)
2 ¾ cups flour
1 T cooking oil (I use canola)
Extra 1 T water
2-3 dozen raisins or chocolate chunks

Preparation

Heat the milk in the microwave or a small saucepan to about 115 degrees. Add the butter (cut in small pieces) and stir until it dissolves.

Pour the warm water into a large mixing bowl. Stir in the yeast and set aside for 5 minutes. (Note: I add a little of the sugar to the water and yeast, so the yeast has some food while it proofs.)

Add the milk and butter mixture to the water and yeast. Then stir in the sugar, one egg, salt, and saffron. Gradually add the flour, stirring until it forms a smooth ball (you will probably have some flour left at this point). Sprinkle flour on a board and put the ball of dough on it to rest, covered with the bowl, for 15 minutes.

Knead the dough for 10 minutes, gradually working in the remaining flour (and more if needed) until it’s very smooth and elastic. Wash the bowl and oil it well with the canola oil. Place the ball of dough in the bowl and turn it over several times until it’s coated well all over.

Cover the bowl with a clean dishtowel and place it in a warm place to rise until doubled in bulk, about 45 minutes to an hour.

Punch down the dough and turn it out on a lightly floured board. Divide it into 12 parts. Roll each piece into a long rope, then coil the ends in opposite directions so it makes sort of a tight “S” shape. Place the rolls 2” apart on greased cookie sheets (I spray mine with Pam). Cover the rolls with a towel and place in a warm place again. Let them rise for 30-45 minutes until doubled in bulk.

Preheat the oven to 350 degrees. Beat the remaining egg and T of water with a fork and brush over the tops of each bun. Decorate the buns with raisins or chocolate chunks.

Bake for 15 to 20 minutes until golden brown. Cool on a rack and then serve to Mommy in bed on December 13th, along with some really good coffee, a little OJ or grapefruit juice. Oh, and bring a copy of the paper. And then go away for an hour or so.

One final note: my drawing of Mimi's wreath is wrong - I should only have put 7 candles on it. Also, I'm big into recycling these days, which is why I did this sketch on the back of a piece of paper with the corrections for my husband's law text (which you can order here if you need an extra (expensive) booster seat for young visitors during the holidays, or if you're really, really hoping to get some light reading on Federal Civil Procedure for Christmas). So those weird little squiggly things that show through aren't really intentional - you don't need to hunt for white fabric with a faint strange pattern if you want to make a St. Lucia dress.

Saturday, December 06, 2008

St. Nicholas Day Gifts - Printable Gift Tags and Paper Dolls


I know it's a bit late in the day for St. Nick to be stuffing little gifts into your cyber-shoes, but better late than never, right?

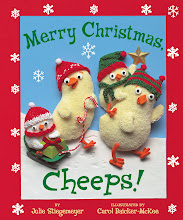
One of your gifts is a page of printable gift tags with images of the chicks who star in my book Merry Christmas, Cheeps! (or if you live in the UK, Merry Christmas, Little Cheeps!) written by Julie Stiegemeyer (Bloomsbury, 2007). The images aren't actually from the book, but do show the Cheeps doing various wintry and festive things, like the guy sledding or baking. Plus there's a penguin with a copy of the book and a nice big chocolate bar - what else do you need for a cold, winter's night?These can be printed with Avery labels (#s 5163, 5263, or 8163) to be self-sticking. Print all the labels you need (available as a pdf here), but please don't sell them. (Just click on the button that says iPaper to get to print options.)
I also have another page of color-your-own paper dolls, this time featuring the two littlest Cheeps. They don't have much in the way of clothing, but they do come with plenty of little accessories. You can access the pdf here.
One of these days, I'll get my act together enough to offer some color versions, with the 3-D art I use in my books.
Sorry I couldn't figure out a way to give you free chocolates - but happy St. Nicholas Day anyway!

Update Notes See my other posts on St. Nicholas Day too. This one has a tutorial and link to a printable template for making paper shoes and more information about the holiday, and this one has a tutorial and link to a template for expanding the paper shoe into a paper boot.

Friday, December 05, 2008

More Lucky Mushrooms and Thrifty Decorating

I promise not to be completely obsessed with mushrooms all month, but I can't help how much I love them. The one above is courtesy of Myra at my little mochi, who has an excellent tutorial here for a super cute felt mushroom. I bought the supplies yesterday to make a few of my own this weekend. (And don't you just love that perky frog?)
These gift tags are just mushroom prints. Cut a white or small portobella mushroom in half and use small paintbrushes to coat the top half in red paint and the stem in white (leave a little space between the colors so they don't bleed when you press the mushroom down). When you print with it, press carefully all over the mushroom so that you don't have high spots leaving unprinted areas. (I also am not above a little "touching up" with the paintbrush.) I added the dots with the non-pointy end of a bamboo skewer dipped in white paint, and the black lines are from a fine-tip Sharpie marker. I printed the grass around the shipping tag example with a slice of potato.

And now onto my super simple, nearly free, but still really beautiful decorating idea: a little food coloring added to water in a clear glass container. The ones above have a mix of red (which looks orange in my bad photo - you need lots of food coloring to get a good red) and green (not even one drop each of food coloring - I poured some water out after adding the food coloring and added even more water).


It's been exceptionally cloudy and gloomy here in Pittsburgh this year, but you can see that with even a smidge of light the effect is pretty magical. Even with my dirty, dirty windows. At night, the glasses look beautiful seen from outside, lit by the house lights.

One of my family's weird traditions is to have Coke in small glass bottles on Christmas. (Santa brings a six-pack, which is a problem because there are five of us. So one of the other quirky traditions is trying to be the first one to "forget" you already had yours and drink the extra.) These Coke bottles were reproductions of ones made in the 1890s, and they're filled with different shades of green. You could add sprigs of greens to look extra festive.
I got the idea for this from the little jars of "potions" my boys used to make in baby food jars and various other containers and require me to store out of reach of their little sister, which meant the jars got relegated to the windowsill. And since the main ingredient in most of the potions was food coloring, they actually looked kind of nice. Since then I nearly always have jars or bottles of colored water in my kitchen windows. I vary the color scheme with the season. I'll do blues and purples in January, pinks and reds in February, and so on through the fall when we have oranges, yellows and reds.
My final suggestion for the colored water theme is an activity/inexpensive gift suggestion for preschoolers. This was a project I discovered when I taught toddler daycare many years ago, and it was hands down the most frequently requested rainy day activities when my kids were small. (I also did it with the kids' kindergarten classes each year as part of science program I taught.) You need:
  • Mini ice cube trays, which you can order here if you can't find them in a local store. (You can use regular ice cube trays, but they're more limited and so kids tire of the activity faster.)
  • A few yogurt containers or something similar
  • An eyedropper or, even better, a pipette like the one in the photo above (we buy ours at Holcombs, a teacher supply store, but they sometimes come with packaged craft or science kits too.)
  • Food coloring
  • Water
  • Soothing music
  • A cup of tea and book for mom

Partially fill the cubes with water and provide two (or more) yogurt cups with water and food coloring mixtues, plus one with just water . (The reason to stick with two colors for younger kids is that otherwise pretty soon all you have is lots of shades of brown.) Show the kid how to operate the eyedropper. ("Hold it and squeeze out all the air. Keep squeezing, dip it in the water, and let go so it will suck up lots of water. Then hold it over the cubes and squeeze out little drops. Isn't that cool?")

Demonstrate how adding a little of each color or a little extra water to a color makes things change! They can suck up colored water from the little squares as well as from the yogurt cups and just kind of move things around. Encourage them to experiment with different approaches, like starting with a strong color at the beginning of a row, and diluting it a little more and a little more all the way down.

Then put on the quiet music and relax with your tea and book. You could easily have 45 minutes of peace. I'm not kidding.

This really does make an excellent gift for 2 to 5 year olds (just be sure to include instructions or the kid's parent will question your sanity). And I guarantee NO ONE else will give the kid the same thing.

I have lots more ideas like this in my first parenting book, FussBusters at Home, in case you're desperate for ways to keep your kids occupied so you can wrap and bake without "help."


Wednesday, December 03, 2008

St. Nicholas Day is Coming!


I've recently added a printable template and tutorial for making paper shoes for St. Nicholas Day. You can get the template here, and the tutorial here.

You have just three more days to get ready! December 6th is the feast day for St. Nicholas, the historical figure many believe is the model for Santa Claus. In some parts of the world, including the Netherlands, St. Nicholas Eve, rather than Christmas, is the big gift-exchanging day. Children put out their shoes (or in some places, put out their boots or hang their stockings), perhaps filled with some hay for St. Nicholas's white horse, and in the morning find their shoes filled instead with candies and small gifts. You can read about St. Nicholas Day customs in many countries here.


While I generally favor any holiday involving chocolate - and in the Netherlands, one of the big customs involves giving children large chocolate initials like these - I celebrated it somewhat inconsistently with my own kids. Keeping track of the advent goodies, gifts for family, friends, and teachers, gratuities for the various helpers in our lives, etc. seemed like more than enough.

But I do wish now that I'd celebrated it after all, a change of heart largely due to reading my friend Julie Stiegemeyer's informative and touching book about the saint, Saint Nicholas: The Real Story of the Christmas Legend.

And today I came up with the perfect way for families to get involved in this shoe-centered holiday: giving shoes to people who need them. You can get in touch with local charities that distribute clothing to needy kids and donate new shoes (or gently used ones if you can't afford to buy new ones) for a child near the age of your own. Winter boots are often badly needed this time of year as well. Make the gift extra appealing by removing the pesky tissue paper that some parents (who shall remain nameless) might accidentally forget about, thereby forcing their child to have painfully cramped toes. And then fill the shoes with small wrapped goodies before you drop them off. Most kids like shoe shopping, even if they balk at other errands, and what kid will object to a trip to the toy store or Dollar Tree? Especially if you remind them that St. Nick is watching and is sure to be pleased with how cooperative and generous they are.

Alternatively, you can donate money, your old shoes, or new shoes to this great organization, Soles4Souls, that distributes footwear to the estimated 300 million kids around the world that don't have any shoes. You can read all about the organization here.

In honor of St. Nicholas, I'm pledging to donate $5 (up to $300) to the organization for every comment on my blog between now and midnight December 6th.
Ha, ha, ha, ha, ha! That's me laughing hysterically about the idea of getting 60 comments in two days.
Thanks.

Tuesday, December 02, 2008

Mint and Gumdrop Mushrooms


Two projects today - both tasty, and both for making those red mushrooms seen so often at Christmas. The how-to for both in a second, but first a few words about why mushrooms at Christmas?

I love these mushrooms, don't get me wrong. I have a number of mushroom ornaments for our Christmas tree as well as other cute little mushroom decorations, some of which I leave out year round. But I've always been curious about their relationship to the holiday (just not curious enough to research it until today).

And it turns out, no one really knows for sure. But Sheila Brown in this interesting article on the Christmas mushroom details some of the theories. First, the amanita Muscaria or "fly agaric" mushroom (aren't those both unappealing names? especially the common one?) is considered a sign of luck, which is why it's often included on Christmas cards. Second, it's associated with the evergreens used to decorate at Christmas. Basically, the fungi grow around evergreens and have an interdependent relationship with them, so they've become associated with each other. Some people think, probably wrongly, that Santa dresses in red and white because of these guys. Oh, and one more interesting bit of trivia: this type of mushroom is called the "fly" agaric because flies are attracted to it. (Not sure what the agaric part means except maybe it's the gagging sound people make because of all those gross flies.) Folks used to put bits of the mushrooms in bowls of milk; the flies would drink the milk and mushroom mixture, get drunk, and fly into things and die. Doesn't that sound nice and Christmas-y?

One last crucial piece of information. Mushrooms in the amanita family are poisonous - ranging from moderately bad news like these ones to extremely/fatally toxic - so better to avoid nibbling on them, especially because they all look pretty much alike. Unless they're these sugary amanitas that I'll tell you how to make.

First, because they're so simple, the gumdrop ones. Basically all you need is a red gumdrop, a white gumdrop, a knife, and a high tolerance for sticky fingers. First, carve a stem shape out of the white gumdrop, making sure to cut the sugary part off the bottom (so the mushroom will stick to whatever surface you put it on and remain more or less upright) and the top (so the red part will stick to it). Save the extra white parts because you need them to make the little white dots. Next, cut the bottom off the red gumdrop. Then chop and mush little bits of the leftover white gumdrop to make tiny dots. Carefully peel the dots off your fingers (easier said than done) and stick them to the red gumdrop in a pleasing, mushroom-y pattern. (On real mushrooms, those white dots are little bits of the stem still sticking to the cap from before the cap emerged.)

Then stick the red top on the white bottom, squish it around a bit until it sits nicely, and you're done. You can eat it right away, but if you let it sit out in the air for a few days, it gets hard and looks pleasantly translucent and decorative sitting on a shelf or hanging from the Christmas tree (just be sure to stick the hook in before it gets totally hard if you're going to hang it).

Next up: the no-bake mint mushrooms. I found this recipe, which my daughter and I used many years ago to make little snowmen, on a scrap of paper tucked in a cookbook. I think but was unable to confirm, that we originally got it from American Girl magazine. At any rate, it works equally well for snowmen or mushrooms, as you please.

You need:
1 tablespoon butter, softened
1 tablespoon light corn syrup
1/2 teaspoon mint extract
1/8 teaspoon salt1 cup confectioner's sugar
A few drops red food coloring
White nonpareil candies (if you can find a jar of just the white ones you're lucky. Otherwise you'll have to pick the white ones out of the mix of a zillion colors. Or you could go buy a box of the tasty Sno-Cap candies, brush the white balls off into a bowl and eat the chocolate so it doesn't go to waste.)

Directions: In a small bowl, combine the butter, corn syrup, extract and salt. Gradually stir in confectioners' sugar. Knead by hand for 1-2 minutes or until mixture becomes pliable. Depending on the weather conditions, you may need to add more confectioner's sugar. The dough should be pretty stiff (or the mushrooms will tend to "melt" and collapse in a most disturbing way) - but you don't want it to get crumbly.

Divide the dough in half and place in separate bowls. Leave one half white, and add a few generous glops of the red food coloring to the other, stirring and kneading to combine well. You may need to add a little extra sugar at this point to keep it firm enough.

After accidentally smushing a few of my early attempts, I hit on this method for forming the mushrooms. (I made teeny tiny ones, which appeal to my love of all things miniature, as well as to my limited tolerance for candy that doesn't involve chocolate - why waste the calories? - but you could always make bigger ones; the process would be the same.) Tear off a piece of waxed paper for a work surface. Pinch off some white dough and roll a log to whatever width you desire. Cut off the length you want. Shape the stem some more, so that it's wide at the base and tapers toward the top. Tap both ends against the waxed paper to flatten and leave to air dry a bit. Make a whole bunch more stems. (You may want to cover the bowls of dough with a damp paper towel while you're working so the dough doesn't dry out too much.)

Next, form the caps by roll a small ball and flattening a bit. Experiment with different shapes. (I like variety in my mushrooms, but you could always strive for uniformity if you prefer). Pour a small quantity of nonpareils in a shallow bowl. Then press your fingertip against a damp paper towel and use it to chase around and pick up individual white nonpareils. It's a bit painstaking at first, but you'll get better. Gently press them over the cap. After you've made a bunch of caps like this, dampen the top of the stem with a wet fingertip, and carefully pick the caps up and place them on the stems, pushing them down slightly so they'll adhere well. Allow to air dry for a few hours, and then they're good to eat!

These make a very pretty gift in a small tin - just make sure the get-ee realizes they're food. We had someone preserve her little snowmen for several years thinking they were decorations (and wondering why they had that odd minty freshness).

Monday, December 01, 2008

Scandinavian Woven Heart Baskets

I apologize for the lousy photos, and I couldn't get my pdf template to work (with luck I'll add it tomorrow) - but I hope you can make everything out enough to follow the instructions. Okay, a whole year later you can get the pdf here. Also you can see some more sample hearts here.


These heart baskets are a traditional Scandinavian Christmas craft; they make beautiful decorations for your tree or windows (as in the above photo - with my relatively tidy kitchen showing in the background) and they also make interesting holders for candy or a small gift.


This is a fairly simple craft for a school aged child, and a preschooler may also enjoy helping.

To make one you'll need:


  • 2 pieces of contrasting papers, each at least 2 1/2 inches by 8 inches, plus an extra strip about 1/2 inch wide and 5 inches long or so. (Red and white are traditional colors, but I also made two of the above from recycled papers - newspaper, a page from a catalog, and the inside of a security envelope)

  • Scissors

  • A little glue or tape

To start, you should cut a template from cardboard or cardstock (I used a box from dog biscuits, as you can see in the photo below, which I forgot to rotate.) My template is 2 1/2 inches wide and 4 inches tall. The lines marked on it show you where to make the cuts so that you'll have 3 strips to weave. I hope tomorrow I'll have a printable template for you, but you can certainly fudge it - I did. It helps to cut the strips fairly long, so you have room to fiddle, especially until you've had some practice. Next fold your papers in half. Place the flat end of the template against the fold and trace around it. Mark the positions of the interior cuts, and then cut around the outside, as well as along the two interior lines. (Sorry for the blurry photos.)


Next comes the tricky part: the weaving. Start by scunching open the uppermost strip on the white half and sliding the upper red strip through it.
Then scunch the second red one open, pinch the first white strip closed again, and slide it through the middle of the red strip.
Finally, open the first white strip again and slide the third red strip in. At this point, you've finished the first row of weaving!
Okay, here's where the how-to photos end - but the rest is more of the same, except for weaving in the second white strip you'll reverse the scunching order. First scunch the first red strip open and slide the second white one through it, then red through white and white through red again. (Sometimes the last top strip will pop out - just work it back into place. It will stay when the basket is done.)

Repeat the order of the first white strip for the third one, and you're about done. Just tape or glue the extra long strip inside to form a handle, add some goodies, and give it to a friend!

In my Merry Christmas, Cheeps! book, the littlest chick can be seen hanging one of these on the tree on the page for "Reach to hang an ornament/Shiny, shiny bright." You can also see one hanging on the tree in the excellent classic book Christmas in Noisy Village by Astrid Lindgren (who wrote the Pippi Longstocking books).

If you get good at these hearts and want to try some more elaborate ones (you can get pretty fancy if you vary the number and shape of the strips, check out this sites for ideas and instructions:


  • This interesting Danish site which has both the basic and very advanced directions (but beware, it plays electronic-ish Christmas music)

  • Margita Mentorp's papirklip blog (I think I have her name right - but the site's in a language I don't speak). It has lots of cool templates for unusual woven hearts, as well as some little house templates to cut out and assemble and other Christmas decorations to make.