Saturday, December 06, 2008

St. Nicholas Day Gifts - Printable Gift Tags and Paper Dolls


I know it's a bit late in the day for St. Nick to be stuffing little gifts into your cyber-shoes, but better late than never, right?

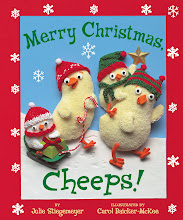
One of your gifts is a page of printable gift tags with images of the chicks who star in my book Merry Christmas, Cheeps! (or if you live in the UK, Merry Christmas, Little Cheeps!) written by Julie Stiegemeyer (Bloomsbury, 2007). The images aren't actually from the book, but do show the Cheeps doing various wintry and festive things, like the guy sledding or baking. Plus there's a penguin with a copy of the book and a nice big chocolate bar - what else do you need for a cold, winter's night?These can be printed with Avery labels (#s 5163, 5263, or 8163) to be self-sticking. Print all the labels you need (available as a pdf here), but please don't sell them. (Just click on the button that says iPaper to get to print options.)
I also have another page of color-your-own paper dolls, this time featuring the two littlest Cheeps. They don't have much in the way of clothing, but they do come with plenty of little accessories. You can access the pdf here.
One of these days, I'll get my act together enough to offer some color versions, with the 3-D art I use in my books.
Sorry I couldn't figure out a way to give you free chocolates - but happy St. Nicholas Day anyway!

Update Notes See my other posts on St. Nicholas Day too. This one has a tutorial and link to a printable template for making paper shoes and more information about the holiday, and this one has a tutorial and link to a template for expanding the paper shoe into a paper boot.

Friday, December 05, 2008

More Lucky Mushrooms and Thrifty Decorating

I promise not to be completely obsessed with mushrooms all month, but I can't help how much I love them. The one above is courtesy of Myra at my little mochi, who has an excellent tutorial here for a super cute felt mushroom. I bought the supplies yesterday to make a few of my own this weekend. (And don't you just love that perky frog?)
These gift tags are just mushroom prints. Cut a white or small portobella mushroom in half and use small paintbrushes to coat the top half in red paint and the stem in white (leave a little space between the colors so they don't bleed when you press the mushroom down). When you print with it, press carefully all over the mushroom so that you don't have high spots leaving unprinted areas. (I also am not above a little "touching up" with the paintbrush.) I added the dots with the non-pointy end of a bamboo skewer dipped in white paint, and the black lines are from a fine-tip Sharpie marker. I printed the grass around the shipping tag example with a slice of potato.

And now onto my super simple, nearly free, but still really beautiful decorating idea: a little food coloring added to water in a clear glass container. The ones above have a mix of red (which looks orange in my bad photo - you need lots of food coloring to get a good red) and green (not even one drop each of food coloring - I poured some water out after adding the food coloring and added even more water).


It's been exceptionally cloudy and gloomy here in Pittsburgh this year, but you can see that with even a smidge of light the effect is pretty magical. Even with my dirty, dirty windows. At night, the glasses look beautiful seen from outside, lit by the house lights.

One of my family's weird traditions is to have Coke in small glass bottles on Christmas. (Santa brings a six-pack, which is a problem because there are five of us. So one of the other quirky traditions is trying to be the first one to "forget" you already had yours and drink the extra.) These Coke bottles were reproductions of ones made in the 1890s, and they're filled with different shades of green. You could add sprigs of greens to look extra festive.
I got the idea for this from the little jars of "potions" my boys used to make in baby food jars and various other containers and require me to store out of reach of their little sister, which meant the jars got relegated to the windowsill. And since the main ingredient in most of the potions was food coloring, they actually looked kind of nice. Since then I nearly always have jars or bottles of colored water in my kitchen windows. I vary the color scheme with the season. I'll do blues and purples in January, pinks and reds in February, and so on through the fall when we have oranges, yellows and reds.
My final suggestion for the colored water theme is an activity/inexpensive gift suggestion for preschoolers. This was a project I discovered when I taught toddler daycare many years ago, and it was hands down the most frequently requested rainy day activities when my kids were small. (I also did it with the kids' kindergarten classes each year as part of science program I taught.) You need:
  • Mini ice cube trays, which you can order here if you can't find them in a local store. (You can use regular ice cube trays, but they're more limited and so kids tire of the activity faster.)
  • A few yogurt containers or something similar
  • An eyedropper or, even better, a pipette like the one in the photo above (we buy ours at Holcombs, a teacher supply store, but they sometimes come with packaged craft or science kits too.)
  • Food coloring
  • Water
  • Soothing music
  • A cup of tea and book for mom

Partially fill the cubes with water and provide two (or more) yogurt cups with water and food coloring mixtues, plus one with just water . (The reason to stick with two colors for younger kids is that otherwise pretty soon all you have is lots of shades of brown.) Show the kid how to operate the eyedropper. ("Hold it and squeeze out all the air. Keep squeezing, dip it in the water, and let go so it will suck up lots of water. Then hold it over the cubes and squeeze out little drops. Isn't that cool?")

Demonstrate how adding a little of each color or a little extra water to a color makes things change! They can suck up colored water from the little squares as well as from the yogurt cups and just kind of move things around. Encourage them to experiment with different approaches, like starting with a strong color at the beginning of a row, and diluting it a little more and a little more all the way down.

Then put on the quiet music and relax with your tea and book. You could easily have 45 minutes of peace. I'm not kidding.

This really does make an excellent gift for 2 to 5 year olds (just be sure to include instructions or the kid's parent will question your sanity). And I guarantee NO ONE else will give the kid the same thing.

I have lots more ideas like this in my first parenting book, FussBusters at Home, in case you're desperate for ways to keep your kids occupied so you can wrap and bake without "help."


Wednesday, December 03, 2008

St. Nicholas Day is Coming!


I've recently added a printable template and tutorial for making paper shoes for St. Nicholas Day. You can get the template here, and the tutorial here.

You have just three more days to get ready! December 6th is the feast day for St. Nicholas, the historical figure many believe is the model for Santa Claus. In some parts of the world, including the Netherlands, St. Nicholas Eve, rather than Christmas, is the big gift-exchanging day. Children put out their shoes (or in some places, put out their boots or hang their stockings), perhaps filled with some hay for St. Nicholas's white horse, and in the morning find their shoes filled instead with candies and small gifts. You can read about St. Nicholas Day customs in many countries here.


While I generally favor any holiday involving chocolate - and in the Netherlands, one of the big customs involves giving children large chocolate initials like these - I celebrated it somewhat inconsistently with my own kids. Keeping track of the advent goodies, gifts for family, friends, and teachers, gratuities for the various helpers in our lives, etc. seemed like more than enough.

But I do wish now that I'd celebrated it after all, a change of heart largely due to reading my friend Julie Stiegemeyer's informative and touching book about the saint, Saint Nicholas: The Real Story of the Christmas Legend.

And today I came up with the perfect way for families to get involved in this shoe-centered holiday: giving shoes to people who need them. You can get in touch with local charities that distribute clothing to needy kids and donate new shoes (or gently used ones if you can't afford to buy new ones) for a child near the age of your own. Winter boots are often badly needed this time of year as well. Make the gift extra appealing by removing the pesky tissue paper that some parents (who shall remain nameless) might accidentally forget about, thereby forcing their child to have painfully cramped toes. And then fill the shoes with small wrapped goodies before you drop them off. Most kids like shoe shopping, even if they balk at other errands, and what kid will object to a trip to the toy store or Dollar Tree? Especially if you remind them that St. Nick is watching and is sure to be pleased with how cooperative and generous they are.

Alternatively, you can donate money, your old shoes, or new shoes to this great organization, Soles4Souls, that distributes footwear to the estimated 300 million kids around the world that don't have any shoes. You can read all about the organization here.

In honor of St. Nicholas, I'm pledging to donate $5 (up to $300) to the organization for every comment on my blog between now and midnight December 6th.
Ha, ha, ha, ha, ha! That's me laughing hysterically about the idea of getting 60 comments in two days.
Thanks.

Tuesday, December 02, 2008

Mint and Gumdrop Mushrooms


Two projects today - both tasty, and both for making those red mushrooms seen so often at Christmas. The how-to for both in a second, but first a few words about why mushrooms at Christmas?

I love these mushrooms, don't get me wrong. I have a number of mushroom ornaments for our Christmas tree as well as other cute little mushroom decorations, some of which I leave out year round. But I've always been curious about their relationship to the holiday (just not curious enough to research it until today).

And it turns out, no one really knows for sure. But Sheila Brown in this interesting article on the Christmas mushroom details some of the theories. First, the amanita Muscaria or "fly agaric" mushroom (aren't those both unappealing names? especially the common one?) is considered a sign of luck, which is why it's often included on Christmas cards. Second, it's associated with the evergreens used to decorate at Christmas. Basically, the fungi grow around evergreens and have an interdependent relationship with them, so they've become associated with each other. Some people think, probably wrongly, that Santa dresses in red and white because of these guys. Oh, and one more interesting bit of trivia: this type of mushroom is called the "fly" agaric because flies are attracted to it. (Not sure what the agaric part means except maybe it's the gagging sound people make because of all those gross flies.) Folks used to put bits of the mushrooms in bowls of milk; the flies would drink the milk and mushroom mixture, get drunk, and fly into things and die. Doesn't that sound nice and Christmas-y?

One last crucial piece of information. Mushrooms in the amanita family are poisonous - ranging from moderately bad news like these ones to extremely/fatally toxic - so better to avoid nibbling on them, especially because they all look pretty much alike. Unless they're these sugary amanitas that I'll tell you how to make.

First, because they're so simple, the gumdrop ones. Basically all you need is a red gumdrop, a white gumdrop, a knife, and a high tolerance for sticky fingers. First, carve a stem shape out of the white gumdrop, making sure to cut the sugary part off the bottom (so the mushroom will stick to whatever surface you put it on and remain more or less upright) and the top (so the red part will stick to it). Save the extra white parts because you need them to make the little white dots. Next, cut the bottom off the red gumdrop. Then chop and mush little bits of the leftover white gumdrop to make tiny dots. Carefully peel the dots off your fingers (easier said than done) and stick them to the red gumdrop in a pleasing, mushroom-y pattern. (On real mushrooms, those white dots are little bits of the stem still sticking to the cap from before the cap emerged.)

Then stick the red top on the white bottom, squish it around a bit until it sits nicely, and you're done. You can eat it right away, but if you let it sit out in the air for a few days, it gets hard and looks pleasantly translucent and decorative sitting on a shelf or hanging from the Christmas tree (just be sure to stick the hook in before it gets totally hard if you're going to hang it).

Next up: the no-bake mint mushrooms. I found this recipe, which my daughter and I used many years ago to make little snowmen, on a scrap of paper tucked in a cookbook. I think but was unable to confirm, that we originally got it from American Girl magazine. At any rate, it works equally well for snowmen or mushrooms, as you please.

You need:
1 tablespoon butter, softened
1 tablespoon light corn syrup
1/2 teaspoon mint extract
1/8 teaspoon salt1 cup confectioner's sugar
A few drops red food coloring
White nonpareil candies (if you can find a jar of just the white ones you're lucky. Otherwise you'll have to pick the white ones out of the mix of a zillion colors. Or you could go buy a box of the tasty Sno-Cap candies, brush the white balls off into a bowl and eat the chocolate so it doesn't go to waste.)

Directions: In a small bowl, combine the butter, corn syrup, extract and salt. Gradually stir in confectioners' sugar. Knead by hand for 1-2 minutes or until mixture becomes pliable. Depending on the weather conditions, you may need to add more confectioner's sugar. The dough should be pretty stiff (or the mushrooms will tend to "melt" and collapse in a most disturbing way) - but you don't want it to get crumbly.

Divide the dough in half and place in separate bowls. Leave one half white, and add a few generous glops of the red food coloring to the other, stirring and kneading to combine well. You may need to add a little extra sugar at this point to keep it firm enough.

After accidentally smushing a few of my early attempts, I hit on this method for forming the mushrooms. (I made teeny tiny ones, which appeal to my love of all things miniature, as well as to my limited tolerance for candy that doesn't involve chocolate - why waste the calories? - but you could always make bigger ones; the process would be the same.) Tear off a piece of waxed paper for a work surface. Pinch off some white dough and roll a log to whatever width you desire. Cut off the length you want. Shape the stem some more, so that it's wide at the base and tapers toward the top. Tap both ends against the waxed paper to flatten and leave to air dry a bit. Make a whole bunch more stems. (You may want to cover the bowls of dough with a damp paper towel while you're working so the dough doesn't dry out too much.)

Next, form the caps by roll a small ball and flattening a bit. Experiment with different shapes. (I like variety in my mushrooms, but you could always strive for uniformity if you prefer). Pour a small quantity of nonpareils in a shallow bowl. Then press your fingertip against a damp paper towel and use it to chase around and pick up individual white nonpareils. It's a bit painstaking at first, but you'll get better. Gently press them over the cap. After you've made a bunch of caps like this, dampen the top of the stem with a wet fingertip, and carefully pick the caps up and place them on the stems, pushing them down slightly so they'll adhere well. Allow to air dry for a few hours, and then they're good to eat!

These make a very pretty gift in a small tin - just make sure the get-ee realizes they're food. We had someone preserve her little snowmen for several years thinking they were decorations (and wondering why they had that odd minty freshness).

Monday, December 01, 2008

Scandinavian Woven Heart Baskets

I apologize for the lousy photos, and I couldn't get my pdf template to work (with luck I'll add it tomorrow) - but I hope you can make everything out enough to follow the instructions. Okay, a whole year later you can get the pdf here. Also you can see some more sample hearts here.


These heart baskets are a traditional Scandinavian Christmas craft; they make beautiful decorations for your tree or windows (as in the above photo - with my relatively tidy kitchen showing in the background) and they also make interesting holders for candy or a small gift.


This is a fairly simple craft for a school aged child, and a preschooler may also enjoy helping.

To make one you'll need:


  • 2 pieces of contrasting papers, each at least 2 1/2 inches by 8 inches, plus an extra strip about 1/2 inch wide and 5 inches long or so. (Red and white are traditional colors, but I also made two of the above from recycled papers - newspaper, a page from a catalog, and the inside of a security envelope)

  • Scissors

  • A little glue or tape

To start, you should cut a template from cardboard or cardstock (I used a box from dog biscuits, as you can see in the photo below, which I forgot to rotate.) My template is 2 1/2 inches wide and 4 inches tall. The lines marked on it show you where to make the cuts so that you'll have 3 strips to weave. I hope tomorrow I'll have a printable template for you, but you can certainly fudge it - I did. It helps to cut the strips fairly long, so you have room to fiddle, especially until you've had some practice. Next fold your papers in half. Place the flat end of the template against the fold and trace around it. Mark the positions of the interior cuts, and then cut around the outside, as well as along the two interior lines. (Sorry for the blurry photos.)


Next comes the tricky part: the weaving. Start by scunching open the uppermost strip on the white half and sliding the upper red strip through it.
Then scunch the second red one open, pinch the first white strip closed again, and slide it through the middle of the red strip.
Finally, open the first white strip again and slide the third red strip in. At this point, you've finished the first row of weaving!
Okay, here's where the how-to photos end - but the rest is more of the same, except for weaving in the second white strip you'll reverse the scunching order. First scunch the first red strip open and slide the second white one through it, then red through white and white through red again. (Sometimes the last top strip will pop out - just work it back into place. It will stay when the basket is done.)

Repeat the order of the first white strip for the third one, and you're about done. Just tape or glue the extra long strip inside to form a handle, add some goodies, and give it to a friend!

In my Merry Christmas, Cheeps! book, the littlest chick can be seen hanging one of these on the tree on the page for "Reach to hang an ornament/Shiny, shiny bright." You can also see one hanging on the tree in the excellent classic book Christmas in Noisy Village by Astrid Lindgren (who wrote the Pippi Longstocking books).

If you get good at these hearts and want to try some more elaborate ones (you can get pretty fancy if you vary the number and shape of the strips, check out this sites for ideas and instructions:


  • This interesting Danish site which has both the basic and very advanced directions (but beware, it plays electronic-ish Christmas music)

  • Margita Mentorp's papirklip blog (I think I have her name right - but the site's in a language I don't speak). It has lots of cool templates for unusual woven hearts, as well as some little house templates to cut out and assemble and other Christmas decorations to make.


Sunday, November 30, 2008

Announcing My First Annual Advent Blog


Happy Advent! This is a very ambitious plan for someone like me who some months can't manage even a single post, but my pledge is that for the next 24 days, I'll do one post per day with:

  • holiday craft tutorials (for kids and adults - some with a book tie-in)
  • recipes
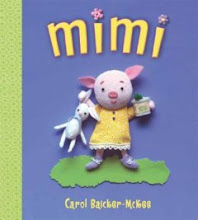
  • printables (including gift tags, a bookplate and more outfits for the Mimi paper doll)
  • thrifty decorating ideas
  • suggestions for cheap, high appeal gifts for kids
  • descriptions of "quirky" holiday traditions
  • and a give-away or two (including a personalized copy of my holiday book for toddlers, Merry Christmas, Cheeps! by Julie Stiegemeyer). Send me an email by December 15, 2008 at baickermckee [at] gmail [dot] com with your name and contact info to register for the give-aways, and I'll pick the winner(s) at random and (I hope) mail the treat(s) out in time for Christmas.


The photo at the top of this post is of the felt (over burlap) advent calendar my sister Anna made for my family more than 20 years ago. It's a bit faded, not to mention falling apart a bit now, thanks to some enthusiastic gift retrieval by the youngsters in my house, but it's still beloved by us all. It has two features my kids consider essential: the pockets are cleverly disguised as pictorial elements (like the balls and hat of the snowman, the top of the lamppost, the windows in the house and church), and the numbers are scattered randomly, so you have to hunt for the right one when it's your turn. (Sometimes you have to hunt rather hard because the numbers were just printed with a sharpie marker and they've gotten blurry over time).

Unless you're planning to stay up very late, and you're well-stocked in the craft and sewing supply department, you probably won't manage to add an elaborate calendar like this one this year (but you could always start planning for next year). But here are some links for crafting advent calendars, many much simpler than this one:
  • A compilation of TONS of different advent calendars from bella dia at the Crafty Crow
  • 3 clever ideas using common objects like matchboxes, assembled by Domestika
  • a funny calendar using Altoid tins at craftzine

The way the advent tradition works at my house is that the Advent Elf sneaks in during the night and leaves one little something (a candy cane, a small toy, something practical-ish like chapstick) in the correct pocket. Sometimes the Advent Elf is delayed by bad weather, traffic, etc. and has to slip in during the day when no one's looking. Also sometimes the Advent Elf gets the pockets mixed up, but it's not nice to make fun of him, especially during Christmas season. My 3 kids take turns getting the gifts, and we have an elaborate rotation system of who goes last (for some reason the most coveted position). This tradition is still going on, even though two of the "youngsters" are now in college. (The Advent Elf is not above using the U.S. Mail.) My husband thinks the Advent Elf is insane, and he might be right.

My sister-in-law has taken the Advent Elf tradition to a whole 'nother level. She shares it with another family, and the Elf surprises one family or the other throughout the month with rather more elaborate goodies, like whole batches of home-baked cookies or a jigsaw puzzle to assemble, or something else that makes me tired just thinking about it. But it does seem to be fun for all of them.

Tuesday, November 25, 2008

Blunchtime Again! A Bread Recipe for Delicious Leftover Turkey Sandwiches

It has been positively wintry here for the last couple weeks, with several snows that have accumulated (well, at least more than a dusting). It's snowing now with 2-4 inches predicted today, more tomorrow and still more on Thanksgiving.

On the whole, I am not a big fan of premature winter. I am already yearning for a Caribbean island. The only good thing about this weather is that it does put me in a cozy baking mood. The other day I decided to make some bread by hand, something I have not done since getting a breadmaker about 10 years ago. And oh my God, I'd forgotten how homemade bread is even better than breadmaker bread (which I do think is pretty tasty too). And especially I'd forgotten how wonderful this bread is, though it was my favorite as a teen, the first wholegrain bread I ever liked and the the first bread I learned to make myself (because my mother didn't bake it often enough to satisfy my cravings). I love this so much I made my mother bake dozens of loaves to serve at my wedding reception.

I do not recall exactly where the recipe is from, though I'd guess from one of my mom's old Scandinavian cookbooks. (My mom's dad was Norwegian.) It's a bit of a bother, as any homemade bread is, but it's completely worth the trouble, even just for the way it makes the kitchen smell heavenly. And feel nice and warm.

Swedish Sour Rye Bread

This makes 2 loaves, which is never enough. If you have a big enough bowl, maybe you should double the recipe.

2 cups thick sour milk
2/3 cup dark molasses
¼ cup salad oil (I use canola)
1 cake compressed yeast (OR 3 packets active dry yeast)
2 cups white flour
2 cups whole wheat flour
2 cups rye flour
2 tsp. salt
Extra flour for kneading

If you don’t have teens to help you make thick sour milk the old fashioned way (by leaving it on the counter all day after fixing their breakfast cereal), you can cheat by adding a few tablespoons of vinegar to the milk and letting it sit for 15 minutes – it should separate and look kind of nasty.) Heat the sour milk to lukewarm. I just beep it in the microwave, checking the temperature every 45 seconds or so. (All the liquid ingredients should be 110 to 115 degrees to activate the yeast, which means you'll want the milk to be a bit warmer than that, if you're the precise measure-y sort.) Pour the milk into a large bowl, and stir in the molasses, oil, and yeast. Put it aside to let the yeast get bubbly and gross-looking.

Sift the flours and salt together into a medium-size bowl. Stir the flour mixture into the milk mixture gradually, beating well after each addition. Turn the dough out onto a well-floured board and allow to rest 10 minutes or more.

Then put on some nice music or, my current favorite, podcasts of old episodes of NPR’s Wait, Wait, Don’t Tell Me and knead the dough until very smooth and elastic (10 minutes or more). You can sing loudly and annoy your children while you do this. Shape the dough into a ball and place in a large, well-greased bowl (I use olive oil to grease it). Turn the ball so it’s coated all over. Cover the bowl with a clean dishcloth and place it in a warm spot to rise until the dough is doubled in bulk (about 2 hours).

Punch down well and turn out on a lightly floured board. Divide the dough in half and shape into 2 loaves. Spray the loaf pans with Pam and put the loaves in them. Place them back in the warm spot, cover with the dishcloth again, and allow to rise until nearly doubled in bulk (2 hours). Bake at 350 degrees for 40-60 minutes until nicely browned and the edges are pulling away from the pan. (The loaves should also sound hollow when thumped.)
Try to let it cool a bit, but go ahead and have some while it's still warm. I'll happily eat it plain, but it's extra incredible with some real butter or a little honey. Or made into sandwiches with your Thanksgiving turkey leftovers. Or with cold turkey meatloaf, which I'll give you the recipe for later, when you're no longer sick of the bird. My family knows to grab some quickly, otherwise, I'll eat it all while they're off at work or school.