Showing posts with label craft tutorial. Show all posts

Friday, December 03, 2010

St. Nicholas Day Paper Boots: For When a Paper Shoe Simply Isn't Big Enough

Not-big-enough paper shoe - Needs more room for chocolate
My tutorial for making paper shoes for St. Nicholas Day is probably my most popular post ever, which kind of cracks me up, since I hadn't imagined there would be much demand for such a goofy thing as a paper shoe. It's so popular that this cool online magazine, InCulture, asked me if they could reprint it this month as part of their holiday issue. You can find it here - and check out the rest of the magazine while you're at it. Lots of interesting articles on multicultural issues for kids and parents.

Anyway, I've recently learned there is an even greater need out there: a tutorial and template for a paper boot! Because boots are also traditional to put out for St. Nicholas Day and well-worn ones tend to smell even worse than used sneakers do, if that's possible.  More importantly, a paper boot can hold WAY more chocolates and other goodies than a paper shoe can. That's a need I can appreciate.

I didn't really have any idea how to make a paper boot, though, so I turned to my smartest, most trusted friend: Ms. Google.

And she let me down. The only templates/examples I could find for paper boots were really lame. In particular, they failed on the most important characteristic of a paper boot: capacity. This is because they were basically boot-shaped envelopes.

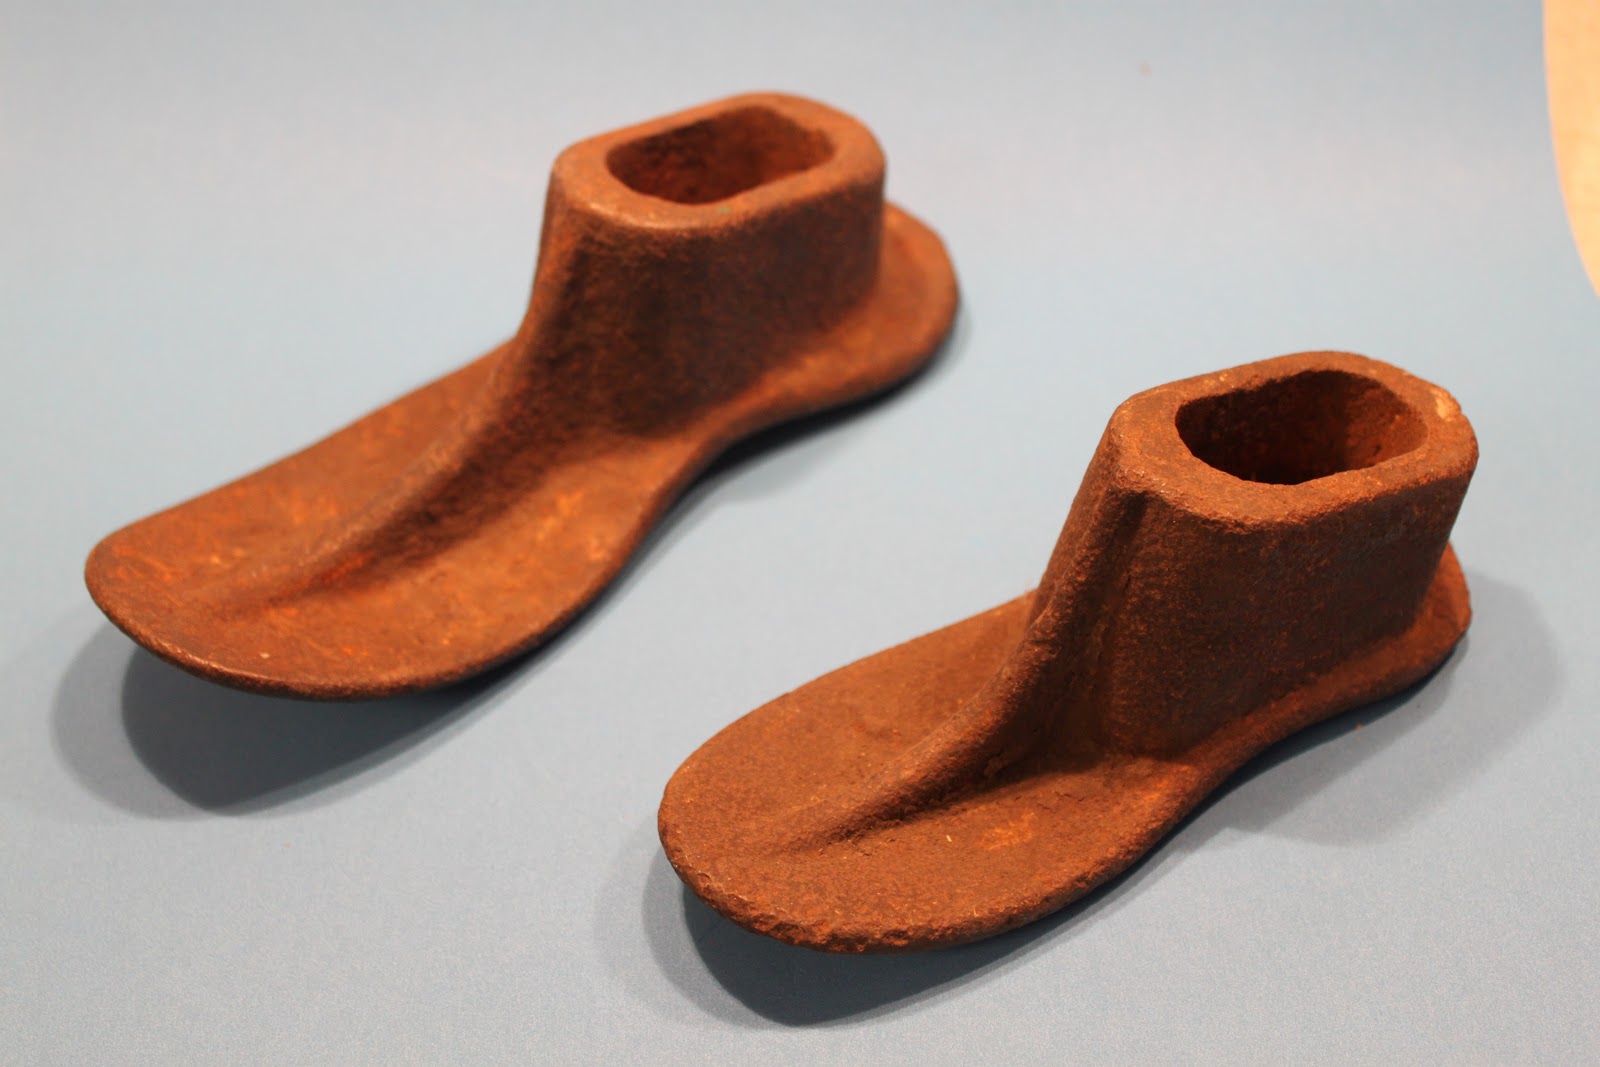
I have limited footwear engineering skills. Really, that paper shoe pretty much exhausted them. Though I do have these really, really cool vintage-maybe-antique children's shoe "lasts." (See, I even know the technical lingo.) They're iron and really, really heavy.
I bought them at an estate sale recently, even though I have no intention of becoming a shoemaker and don't have young children anymore. My husband says I'm insane. But he says it lovingly, so I forgive him.

So I was kind of stumped. Then I tripped over someone's boots in the hallway (oops - they were mine. It SNOWED yesterday. The nerve.) And then I had a flash of inspiration for how I could adapt the basic St. Nick paper shoe into a paper boot. And it only took me two tries to make something that works.

Here's how you do it:

You'll Need
  • Scrap papers
  • Cardboard from a cereal box (for making the original shoe, if you haven't already)
  • Printed templates (see below)
  • A pen or pencil
  • A pair of scissors
  • A glue stick (preferably the strong craft kind) or white glue with a toothpick or something to apply it.
  • A handful of unused tissues
  • A smidge of patience and frustration tolerance
Steps
1.Make the paper shoe from the template and tutorial here.

2. Print out this new template for the boot's upper, and transfer it to a paper of your choice.
I used the test print sheet my stupid printer wastes ink on every time I install a new cartridge. Cut out the two pieces. (Mine has nice decorative edging because I accidentally got Sharpie all over it when I was tracing it to make the printable template. I'm pretending it's a design feature.)

3. Stuff the shoe with the unused tissues. (You can reuse them later, so just sniffle for a bit until this is done.)
Stuff them loosely. You're going to need to extract them from the finished boot later.

4. Slather some glue stick on the piece that attaches to the heel and stick it on. Be patient. Wait for the glue to dry.

5. Now glue the sort of pointy part of the other piece of upper onto the top of the shoe. (There are probably fancy technical names for these parts, like "flange" or "gasket" or "whippersnapper," but I don't know them.) BE PATIENT. It will be much easier to do the next, a-little-bit-fiddly step if you let the glue dry.

6. Pressing hard, run the glue stick along the edges where the boot part will attach to the rest of the shoe upper and turn the corner to run glue along the part that will stick to the piece you already attached to the heel of the shoe.
Then stand the shoe up and stick everything together.
This is easier said than done. In truth, it is a bit fiddly. It might not be perfect. I have a little gappy place in mine. That's okay. This is a paper boot, people, not a pair of ridiculously expensive Frye boots like my daughter wants for Christmas. Just pretend you're one of the little elf guys in this story.
Only with less hammering. You won't have much boot left if you break out the hammers.
Do one side at a time, because otherwise the glue on the other side will dry out before you finish attaching the first side.

Here's a closeup of the attached bits.
7. After the glue dries, pull out the tissues, wipe everyone's noses, and dispose of them properly. Not in recycling, even though they're paper. Too gross.

There! Not bad for a paper boot, is it? And it totally beats those envelope ones in the important capacity category. You can have a rush of enthusiasm and decorate it if you want - glue some ribbon or rickrack around the top, attach some real or paper buttons or silk flowers or something. Be creative - I bet you can come up with some very good clever ideas using common household items, like flourescent-colored cereals or wheels that have come off little cars.

Just don't forget to put it out for St. Nick on the night of December 5th. Because it really looks best all filled up with chocolate and other lovely goodies.

Tuesday, December 22, 2009

Cut Paper Christmas


I'm not sure why, but I always have urges to do cut paper crafts at Christmas (which is why the floors are always covered in tiny scraps at the holidays).

The two paper cuts above were leftovers from a flurry I cut one year to decorate packages. They're basically just the snowflake idea. I precut thin paper (these were origami paper) into a circle, folded it in half (right sides together), in half again, and then into thirds and then cut patterns out freehand. There are a few simple tips that may help you make especially intricate ones: first, do the folding carefully and press the creases well (you can even iron them). Second, have a mixture of large cut away areas and others that are narrow and repeating. Be sure to use very sharp scissors; I use embroidery scissors. (Though check out these amazing Polish paper cuts that were traditionally made with sheep shears!) Finally, take care not to tear delicate areas when you unfold them. (Small tears can be repaired by gluing narrow support pieces to the back of the paper cut.) I always iron my finished piece flat.

The paper cut above was done by my oldest son when he was almost 10, and the similar one below was cut when he was not quite 5. You can see he gained a lot of skill in the years between. In both cases, I folded a piece of paper for him (right sides together) and drew one image onto the wrong side, making sure I had an area of join along the fold. By 10 he was able to cut the design out pretty accurately by himself. I showed him how to trim the excess paper close to the drawn lines and then to cut into tight areas, removing sections at a time, rather than trying to cut along the whole perimeter. When he was younger, I held the paper and rotated it for him as he snipped (mouth open - why do kids do that when they cut with scissors?). Even so, he accidentally snipped off the antlers, but they're cute fawns or does anyway.

Other tips to help young cutters: First, work moderately large and minimize the number of curves or delicate stand-alone areas. Also, use a moderately heavy paper, like old paper bags (below) or coated silhouette paper (above). Cardstock is usually too heavy for folded designs - takes a lot of hand strength - and thin papers flop too much, becoming frustrating.
The teddy bear below was by my daughter when she was going on 6. She had better fine motor skills than my son did around that age, and she was able to cut the bear on her own, though I recall cutting out and gluing in place the eyeballs and nose/mouth pieces.
Can't recall which kid did the penguins below, but they were accordian-folded, like the strings of paper dolls.
The tree below was our Christmas card one year. Last year I made up a page of smaller images to use as gift tags, and meant to post them as a printable pdf - but apparently I never did. I'll see if I can hunt it down and put it up tonight. I made the ornaments with handheld punches while the design was still folded in half.

Hm. I just thought of one thing that has probably prompted my Christmas paper cut connection: these Danish paper cuts. I bought these at a little shop at Rehoboth Beach in Delaware many years ago. (Sorry the photo is blurry.)
The top red one I hung the Christmas after I got it. Then I decided I could leave it up until Valentine's Day, because of the heart theme. Then I decided I could leave it up all year because of the kitchen/cooking theme. Then it faded to almost white...
I was about to throw it away when I realized I could just paint it red again, so I did! I think it's even brighter now than when it was new.
If all those paper cuts sound too complicated for you or your kid, you could make something like these trees instead, which are crafted entirely from recycled materials (from left: newspaper, greenish magazine and catalog pages, and someone's old physic's homework. The stars are from a Triscuits box and the papers are just taped to cones I made by twisting - and sometimes stacking - and taping together subscription cards from magazines. I stuffed extra recycled paper inside the cones to weight them and make them stand better).

To make these, cut long strips of paper, fold them in half, right sides together. Mark a line to cut to, and use your scissors to cut fringye-y "bites" up to the line. For younger kids, cut the strips over-wide, so there's less chance they'll cut all the way through, and stretch the paper taut by taping it between two chairs; you can trim the paper near the fringe afterward. Start attaching the strips of fringe near the bottom of your cone in a spiral, anchoring it frequently with small pieces of masking tape. You can make a little extra piece taped into a cone for a nice pointy top, and tape a star on to hide any lopsided parts.

I used these for a centerpiece at a party last year, and several people asked me where I bought them - they really come out looking nice.


Wednesday, December 02, 2009

Hot+Not: Hearts and Chili and More


I'm joining in again with what's hot and what ain't at Loobylu (and you should definitely head over there to wish her a happy 10th blogging birthday at a minimum), but I'm starting to squeak in just under the deadline every week - but it's one of the "nots" fault. At least it's not yet midnight on Wednesday (here in Pittsburgh anyway), so here's my list:

HOT

A Template for the Scandinavian Heart Tutorial Which I posted, um, last December here. Well, now that I've remembered again how to turn jpegs into pdf files and post them so you can actually get them (I think Blogger still doesn't allow them - somebody please correct me if I'm wrong), I decided to make a new printable (can't find the old one anymore) and quick get it up. You can get it here. It's not exactly pro-quality or anything, but it does get the job done - as shown in the examples above.
This (above, not the chili below) is what the finished templates should look like when you make them out of your cereal box.

Turkey Chili - and Using Up the Last of the Thanksgiving Turkey
This is such an easy meal and satisfying on a cold night (and again for lunch the next day) and it makes a nice change from yet another turkey sandwich. I make my chili dinners a little differently each time (my usual cooking approach), but here's more or less the way I did it this time - and it was very good.

Turkey Chili
Olive oil for sauteing (1-2 T)
2-3 ribs celery, chopped
1 large onion, chopped
2-3 cloves garlic, minced
Other veggies (optional) like shredded carrots, peppers, or finely chopped broccoli, or whatever you have about to go bad
All the leftover turkey, cut into cubes - or 1 lb ground
2 cans chili beans, 1 mild, 1 medium (you can substitute whatever canned beans you like - I often use one can of black beans - but you may need to increase the other seasonings if they're plain)
2 small cans diced tomatoes (these had more onions and garlic and peppers in with them)
1 medium can tomato sauce
2 T, more or less to taste, chili powder (although I think that was a tad too much here)
1-2 tsp cumin
Dollop of sour cream and/or shredded cheddar cheese and/or rice or something like that (all optional)

Saute the chopped veggies in the olive oil until soft and add the cubed or ground meat. Add the beans, canned tomatoes and sauce and bring to a gentle boil. Add the seasonings gradually, tasting frequently (it's easy to go overboard). Stir in well, reduce heat and allow to simmer until heated through or the kitchen smells incredible. Serve as is or over rice (or noodles, or potatoes, or even toast). Garnish with sour cream and/or cheese, especially if you've accidentally made it too spicy. Great served with cold beer, hot corn muffins and a tossed salad.

Now I'm hungry again.

This Book It's called The Worst Kids in the World in Australia. Here's a link to the author's website.
This year I've decided to review mostly vintage holiday books (see my nots for why), which is easy for me to do since there are so many I love. This chapter book has been a favorite of my family's for many years. I'm reading it aloud to my daughter yet again (I absolutely cannot shake the daily holiday book readings no matter how old my kids get - I'm worried that next December I'll have to read them to the dog after Sara's off at college too). Anyhow, how can you resist a holiday book that opens, "The Herdmans were absolutely the worst kids in the history of the world. They lied and stole and smoked cigars (even the girls) and talked dirty and hit little kids and cussed and took the name of the Lord in vain and set fire to Fred Shoemaker's old broken-down toolhouse." Fortunately, the book is still in print and easy to find (plus there's a movie version and a play script, though I've not seen either).

Having My Mini Pie Tutorial Mentioned on joepastry Great website for foodies. You can find it here and read his short post about my little apple pies here. I'm drooling with pleasure. Thanks to Lisa Holewa, author of the fabulous parenting book What Kindergarten Teachers Know for mentioning the post to Joe.

College Applications. Getting Done! 4 down and bunch still to go but we are all less grouchy already. And as a bonus the girl already got an acceptance letter (probably the only one she'll get until April, but it sure does take the pressure off). I would be completely content not to ever edit/proofread another application essay as long as I live.

NOT

Bad Electrical Karma I seem to be breaking (or at least causing to work badly) every electrical item I get near. First one computer, then my email stopped working on the other (and I've lost apparently forever, all my old saved ones in my folders), my car's been acting up, and now my beloved Mac is being as....slow...as...a...turtle...eating....molasses. I've restarted everything and nothing is better. It is driving me insane.

The *&#%# CPSIA Law Which is not going away, not getting tweaked to resolve its flaws, and is scheduled to move forward with testing requirements come February. Vintage books, despite being so low a risk that NO ONE has ever gotten lead poisoning from one, remain on the chopping block, and I worry what will happen come February. I can still find old kids' books for sale online, but almost none at my local used bookstores or the library bookshop. I worry they're being pulped. I know, your eyes are glazing over. Everyone who knows me is tired of hearing about this - BUT IT IS STILL A REAL PROBLEM! And it's going to get worse. Call your congress people again and give them a good ranting for the holiday. I know I'm going to. Again.

There, not too bad. Other little grumblies, but mostly life is good. Though my house isn't decorated, I haven't bought gifts much less wrapped them, and the only lights up are the ones I had up in the backyard over the summer (but they still look festive out there, so I think that can count). But I feel merry anyway.

Tuesday, December 01, 2009

Get Ready for St. Nicholas Day - by Making Paper Shoes with My Handy-Dandy Tutorial!


How goofy are paper shoes? But when I checked the stat thing for my blog the other day, I noticed that lots of people have been coming here looking for directions and a template for making them for St. Nicholas Day, which is coming up fast on December 6th. I felt kind of bad because I don't have anything like that on here. And then, probably because I've been busy making little bunny slippers for my Mimi doll, I realized I could figure out how to make some, so I did. These ones are just the right size to hold the bag of chocolate coins St. Nick is likely bringing my kids in a few days. (You can buy the same ones at Aldi's. Yum.) These paper shoes turn out to be very easy to make, and practically free (except for a small quantity of glue) because I used all materials from the recycling bin.

My husband says blogging is making me completely lose my marbles. He may be right. Only now am I wondering why people would want to make paper shoes for St. Nick Day - for party favors? For a class project? Because they're not sufficiently addicted to chocolate to overlook the fact that their bag of chocolate coins smells a bit like old sneaker if they put out their regular shoes to receive treats, like we do?

Whyever. Here's the tutorial:


STEP ONE: Gather your materials You'll need:
  • a printed copy of the template, which is available as a pdf here,
  • some lightweight cardboard (I used some from an empty cereal box),
  • some scrap paper (I used the insides of security envelopes, which I am absolutely addicted to these days - I have fits if anyone rips the envelopes when opening bills),
  • some kind of a quick grabbing glue, like Alene's Fast Grab Tacky Glue, pictured above (and no, Aleene's does not give me any kind of a kickback for how frequently I mention their glues, but I wouldn't say no if they offered one...),
  • a pair of scissors, and
  • a pencil for tracing the patterns
STEP TWO: Transfer your patterns and cut out all the pieces I just cut out the templates and traced around them on the back side of my paper, but there are many other ways to transfer patterns, and I will guess you are smarter about the whole thing than I am. Remember that the heel upper piece needs to be cut along a fold.
I did cut 2 of the sole templates, so I could give the slippers a nice, finished looking bottom. I cut them with the cardboard right sides together (whatever that is for you) because I wanted the plain brown to show both inside the shoe and on the bottom of the sole. This is because I am insane.

STEP THREE: Fold the tabs on the uppers toward the wrong side of the paper For you origami people, if you're looking at the right side of the paper, it should be a mountain fold.

STEP FOUR: Ignore the picture above and glue the heel/upper piece on first Or carefully peel the rear part of the toe piece off so you can get the other piece glued in place...
Start by spreading a thin line of the tacky glue along the outer edge of the bottom of sole A (the top of this piece will be what shows inside the shoe). Glue the upper to the sole starting by attaching the tab along the fold to the middle of the heel. Work toward the front, bending the upper so that the fold along each tab is snug against the sole - should be pretty easy.
Then attach the toe upper the same way, starting with the middle tab. This is a bit trickier to glue because you have to allow the top of the upper to bow up over the sole, but it's still not terribly difficult once you get the hang of it. Position the tabs at whatever angle gives you a snug fit to the sole.

After I finished this tutorial, I had the bright idea to do a google search of my own for paper shoes. Naturally there are a number of others out there. I like the shoes here (meant as a shower favor thing, but that hardly matters) - they're so cute and the template looks so professional - but I do think they're probably a lot more trouble than mine. They're from Lovebug Scrapbook who says they're adapted from a tutorial in an old issue of Somerset magazine.

Now for my suggested twists on a new tradition for celebrating St. Nicholas Day. Take your kid shopping for some new shoes -- for someone needy. "Encourage" him chip in some of his own money if he has any (and if he's 3 and up, he ought to have small amounts to spend, save, and give). Then help him write a note to St. Nick saying he'd like St. Nick to take the shoes instead of leaving him presents in them, and give the new shoes to a child who really needs some. St. Nick will likely leave behind some of these paper ones with some treats anyhow, and a nice note about how he appreciates your child's kindness so much that Black Peter definitely won't be leaving him any coal this year!

You can help St. Nick donate the shoes to a local homeless shelter, women's shelter, or other organization that collects shoes for needy kids. Or you can make a donation to Soles 4 Souls here, which does a lot of good things.


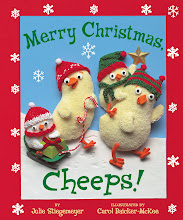
While you're awaiting St. Nicholas's visit, you might want to read about him. If you'd enjoy a book that focuses on the religious aspects of the man and his holiday rather than the folktale and celebration angle, I highly recommend my friend Julie Stiegemeyer's book, pictured above. Julie has such a clear, warm writing style that I can't help feeling a bit teary every time I read her books. This one is clearly a standout among St. Nick books too - it continues to be a mega-seller year after year. I have amazon ranking envy... Here's a link to read more about it on Julie's blog, and also one for buying the book on amazon, thereby making me feel even more jealous (in a nice way).

Still hungry for more about St. Nicholas and the celebration on December 6th? Check out my last year's post here or check out this amazing website completely devoted to the holiday. It has stories, recipes, crafts (including yet another paper shoe one, sigh), songs, e-cards and more.

Update Note I've added a tutorial and template for expanding the paper shoe into this paper boot. You can find the tutorial and a link to the printable template here.

Monday, November 23, 2009

Miniature Apple Pie Tutorial


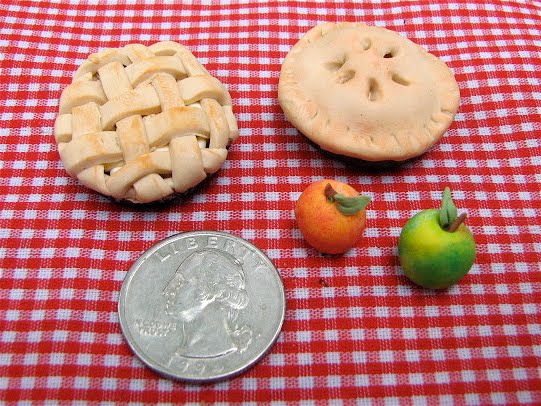
Well, I still haven't managed to resurrect my old hard drive. But I've decide to celebrate having a new computer up and running by recreating the mini apple pie tutorial I mentioned in an earlier post here. This tutorial is more or less the process I used to make the apple pies in my newest picture book An Apple Pie for Dinner (by Susan VanHecke, Marshall Cavendish, 2009). I learned the basic strategy for making the pies, the apples, and many of the other clay miniatures for the book from Sue Heaser's outstanding book Making Doll's House Miniatures with Polymer Clay.
You can read about Sue at her website here and also find ordering information for the book - which I really cannot recommend highly enough if you're into making polymer clay tiny things.
Anyway, here's the tut (I'll do the apples, and maybe some pumpkins or something too, tomorrow. I hope.):

STEP 1: Gather your materials (most of which are shown above)
  • Clay I used Fimo "sandstone" for the crust and a mix of yellow and white for the apples (but you could certainly cheat on them since they barely show). Any brand of polymer clay will work. If you're making this with a very young child, you might want to consider using a more kid-friendly modeling material like Crayola's Model Magic, plasticine, or even play dough. For that matter, you could use snippets of real dough and apple bits (though I'd recommend either not eating the finished product or removing the plastic liner from the bottle cap first).
  • Bottle Cap This will be the pie pan. You can buy unused ones at craft stores or some kitchen/beer-making supply places and they're really ideal since they flare out a little more. But I just used one from a bottle of root beer, and it was fine. If you're making this with a young child, consider using some larger "pan" like a bigger metal lid or dessert patty pan - this scale is challenging for little fingers.
  • Soft Pastels OR Ground Cinnamon You'll use these to "brown" your pie to a lovely golden color. You also need a tool to scrape some of the pastel dust off and a paint brush to spread the coloring, whichever you use. I used real cinnamon, which works just as well and has the added advantage of smelling lovely.
  • A Cutting Tool I love the super thin slicing tool pictured above, but an x-acto blade or old paring knife (NOT one you'll want to use again for food) or other sharp blade will do. Obviously an adult should use the sharp tool!
  • Waxed Paper Or something similar to protect your work surface. Do not use polymer clay directly on wood or on any surface used for food preparation or consumption.
  • A Baking Container Many polymer clay artists prefer glass pans, but I find cookie sheets, metal or ceramic baking dishes or cheap aluminum bakeware works fine. You can even just bake the little pies inside a cupcake liner place carefully on the rack. Just don't use a container you'll want to bake food in again.
  • A Small Wad of Fiberfill (optional) For filler in the bottom of your pie and a few strands for "steam."
  • Miscellaneous A soft brush (even a soft OLD toothbrush will do), a pointy thing like a bamboo skewer or knitting needle if you want to make a traditional top crust (I'm going to show a lattice-top crust). If you want to add steam, you'll also need a couple drops of a glue that adheres to clay. And if you want a sliced pie, some gloss medium or varnish will give it a more realistic look.
STEP 2 Prepare the crust
Cover your work surface with waxed paper. Then condition the clay you're using for the crust by kneading it with your fingers or running it through a craft pasta machine. You'll need two balls about the size shown (I stuck the penny and bottle cap in to help you judge the amount.)

STEP 3: Roll out the dough into circles
I didn't actually roll these out - just flattened them with my fingers. With a pasta machine, use the #4 setting. The kids I've done this project with really liked using miniature rolling pins, but then we had to go back and fine tune with fingers. Ideally, the crusts should be very thin (especially the one for the top crust).


STEP 4: Put the crust in the pan
I used the rounded end of my old toothbrush to help work the crust tightly against the sides of the "pan." Any rounded object will work.


STEP 5: Trim the excess dough
Not really a precision maneuver at this point. It does help to leave a little dough overlapping the top crust, especially if you're going to make a full top crust. This is easier with the flared unused bottle caps, but you can fudge with either.


STEP 6: Prepare the filling
I like to put a small wad of fiber fill in the bottom of my pie as filler - but you could also make a zillion more mini apples or use little lumps of clay. If you want to make the finished pie look like it has a slice taken out of it, make sure you cut away a slice of bottom crust and leave just a couple crumbs and a couple apple bits in the bottom. Save the cut out bottom crust to make a slice that will stand on its own.
(By the way, I had too much fiberfill in the picture above and took some out before filling it with my apples.)
Prepare the clay for the apples by conditioning a small ball of white and a pinch of yellow and kneading them together until they're a pale yellow. You can add a smidge of green too, especially if they're supposed to be Granny Smith apples.
Form this clay into small apple crescents. They won't really show much if your pie is completely covered, but they look good peeking through and give the top crust a natural lumpy look.

STEP 7: Dump the filling in the pan
Really, carefully arrange your mini apples over the fiberfill or clay lumps. Remember the nearly "empty" area if the pie will be missing a slice, and put some apples in the cut out slice you set aside.
At this point, you can sprinkle/brush a little cinnamon or cinnamon-colored pastel over the prepared apples - more important for a sliced pie than a covered one. (Don't forget to add some to your separate slice too.)


STEP 8 Prepare the top crust (Sorry for the lousy photo here.)
Retrieve the other crust circle. If you'll be making a lattice top like I am, cut it into narrow slices. I wanted at least 10 strips, so I could have 5 in each direction.

If you'll be making a full top crust, use your skewer or knitting needle to poke some holes in the top (where the steam would escape). You can also use clay scraps to make little leaves or a tiny apple for a decoration for the top. Finally, if you want a sliced pie, cut out a wedge shape out of the top crust now - it's trickier to slice it once it's in place.

Step 9: Put the top crust in place
For a full crust, lay it in position (carefully if you're going for the sliced look) and push it down around the edges of the bottom crust, remove the excess, and use your skewer or knitting needle to "crimp" the edge, just like you would use a fork to crimp a real pie crust.
If you're doing a lattice top like I am, follow these directions:
a) Lay five parallel strips, leaving the same width between strips, across the top as shown. Place the longest strip down the middle, the next 2 on either side of it, and the 2 shortest toward the edges. (I'm going to refer to the strips by number, with "1" at the top.)
b) Gently fold strips 1, 3, and 5 back on themselves, leaving 2 and 4 in place.

c) Lay a new strip (the other longest one) down the center of the pie over strips 2 and 4. Then fold numbers 1, 3, and 5 back down. You've finished the first weaving!

d) Now fold #2 and 4 back on themselves, leaving 1, 3, and 5 in place.

e) Lay the next longest strip parallel to the one you just place and fold strips 2 and 4 back in place. I have no idea why this is underlining.
f) Go the other side of the center strip and again fold 2 and 4 back on themselves, but in the opposite direction. Lay another strip down and fold 2 and 4 back. It should like the picture above.
Repeat with the last 2 small strips, but folding 1, 3, and 5 back in opposite directions and replacing them (should look like the photo below).

STEP 10: Trim the excess
Just make sure the top crust is adhering well to the bottom one and/or the pan.

If you're making the other style top, also remove the excess, and then use your skewer or knitting needle to "crimp" the edge, just like you would use a fork to crimp a real pie crust

STEP 11: Brown the crust
Gather some pastel dust or, as in this case, real cinnamon on your soft brush and lightly dust the top of your crust, thinking about how a real pie crust browns (usually more near the edges and a bit in the center). You can use your fingers to smooth out the dusting if you want. (I wish I'd gone a little heavier with the browning on this pie in hindsight.)

STEP 12: Bake and enjoy!
Follow the clay manufacturer's instructions regarding temperature. Because of the small size and thinness of the clay, these will bake quickly - I give them 15 minutes. Allow to cool before using. And be sure to use the oven fan - probably not great to breathe polymer clay fumes on a regular basis.

Optional Extra Steps
You can dot a clay-strength glue on the top of the pie and attach a few strands of fiberfill as steam. (Use a toothpick to press them in place if you don't like glue-y fingers.)
If you've made a sliced pie, paint gloss medium or varnish over the apples at all the cut edges (don't forget the separate slice too). This will give it a realistic cooked appearance.
Bon Appetit! (Not really!)